With Apple's iOS 14 and its privacy updates, the Meta pixel will cease to exist as it is. Meta quite recently communicated that it will limit conversion events to 8 per domain. You can find their official communication about it here. As we've worked with over 800 developers, that would mean that the pixel capabilities would only be enabled with around 1% of Geeklab users. Therefore using conversion events as we did is not an alternative moving forward. Instead we went with Meta's guidelines on how to use landing page views
👉 What can be done
Meta introduced another alternative, that will allow advertisers to still optimize campaigns on Meta with the pixel. Instead of conversion events, the pixel can be used to optimize campaigns towards landing page view. Because of this we changed the flow of Geeklab tests just a bit to make sure we can optimize the campaigns the correct way, utilizing the landing page view options.
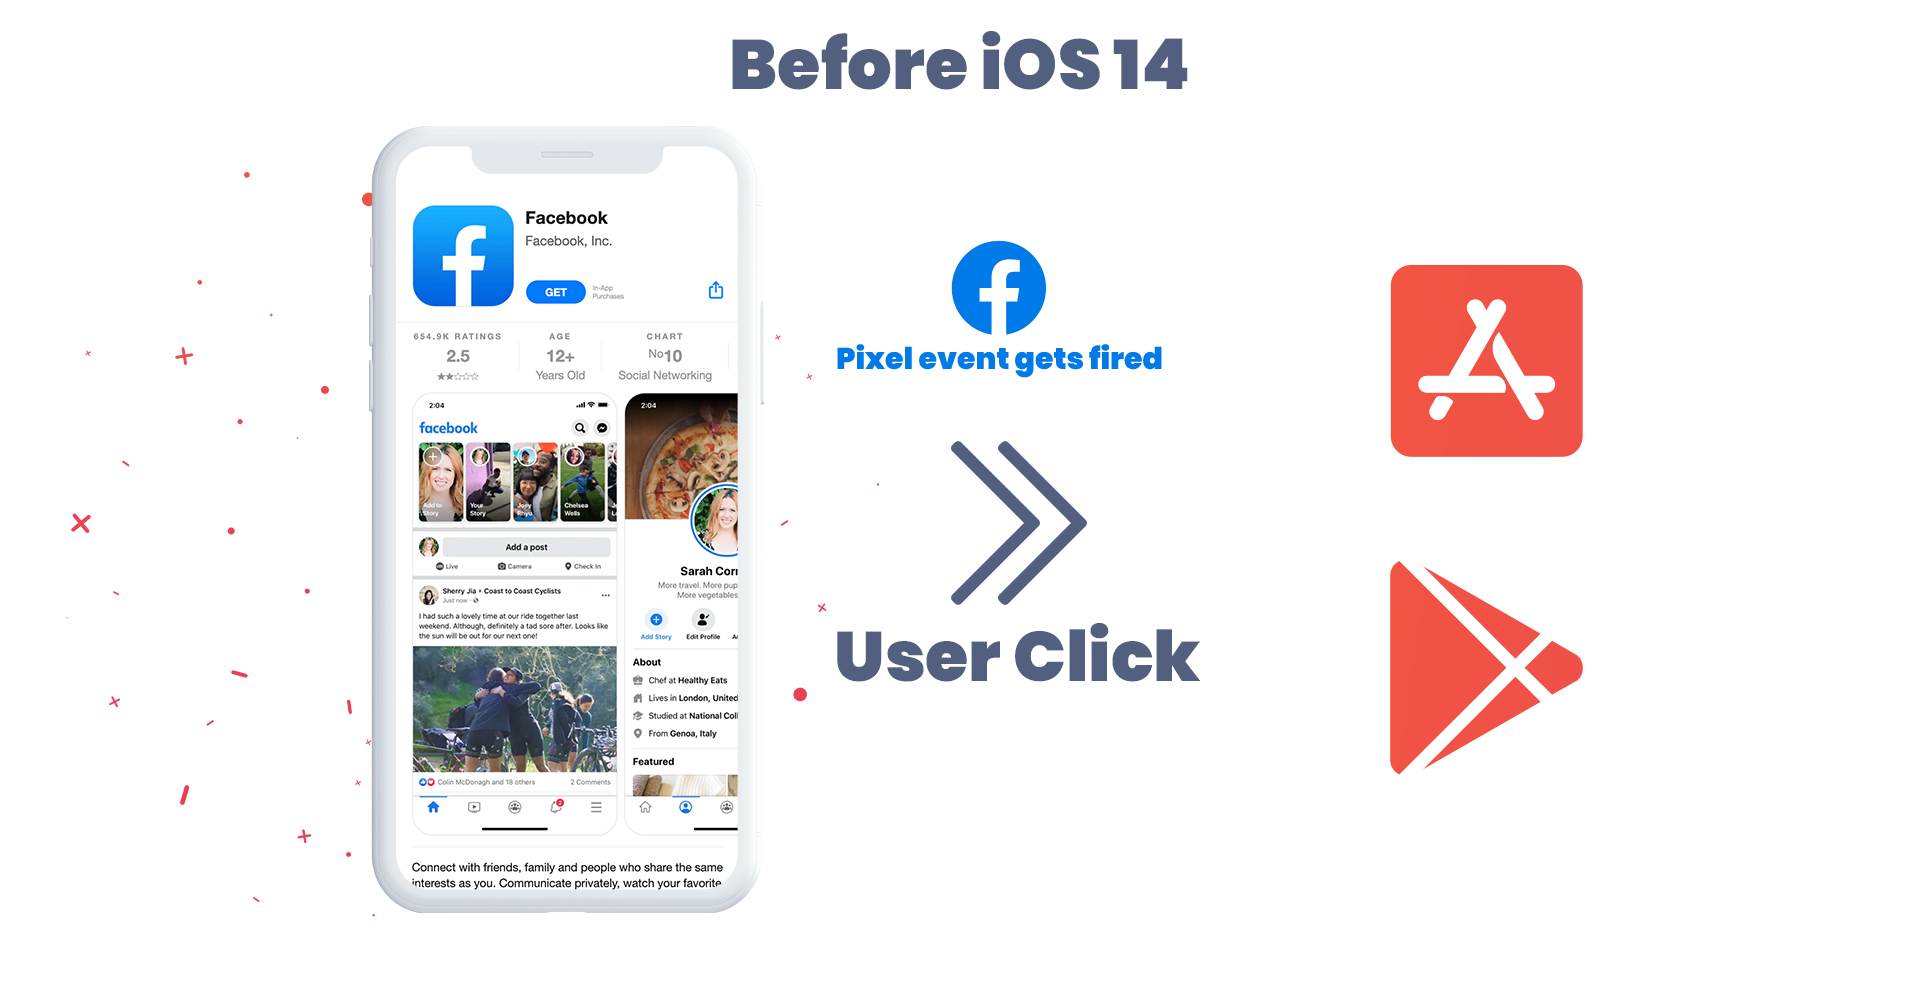
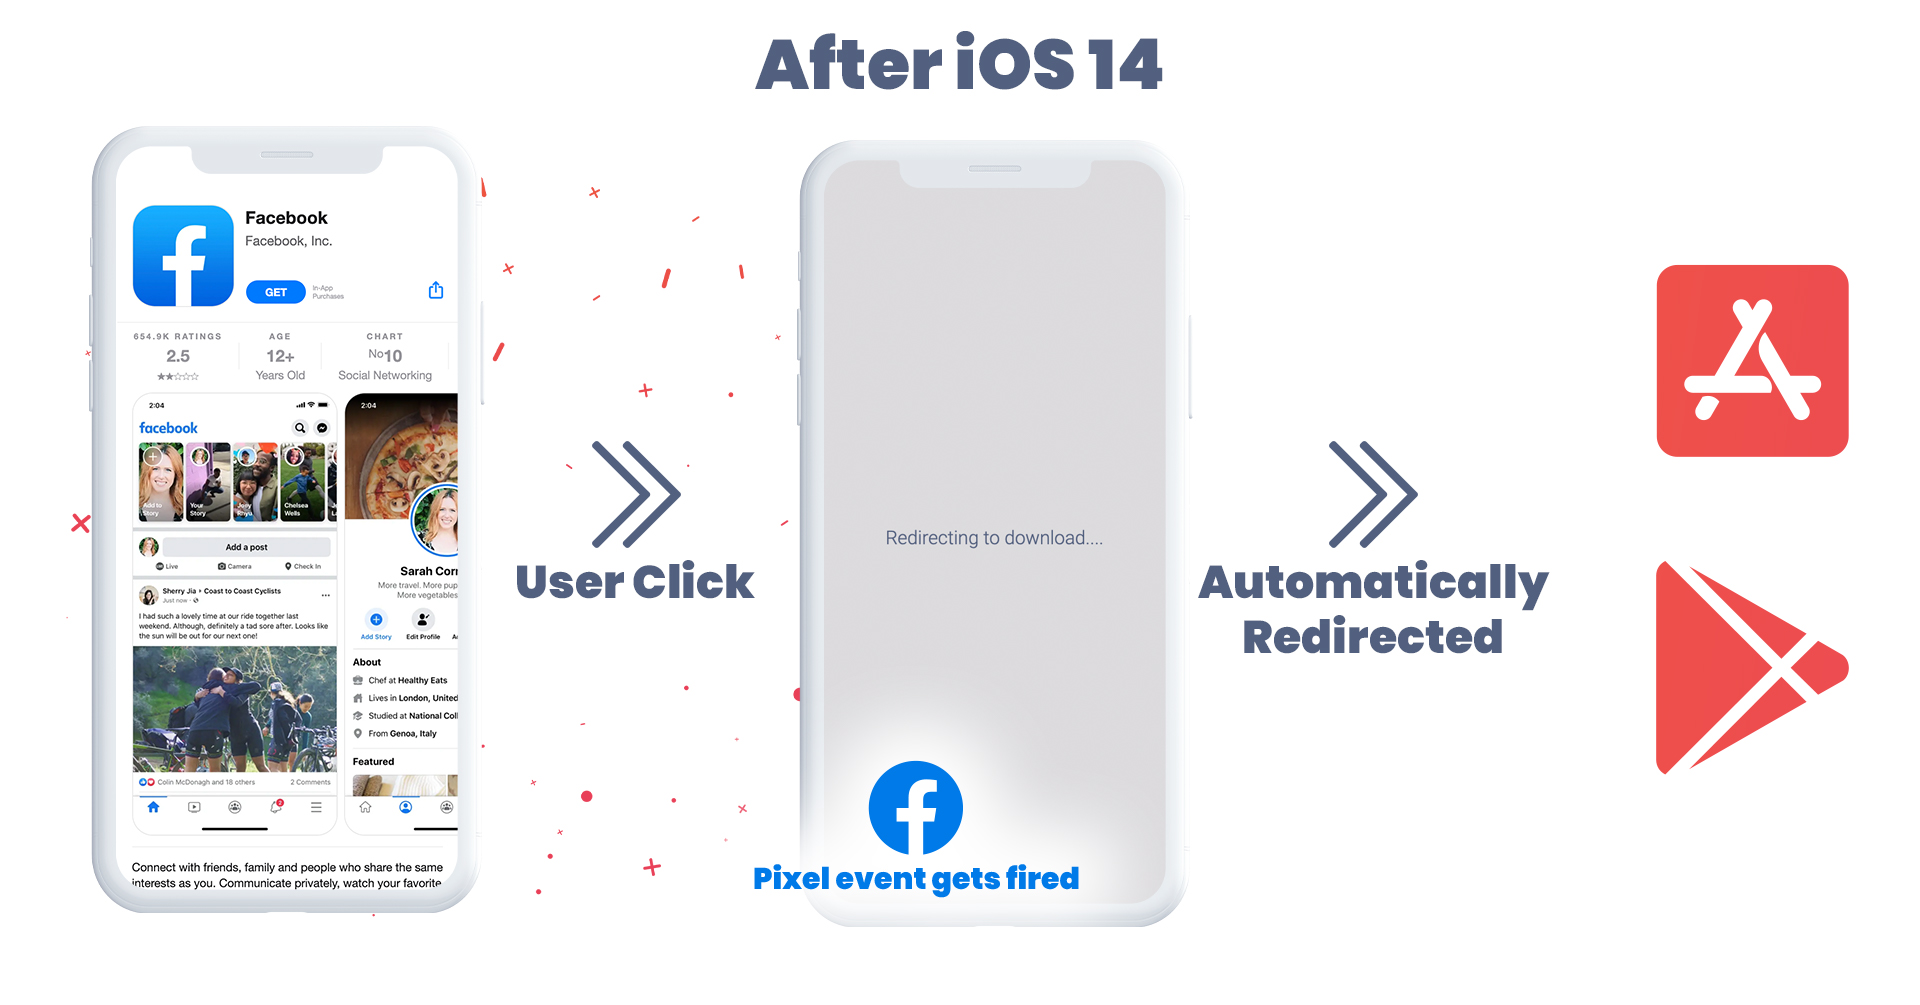
In this new flow, users will see a redirecting page for a second before redirected to the final destination you've picked when creating the campaign. When on this page, the pixel will be introduced firing back the landing page event to Meta, allowing you to optimize your campaigns towards people who click install, much like earlier with the Pixel's conversion events.
👉 How to setup Pixels
Here's a step-by-step guide on showing how to setup the new pixels, how to verify it is working and how to optimize campaigns towards landing page views.
1. Head over to your team's Meta Business Manager, and navigate to Pixels, under the data sources tab like shown below.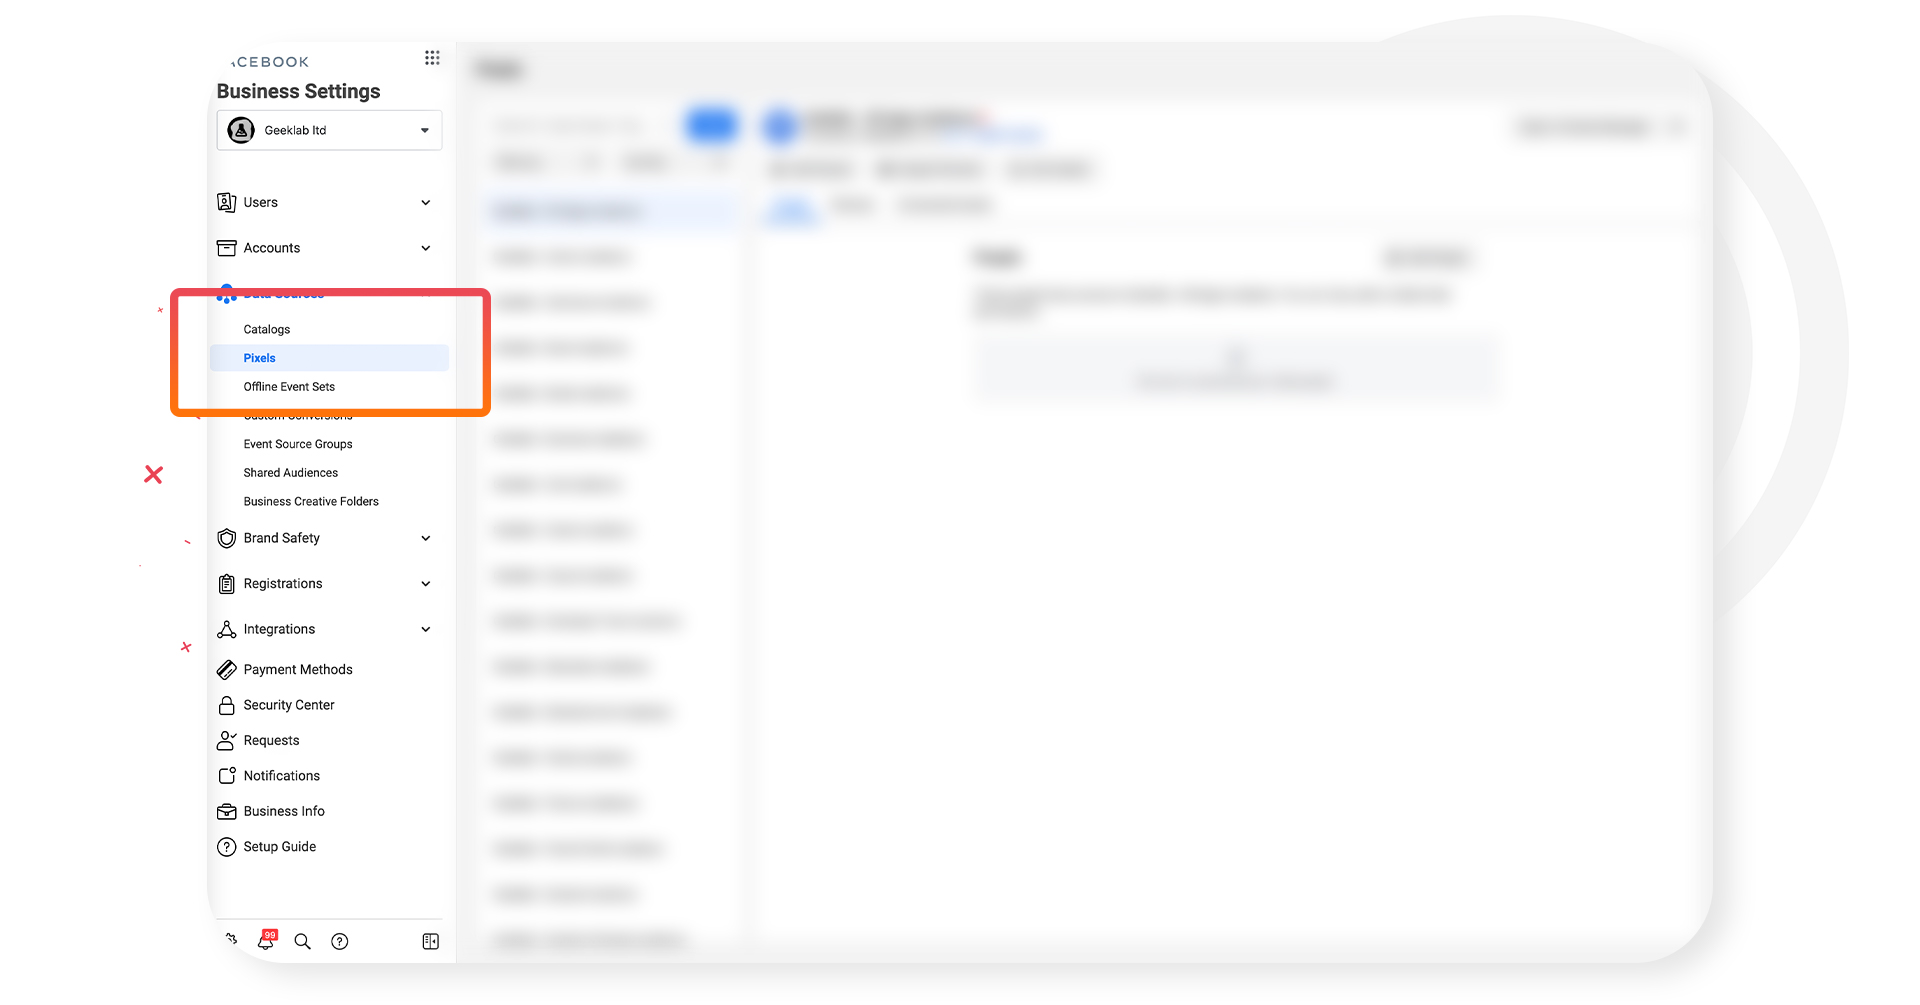
2. If you're creating a new pixel, click add. If you are using an existing pixel, move forward to section 4.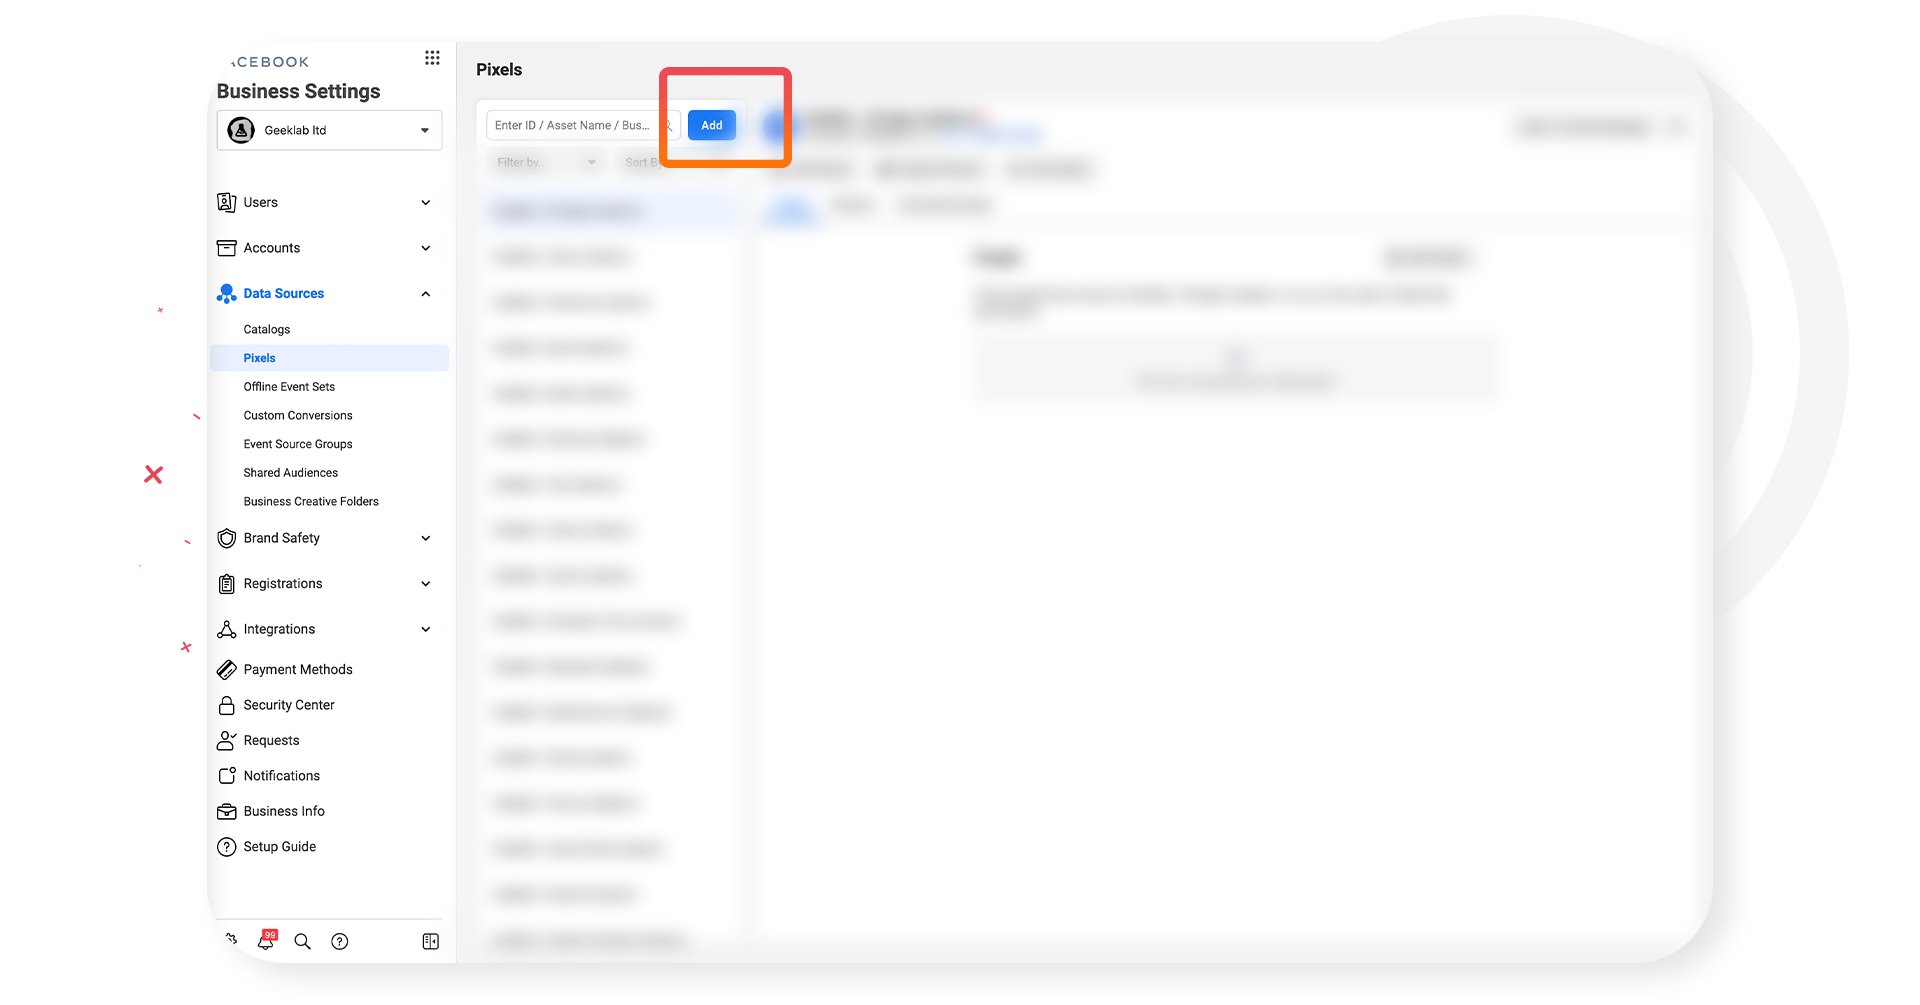
3. Give your pixel a name, click continue after which you should see another popup. Feel free to close the popup as shown below.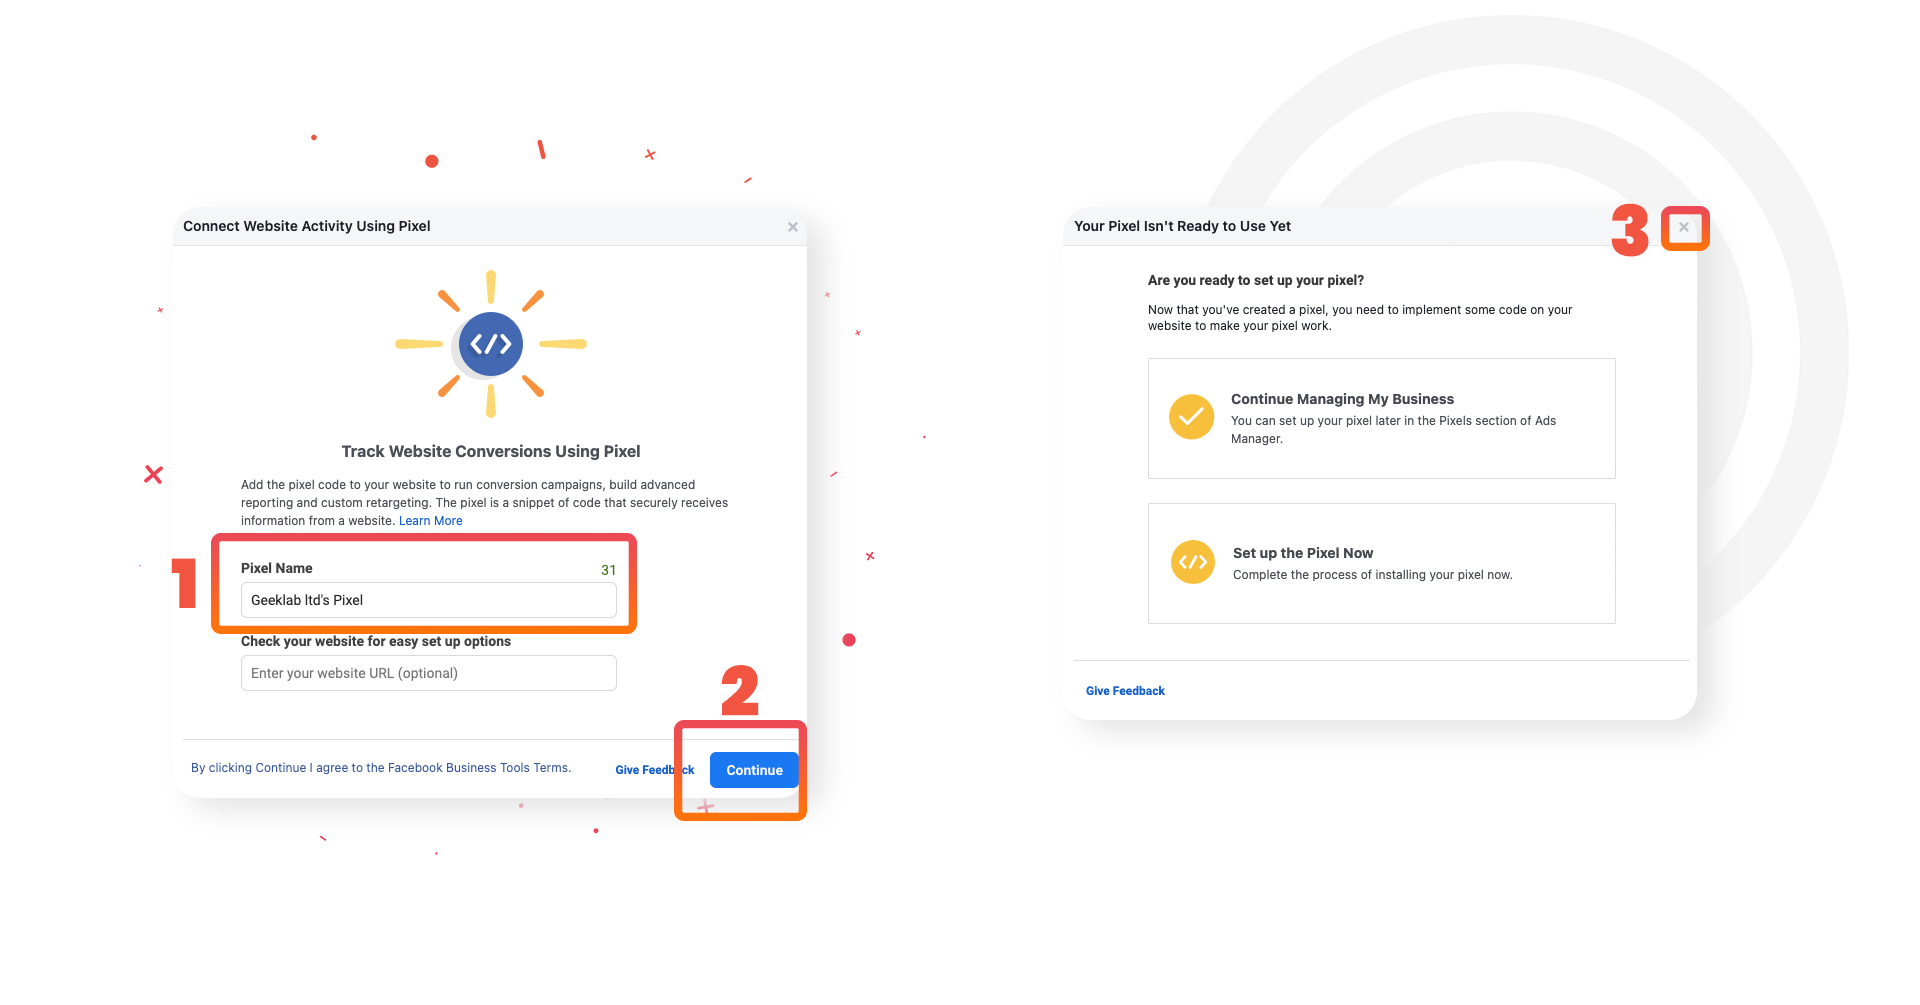
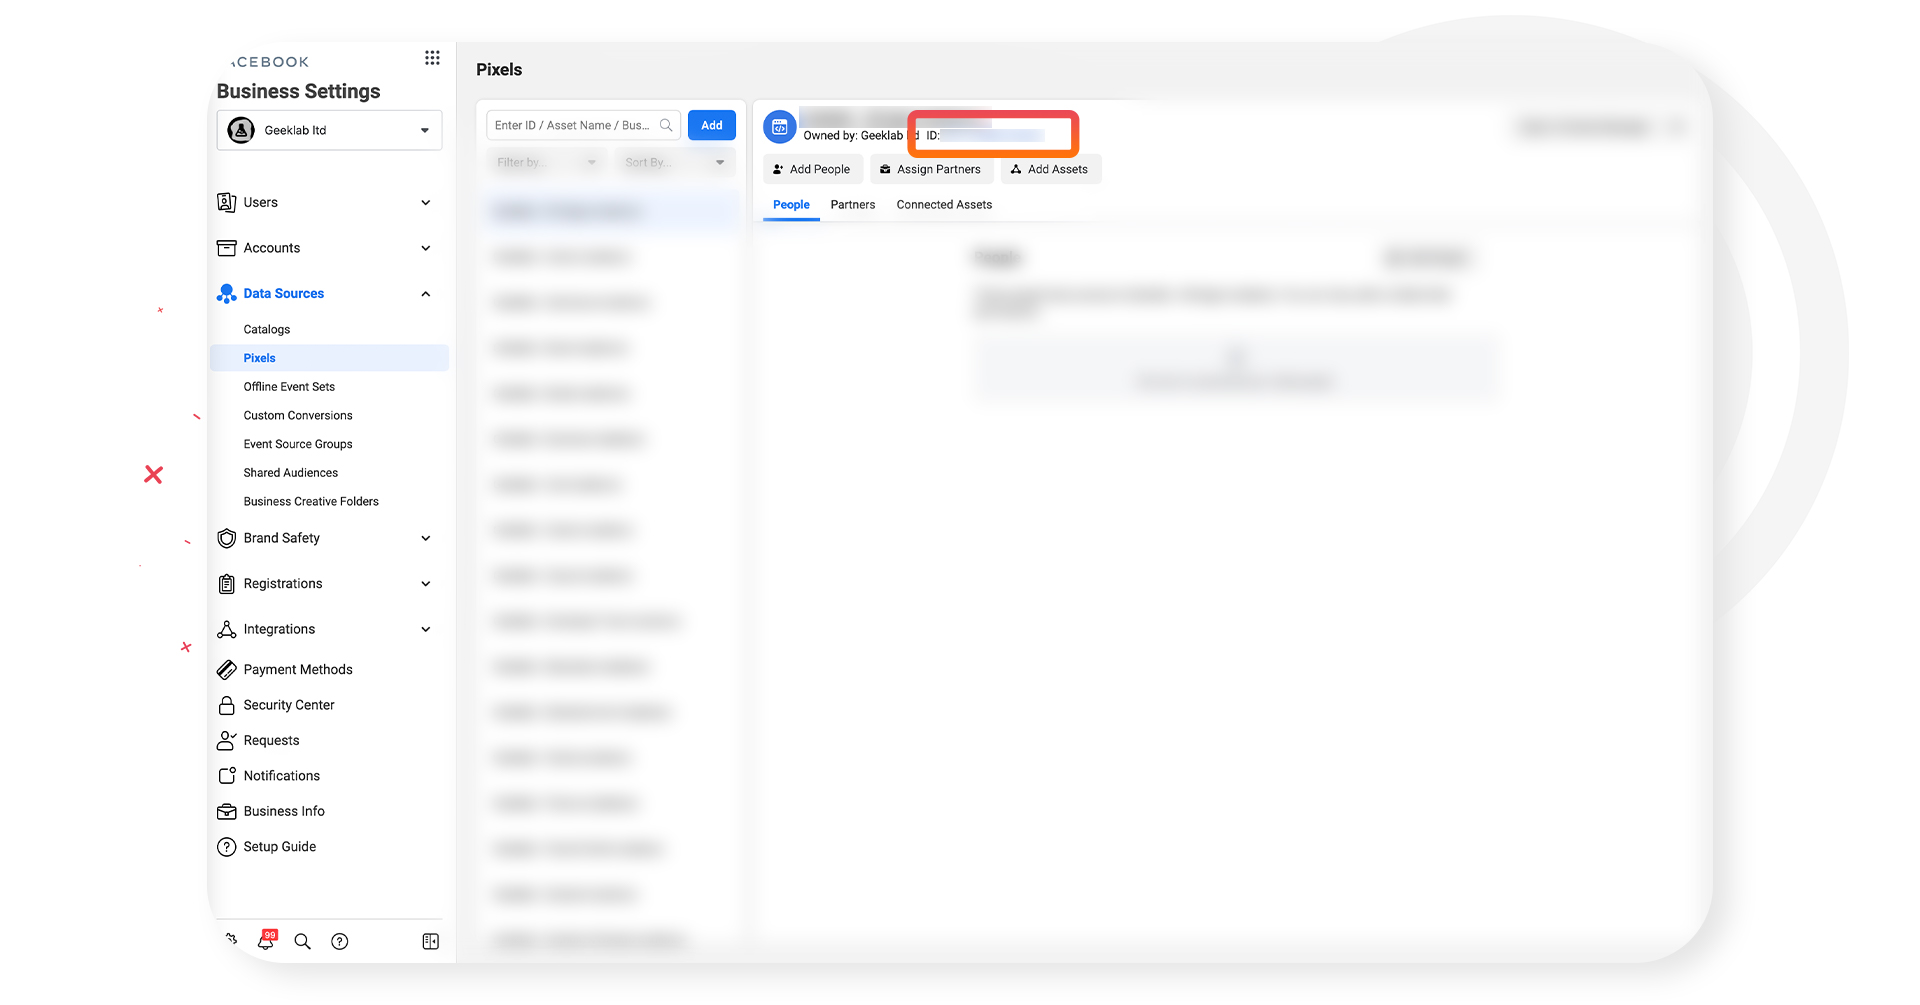
4. Now select the pixel you want to use and copy the id from the position shown below
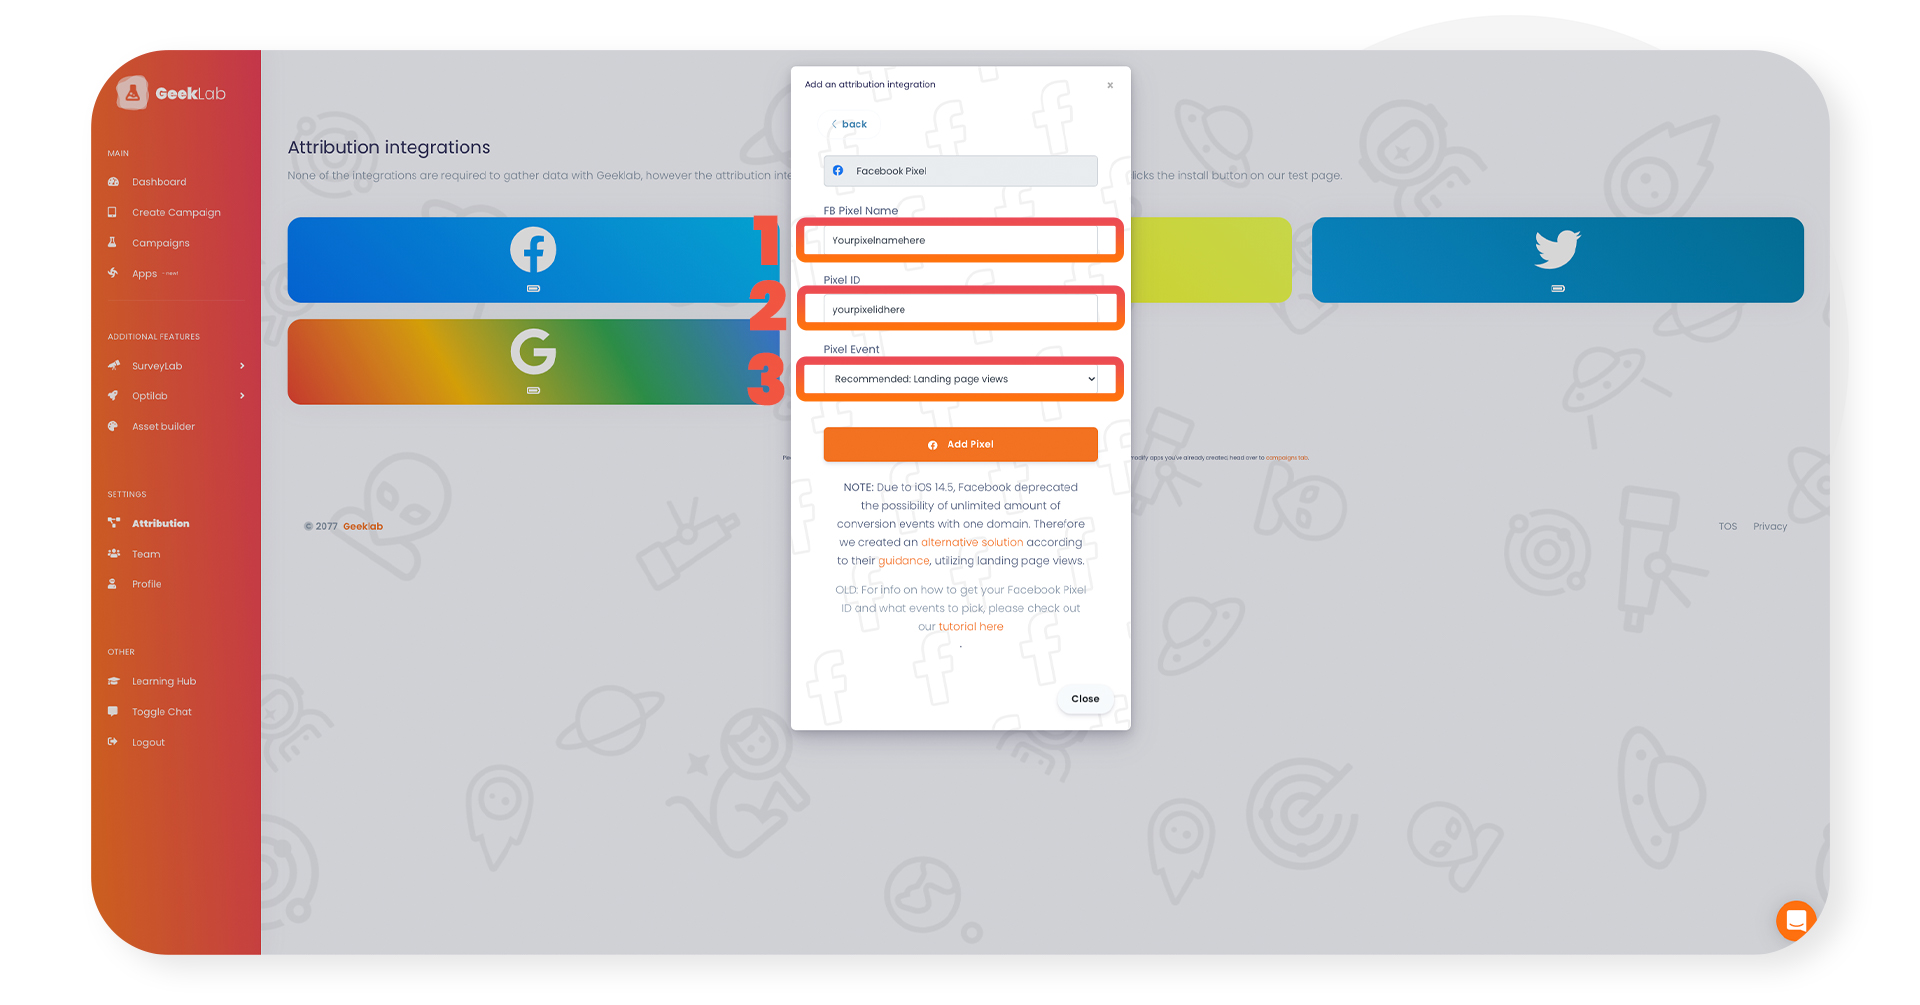
5. Move over to the attribution section on Geeklab, and proceed to add a new Meta Pixel integration. Proceed to give your pixel a name (1), copy the id you got from the previous section to pixel id input (2), and lastly select Landing page view from the Pixel Event selection (3). After that click Add Pixel.
And that is it! Now you can select your pixel when creating new campaigns, or edit the existing variants and add the pixel to the specific apps! 🎉

👉 Verify that the events are working
To make sure the pixel is integrated correctly, you can use Meta's events manager and Geeklab preview links to make sure everything works as it should.
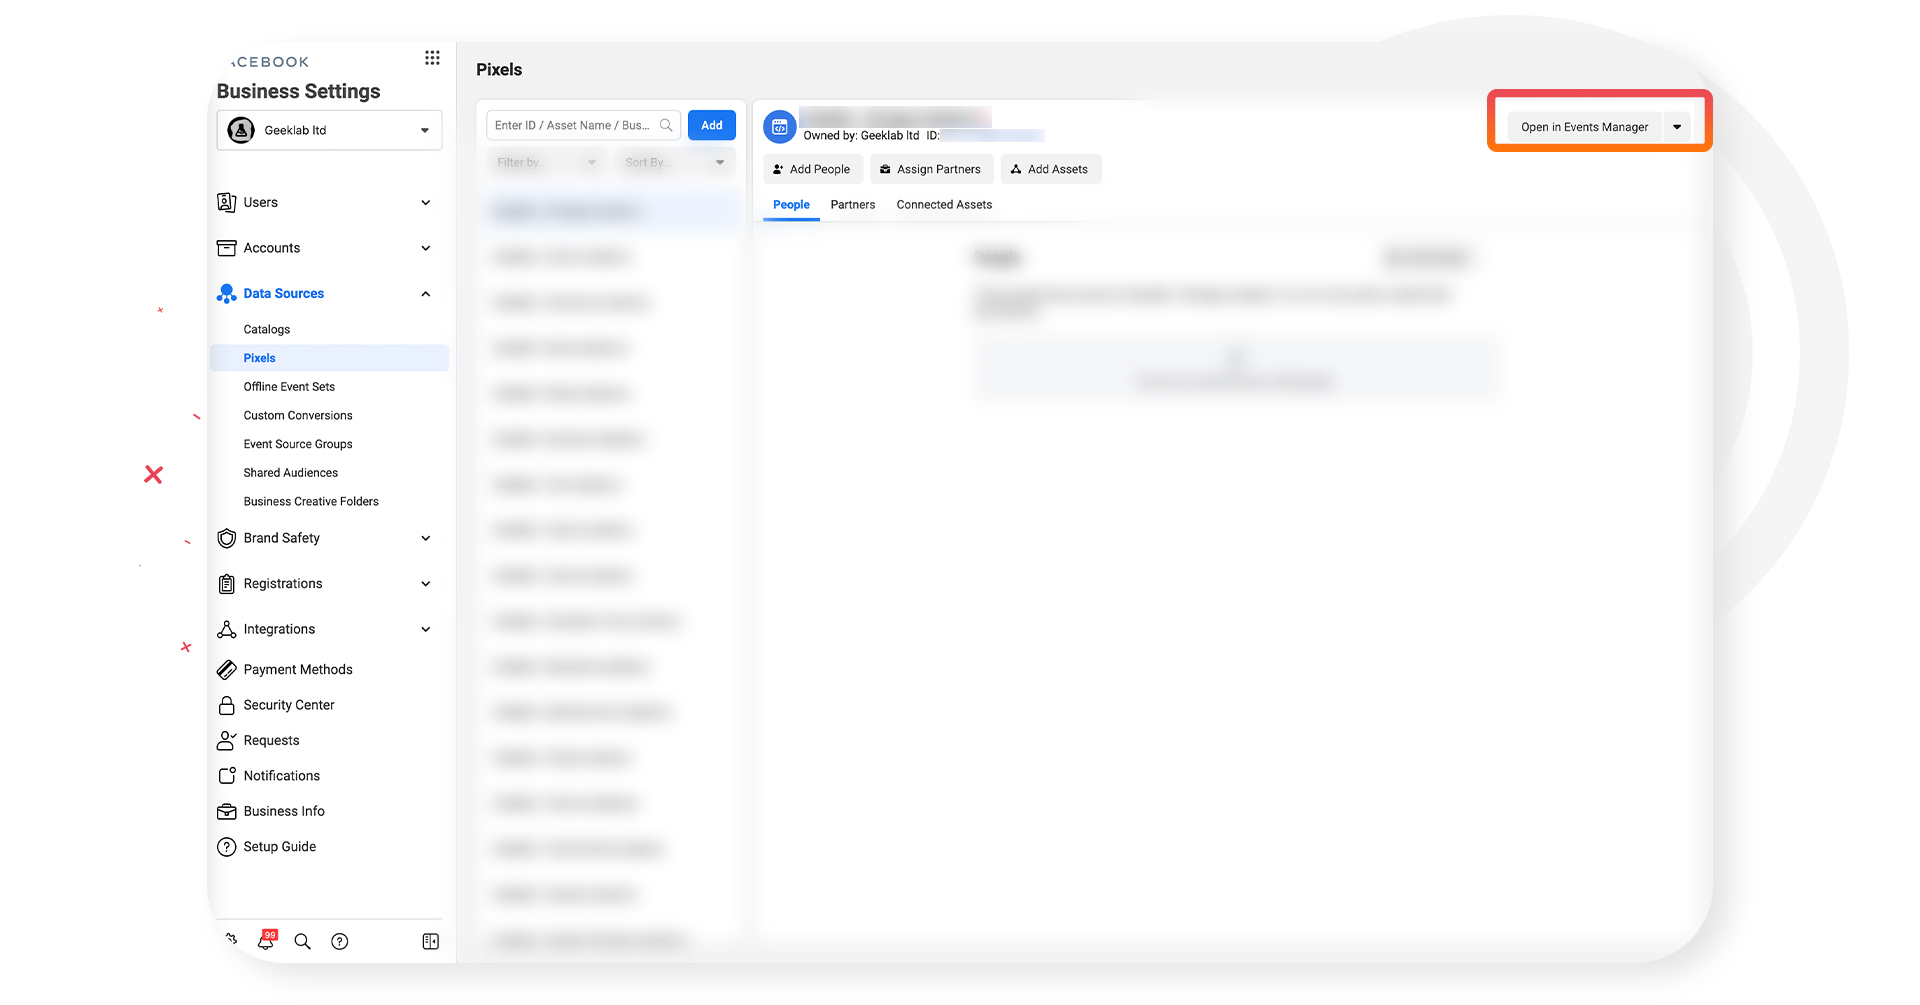
1. Head over to your team's Meta Business Manager, and navigate to the Pixel you are using and click open in events manager.
2. Select Test Events (1) and insert your variants preview link to input field (2). Make sure you use the preview link, after which you can click open website (3)
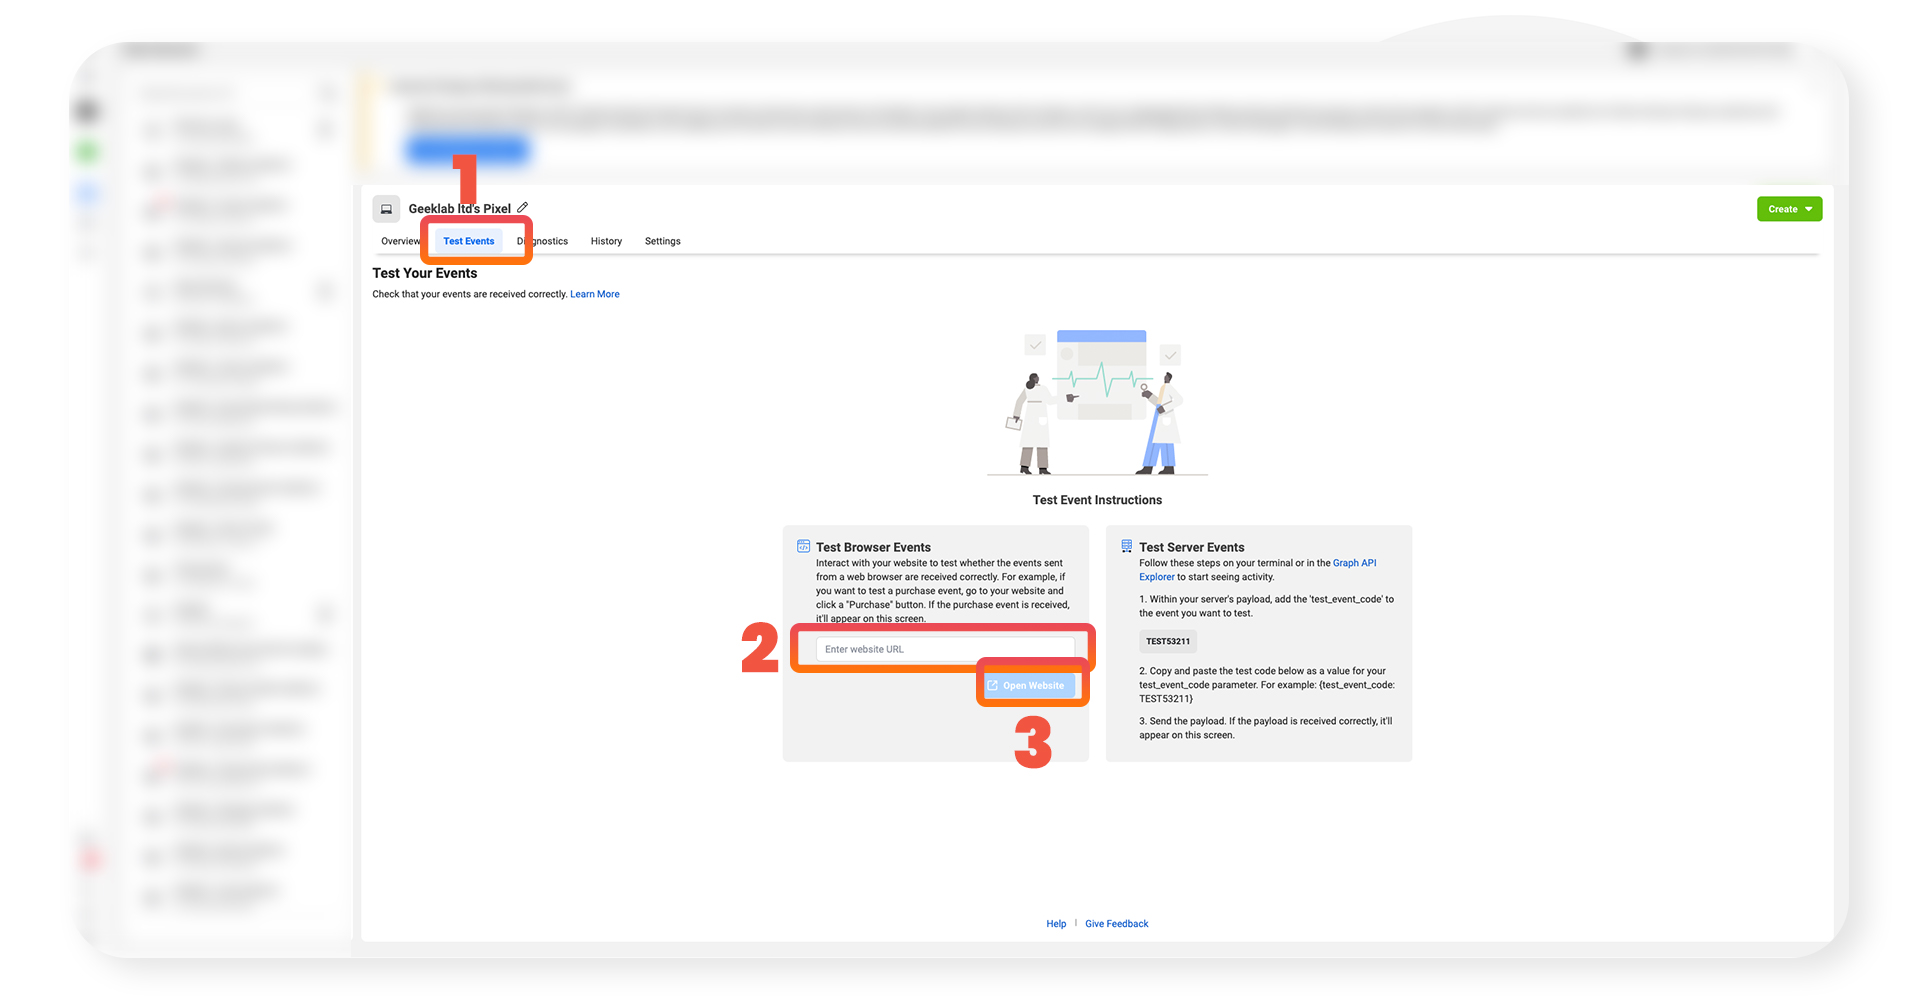
3. It will open up the variant page as a webpage, click the install button, and wait to get redirected. After redirection, you should see an event in the overview tab on Events manager as shown below.
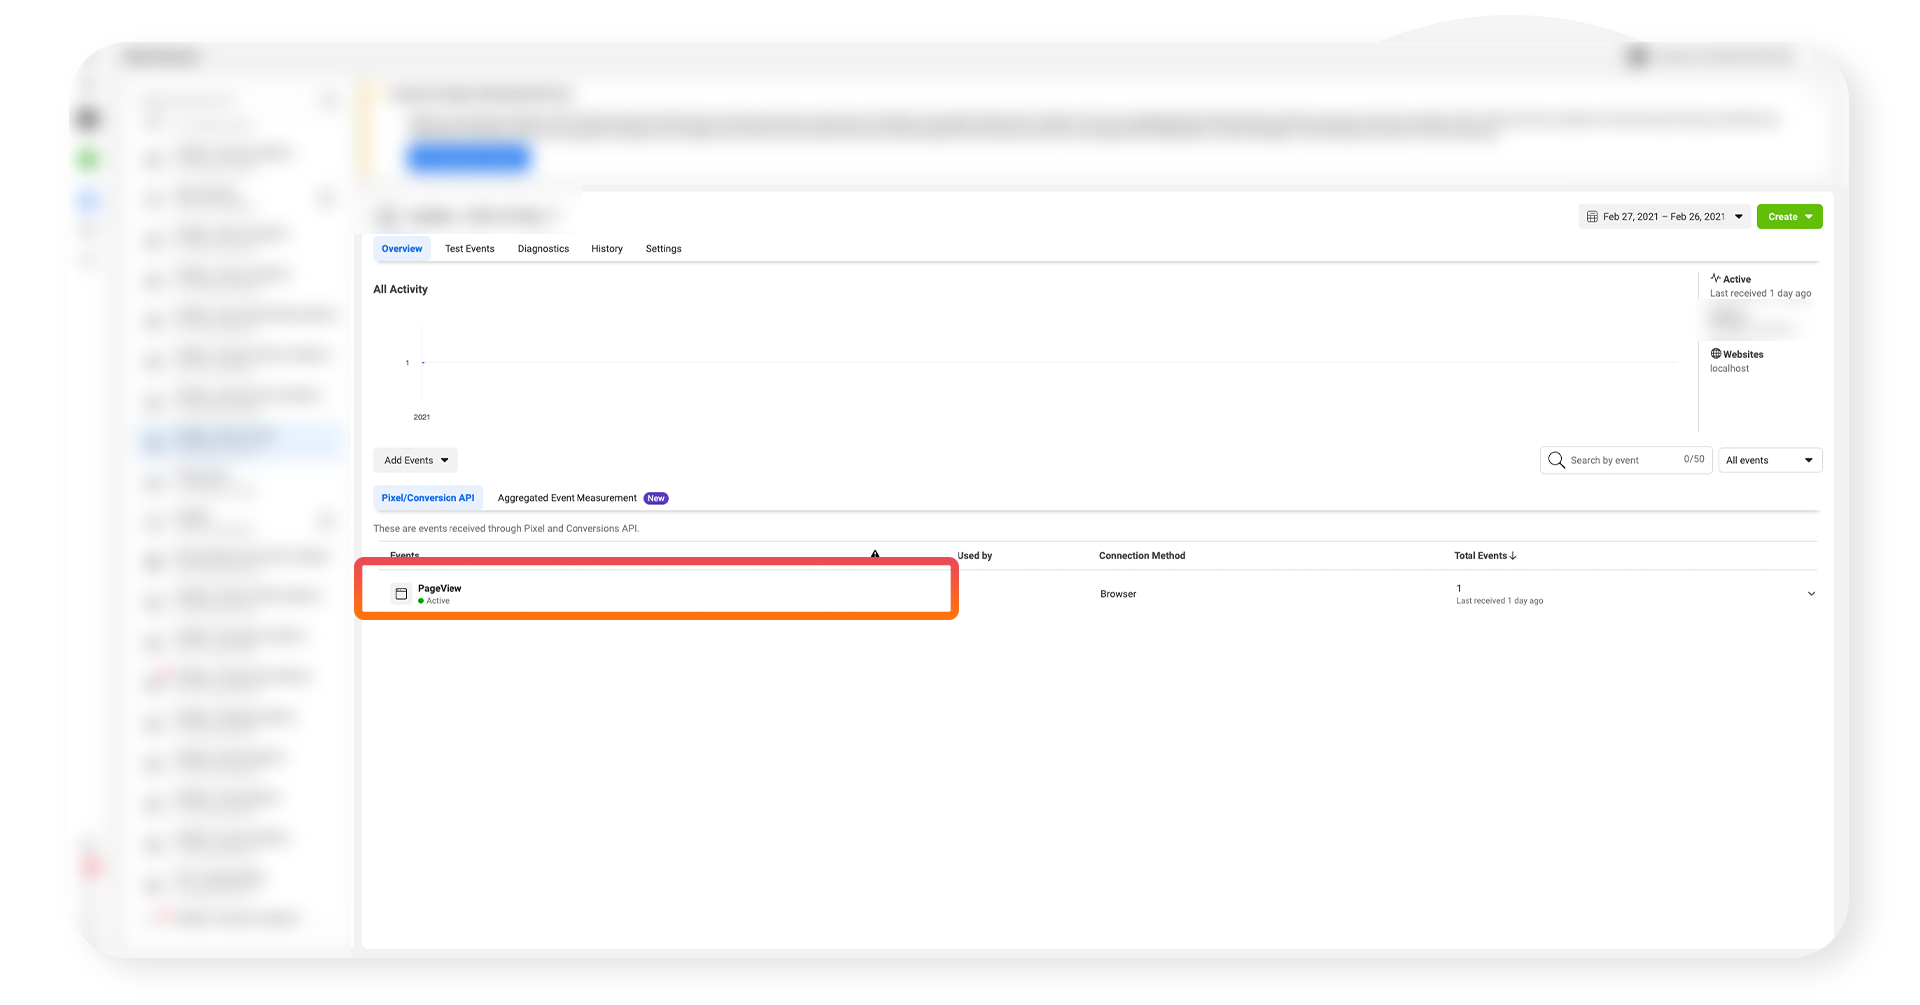
Pixel is working and your rocket is ready to get launched! 🎉
👉 Setting up campaigns to optimize towards Landing Page Views
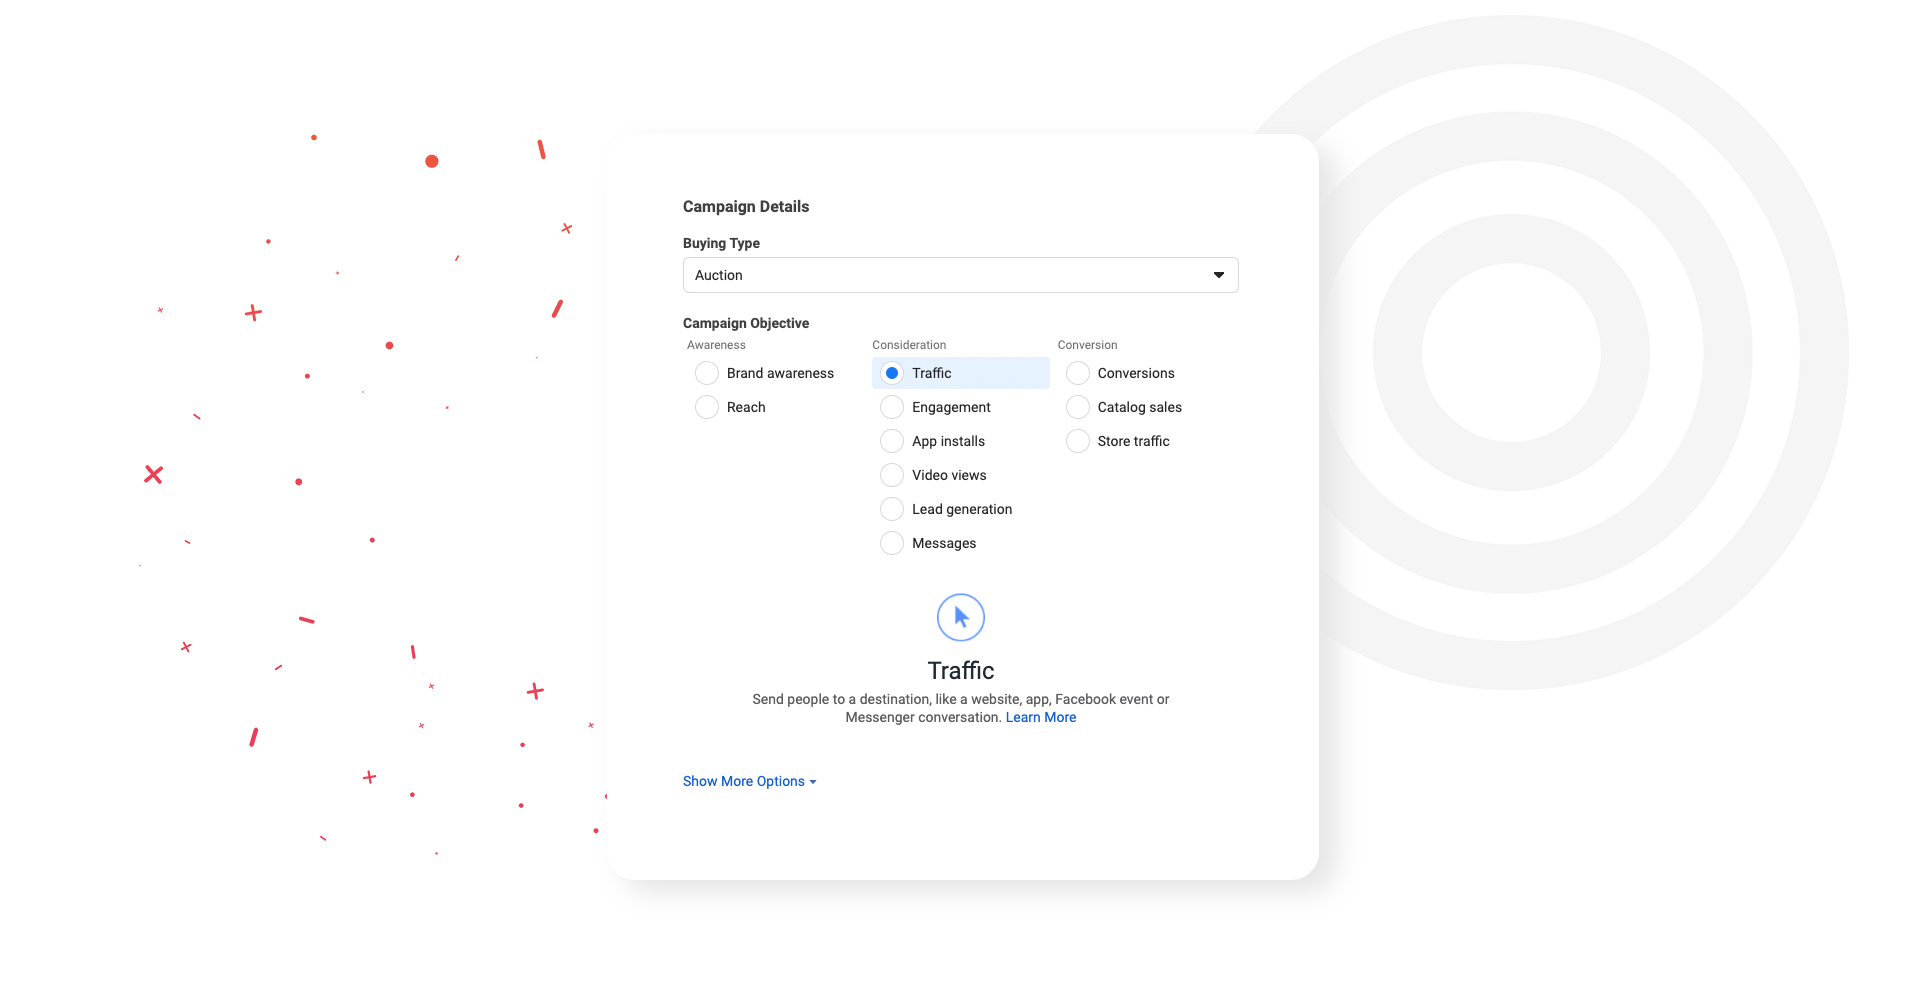
Unlike the conversion-based campaigns, the setup here is a bit different.
1. When creating a new campaign, select Traffic as the campaign objective. This setting is set on the campaign level.
2. On the ad-set level select website as the target for the traffic (1). On the bottom of the page on the ad-set level, select optimization for ad delivery to be landing page view (2).
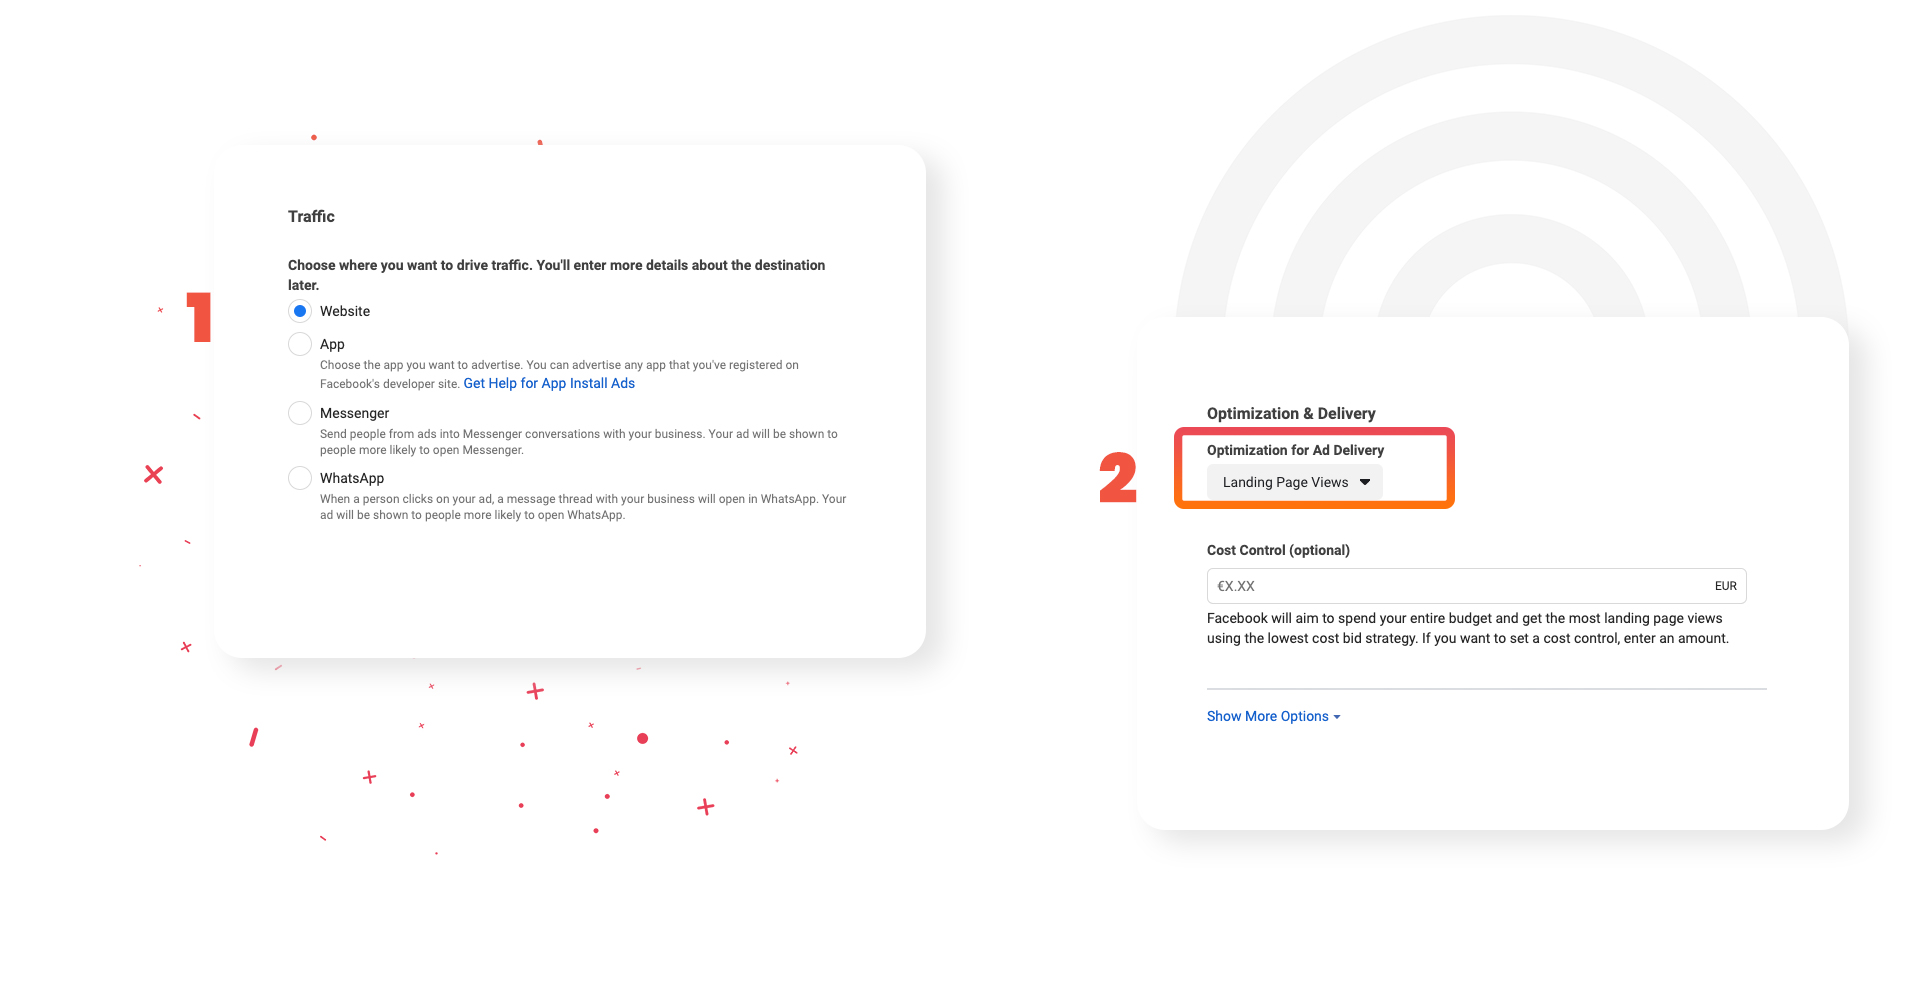
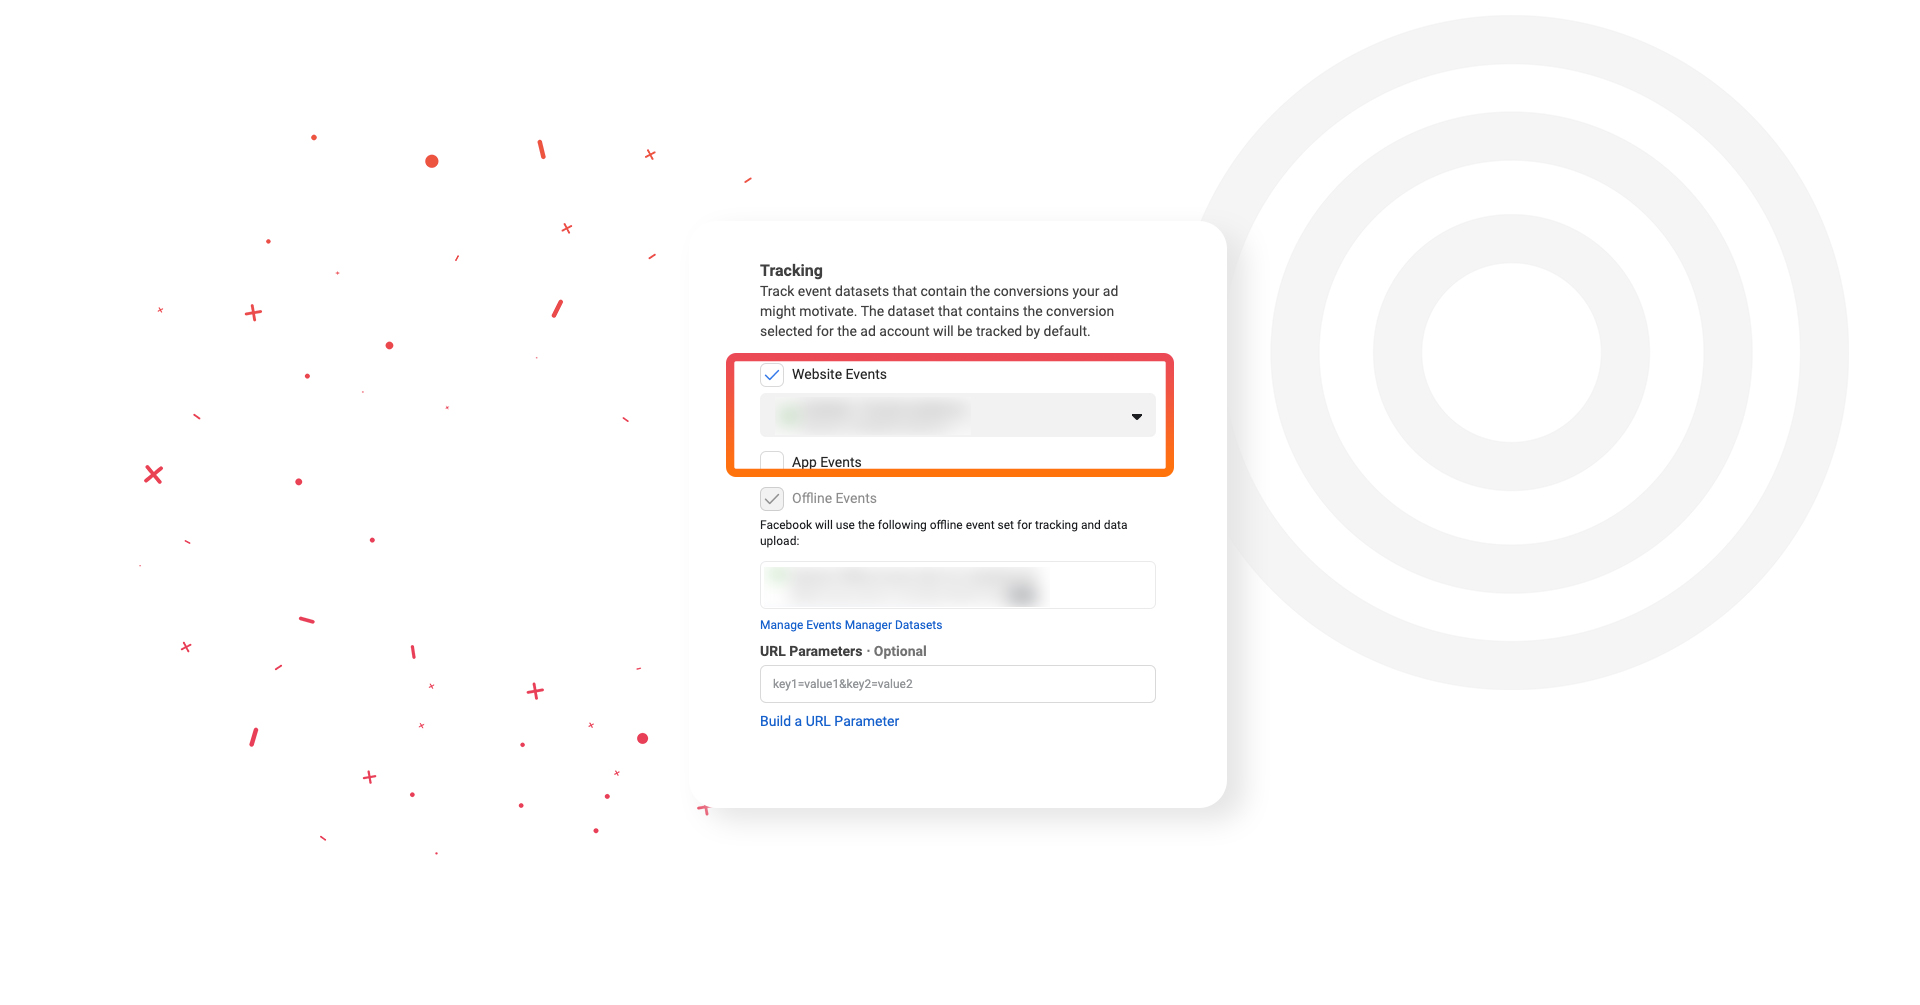
3. On the ad level make sure that the pixel is selected under the tracking panel.
That's all! Remember to double-check you are targeting correct GEO's, limiting the audience to specific placements and specific devices. We've got a post or two about that as well. 🎉