We understand how challenging running a Facebook ad campaign can be. So here's a step-by-step tutorial on how to do it.
Before getting started make sure you have two factor authentication enabled before you begin. Without it, Facebook will not allow you to create a business account. Also, before you begin creating the ad campaign, make sure you have the campaign or variation tracking links from Geeklab. Lastly, make sure you have a Facebook page for your product that you can link to your campaign.
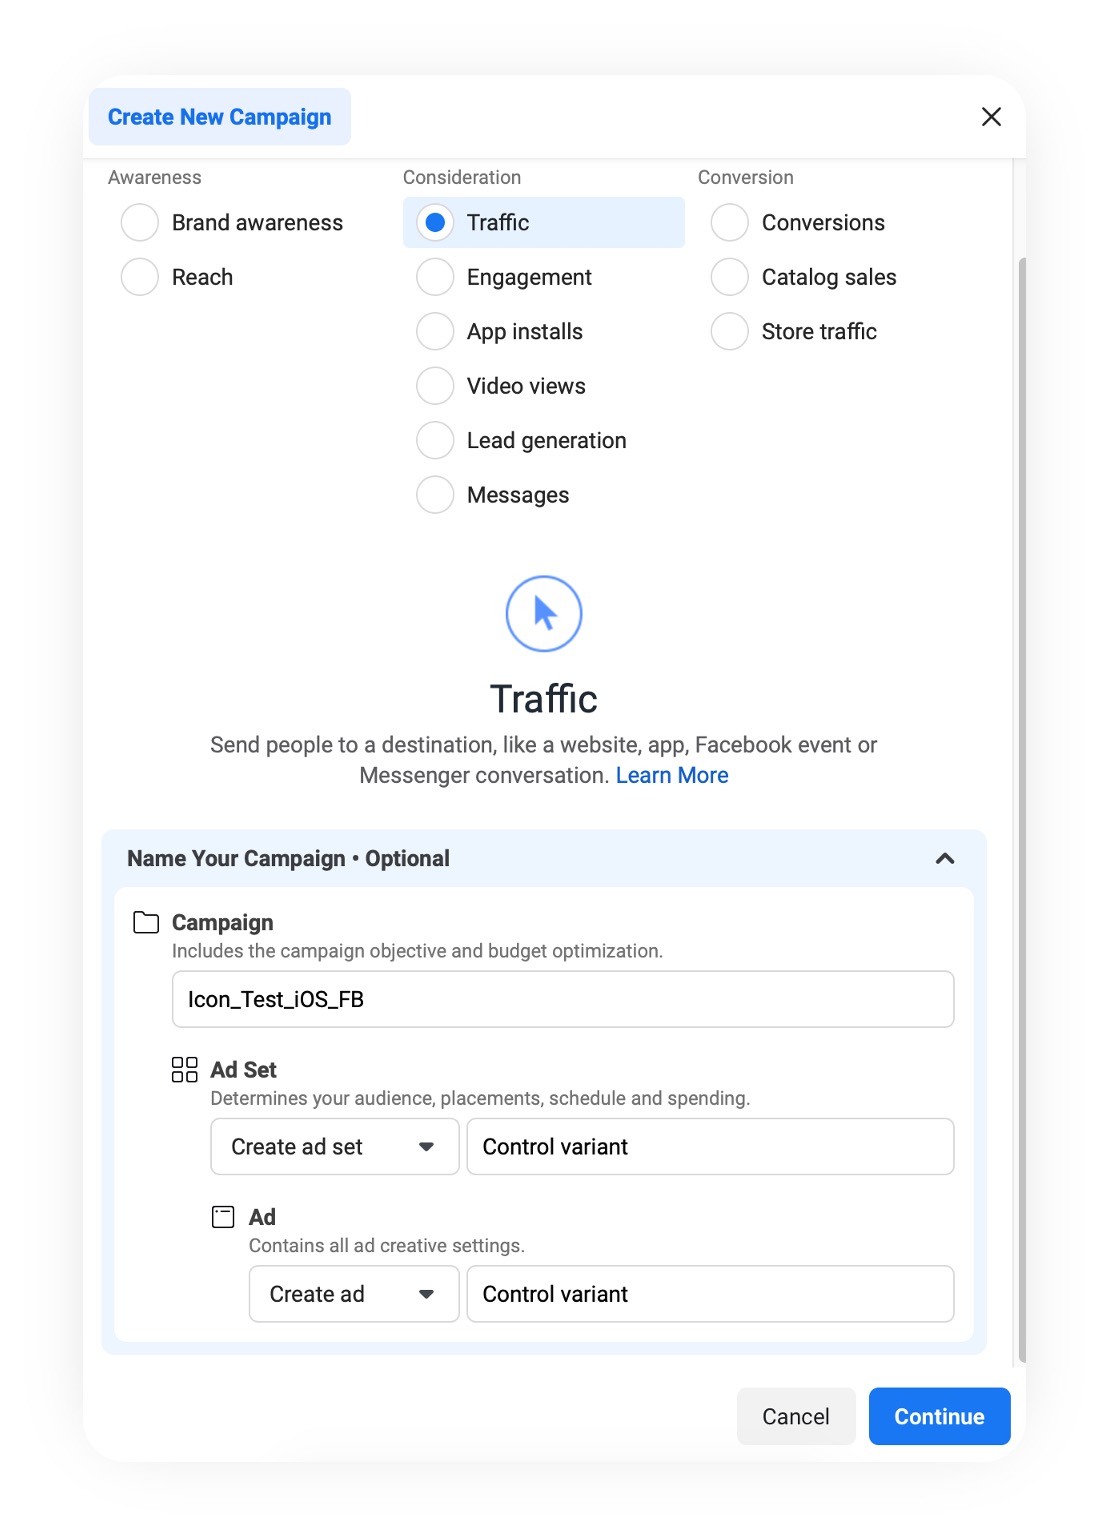
1. Ad Campaign. The first step is to create a new campaign. You should select Traffic as your Campaign Objective. Clicking on the 'Name you campaign' to add names for the Campaign, Ad Set and Ad.
If you use the campaign tracking link, this is the only Ad set and Ad you will need. However, if you want to use different tracking links for each variation, you must create separate Ad Set for each one. In that instance, give each Ad Set the same name as its variant.
After this you can press continue.
2. Ad Set. After pressing the continue it will open the editor. You can then navigate to the Ad Set, which can be found in the editor's left top corner.
2.1 Here you want to choose Website for traffic. Also you want to keep the Dynamic Creative and Offer, off.
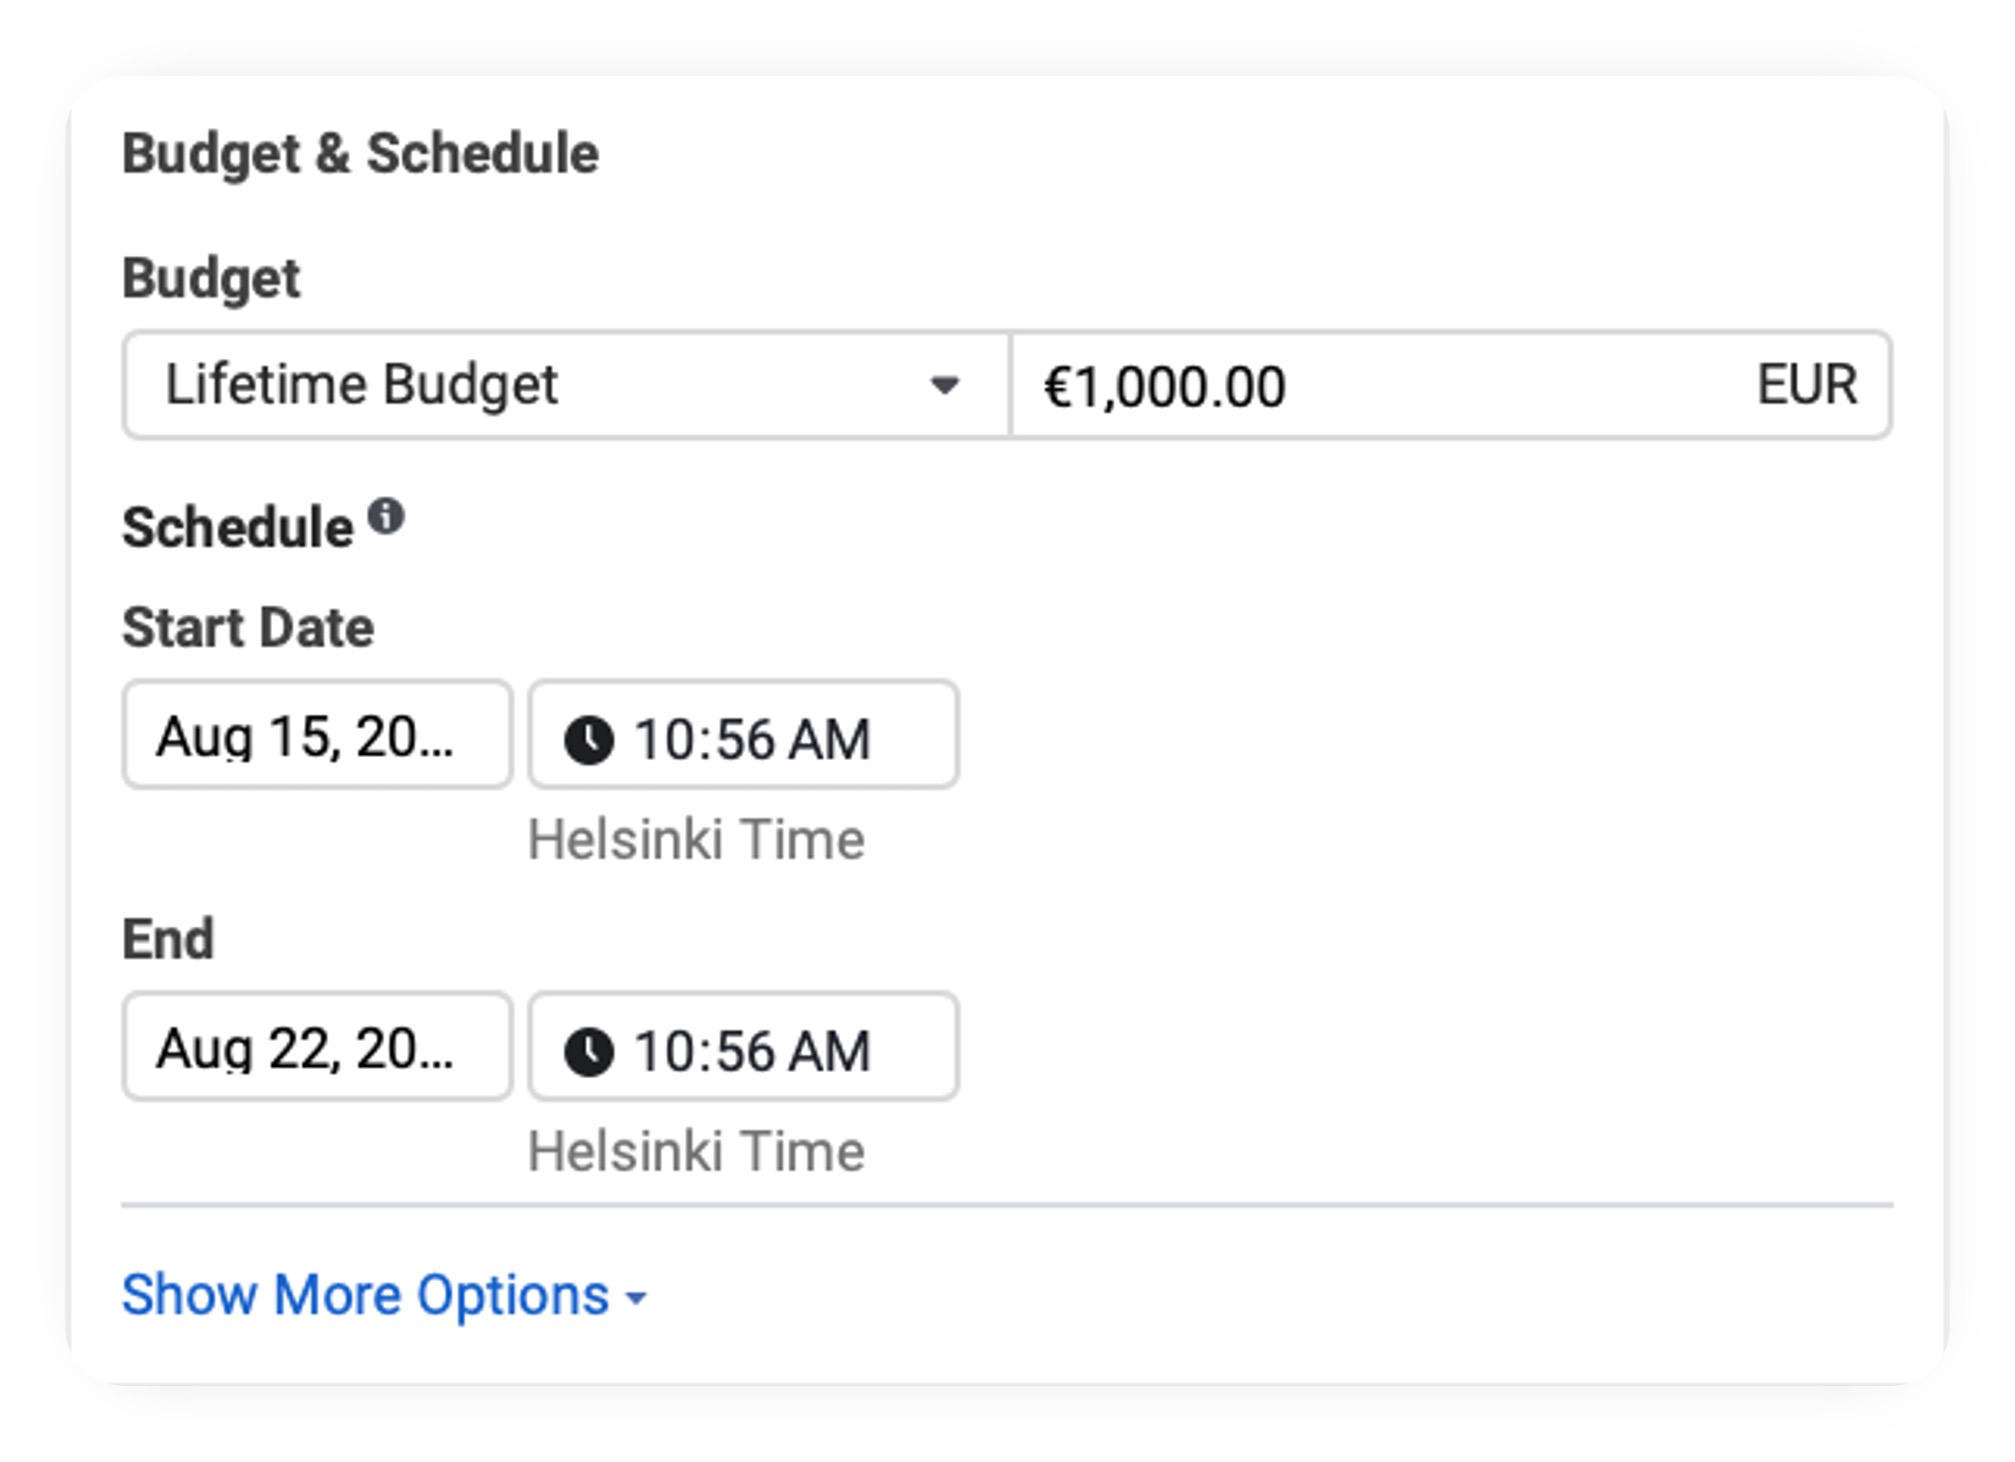
2.2 The budget varies due to a variety of factors that are affecting the pricing, and there is no set amount that would be required for the campaign. Nonetheless, you have the option of making the budget a predetermined amount (Lifetime Budget). Lifetime Budget requires a start and end date.
You can also choose daily budget. Please read the information tab next to Budget for further information.
Note: When using multiple ad sets (variation tracking links), you should provide the entire budget to the first ad set. Later, when creating more ad sets, you can divide the budget evenly among the ad sets.
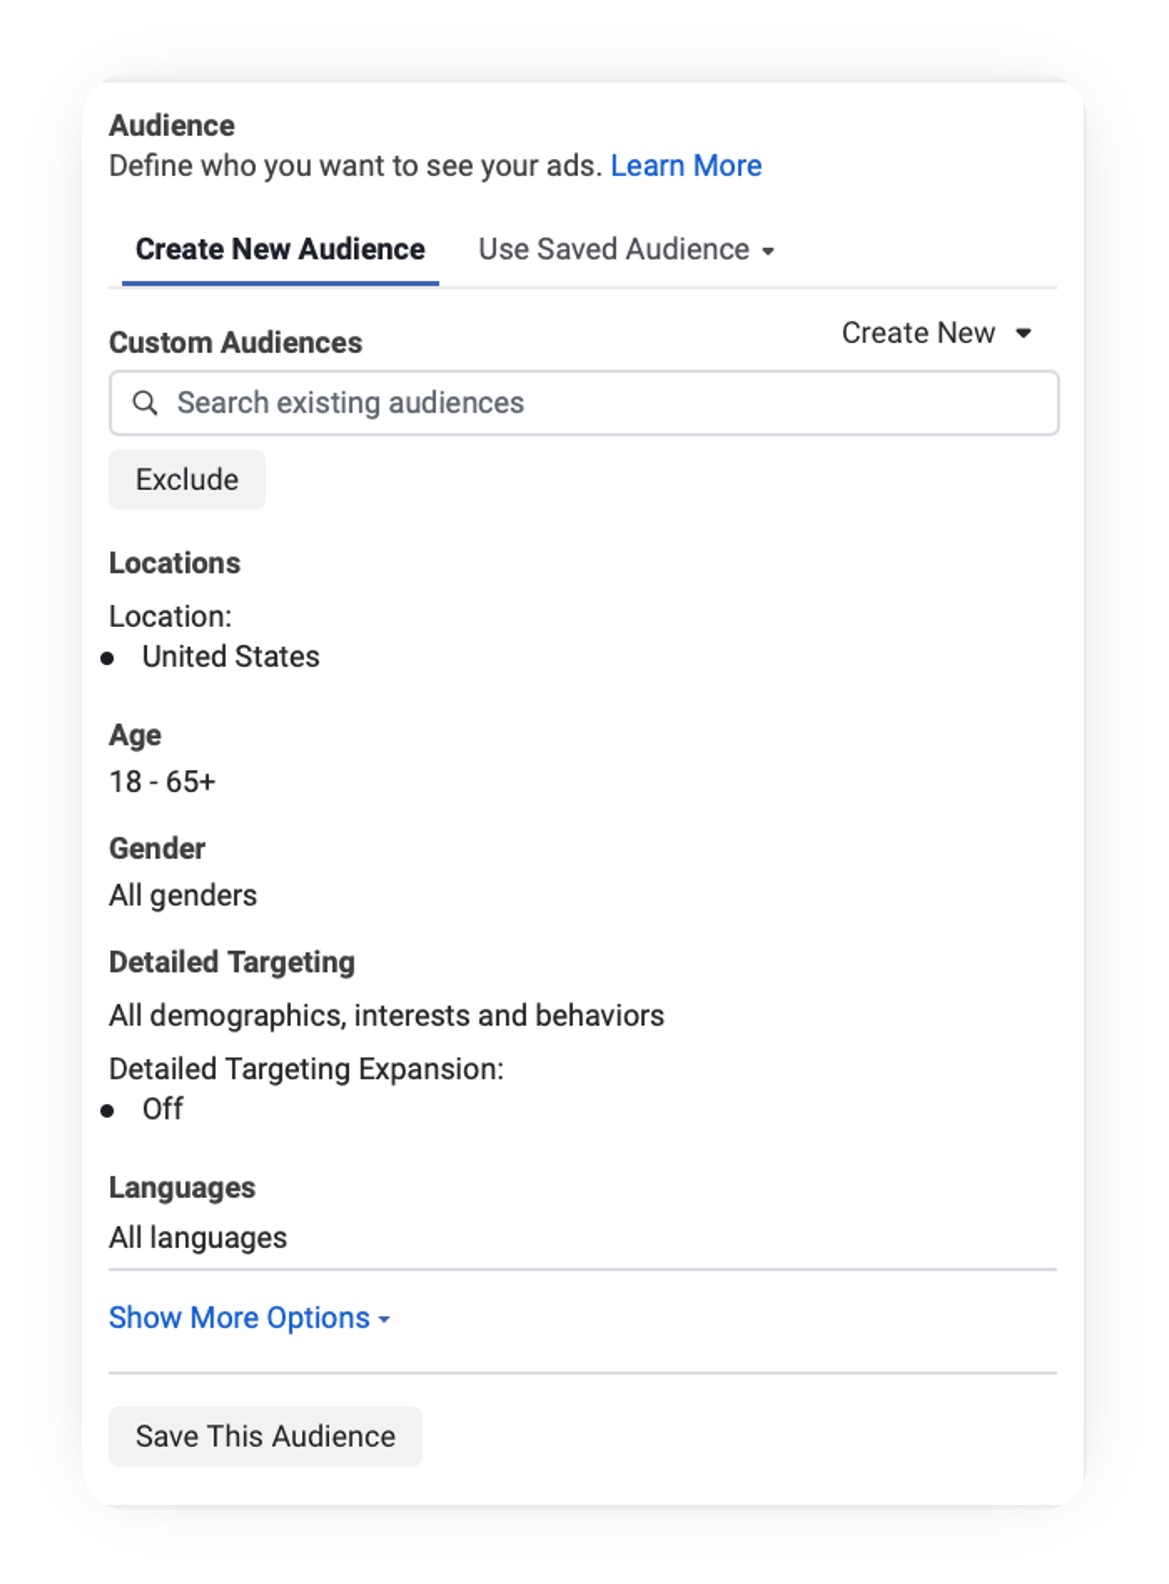
2.3 Moving on to Audience. This lets you target curtain type of accounts. If you have saved Audiences in your Facebook account you can use those as well.
2.4 Moving on to ad placement and Mobile device & OS. We recommend to set the placements manually. Here you get to choose where the ads will be shown. We like to show ads in Facebook and Instagram feeds, but this is preference question.

Choose Mobile Device and the Operating System according to the look-a-like page.
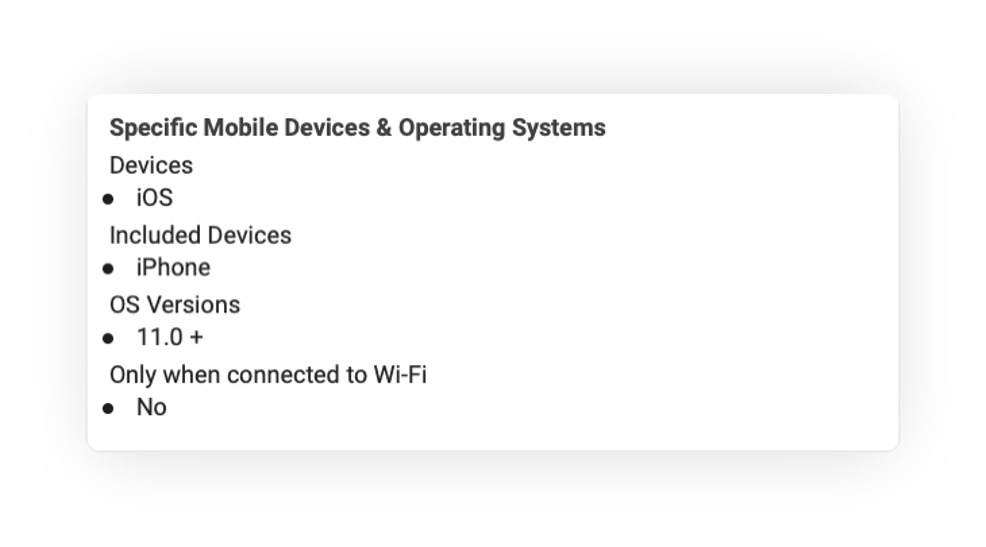
Note: Very specific audience and small population in certain OS might affect the amount of traffic you get. If you encounter problems where your traffic is slow and small you can try to widen the OS preference or how similar the user must be to the lookalike audience.
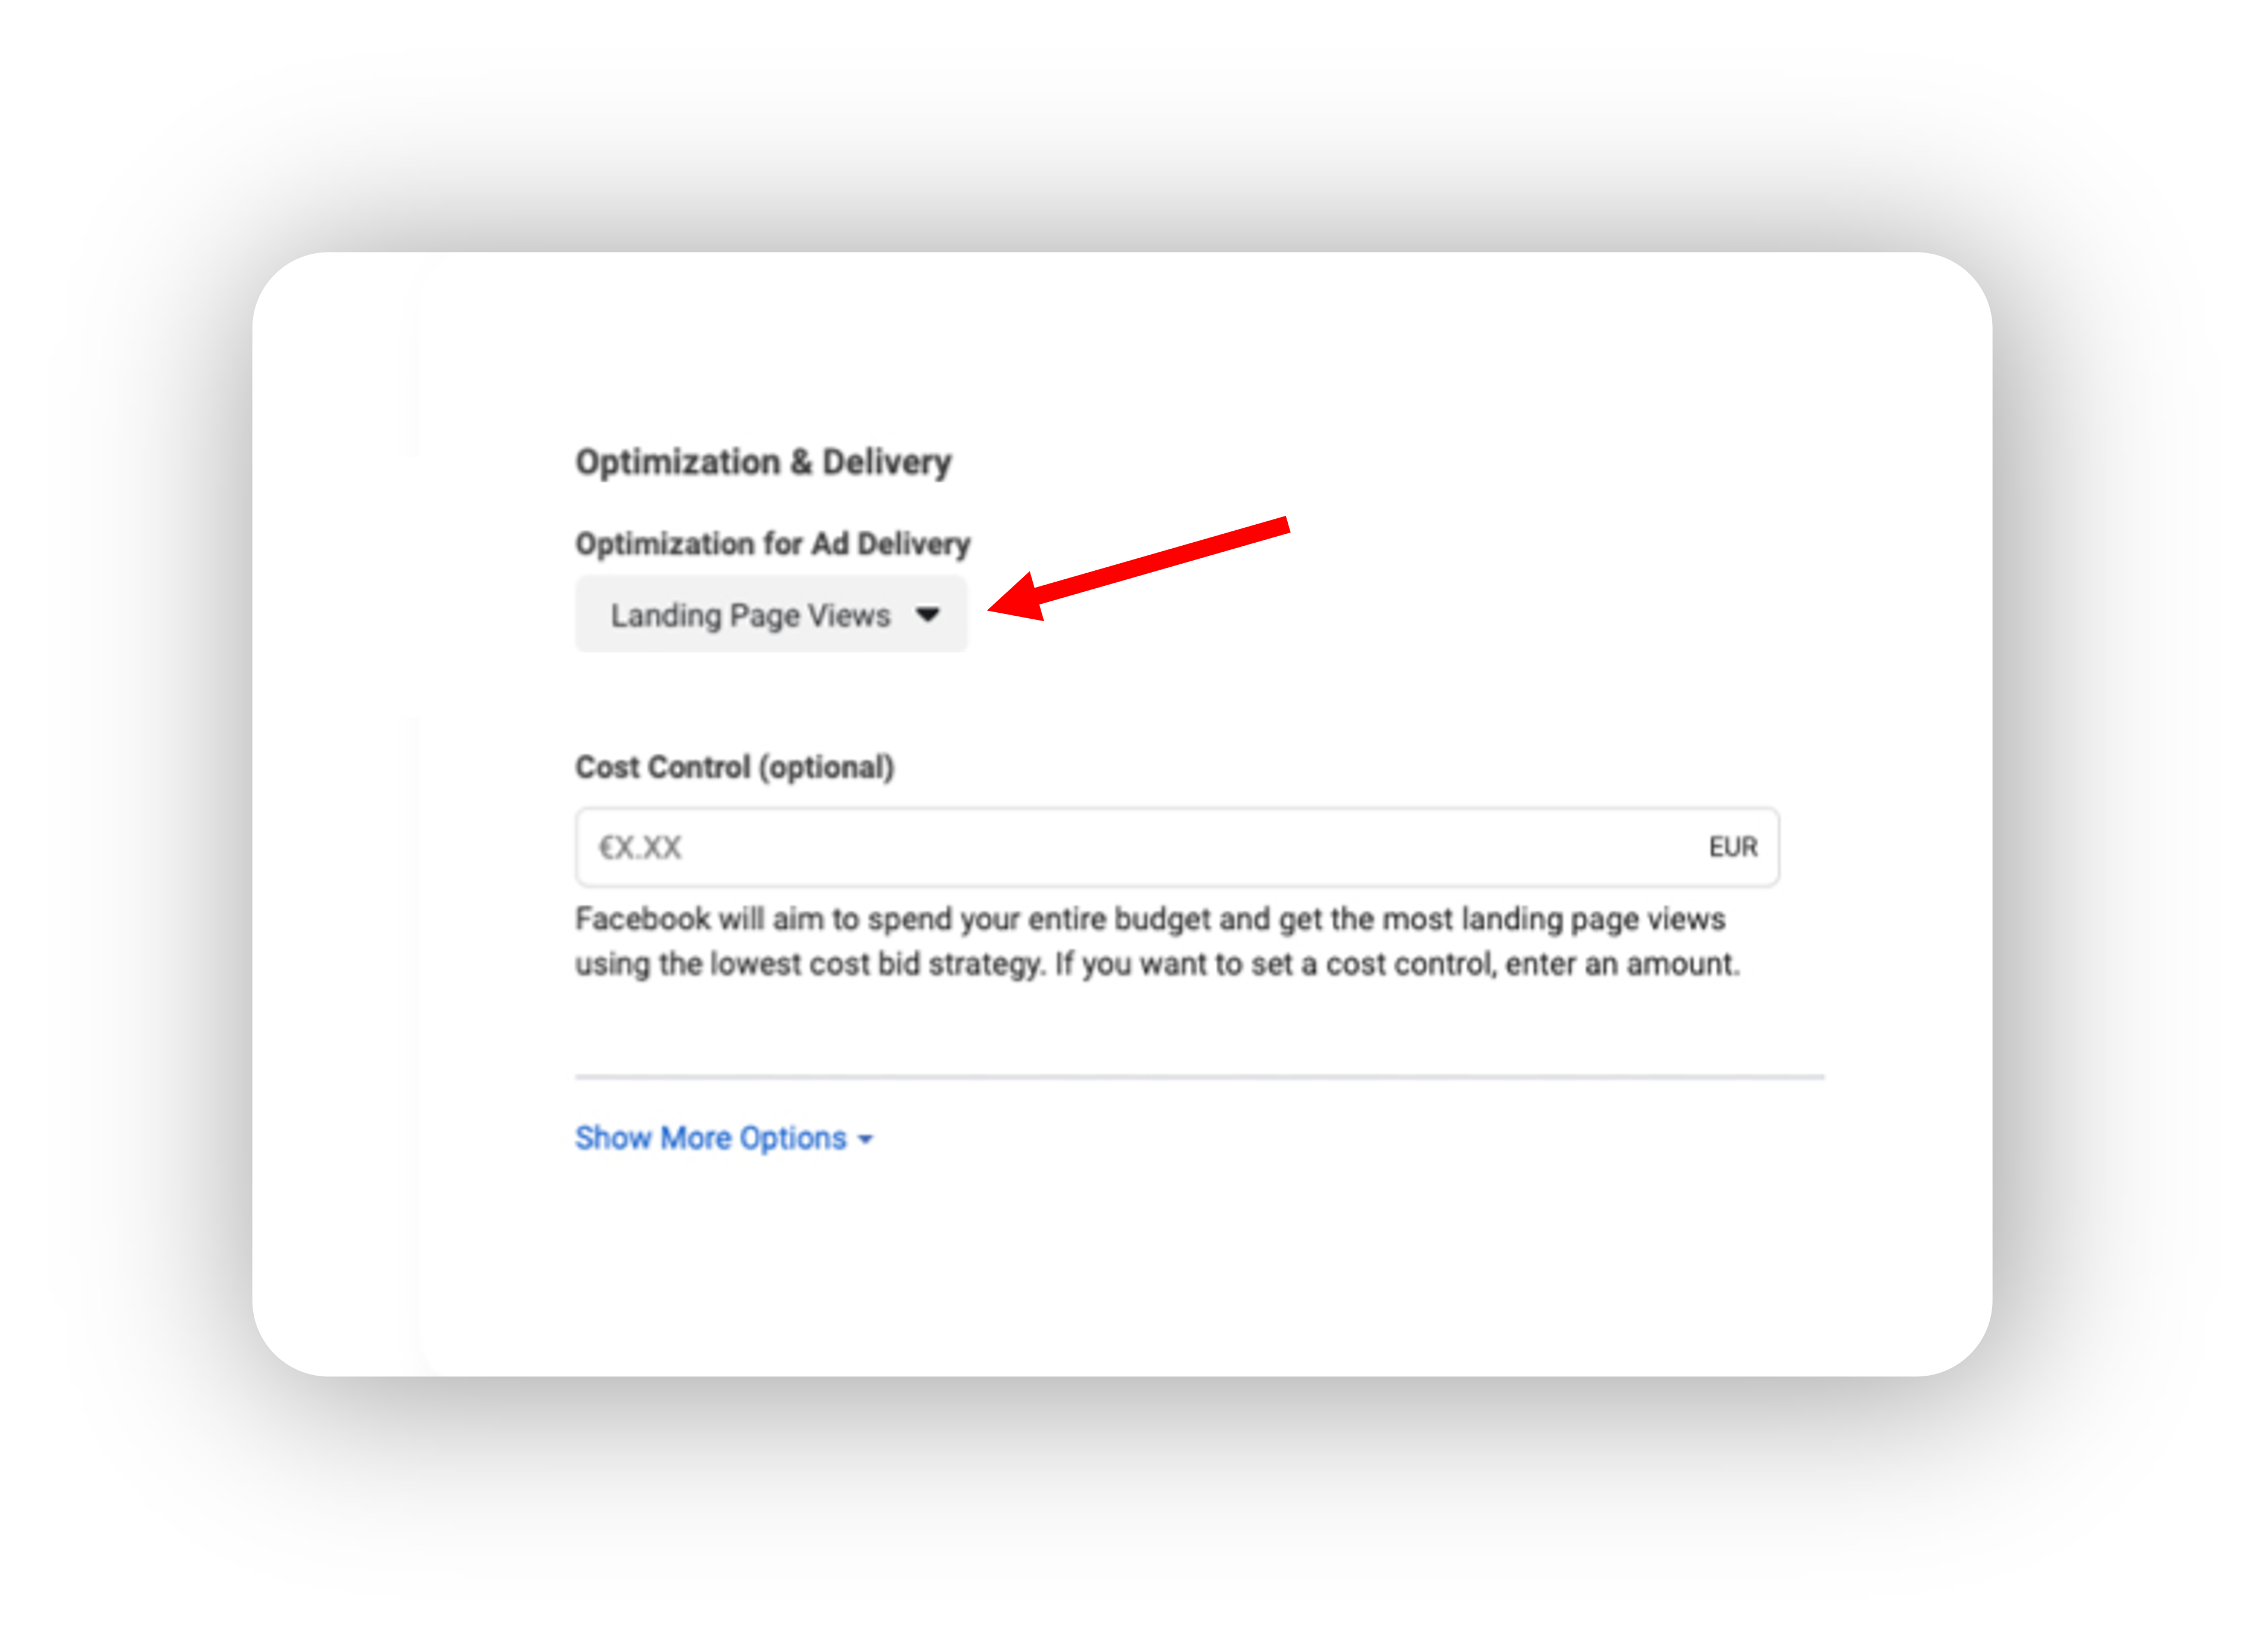
2.5 Finally, in the ad set level, select Landing Page Views from the optimization & delivery options. The cost control field can be left blank..
3. AD. Jumping on to edit the ad, which can be found in the same place as the ad set.
3.1 If you linked the product Facebook page to your account, it should appear here automatically; if not, you may create a new one using the 'Create Page' button. You must also link the Instagram product account if you choose to advertise on Instagram.
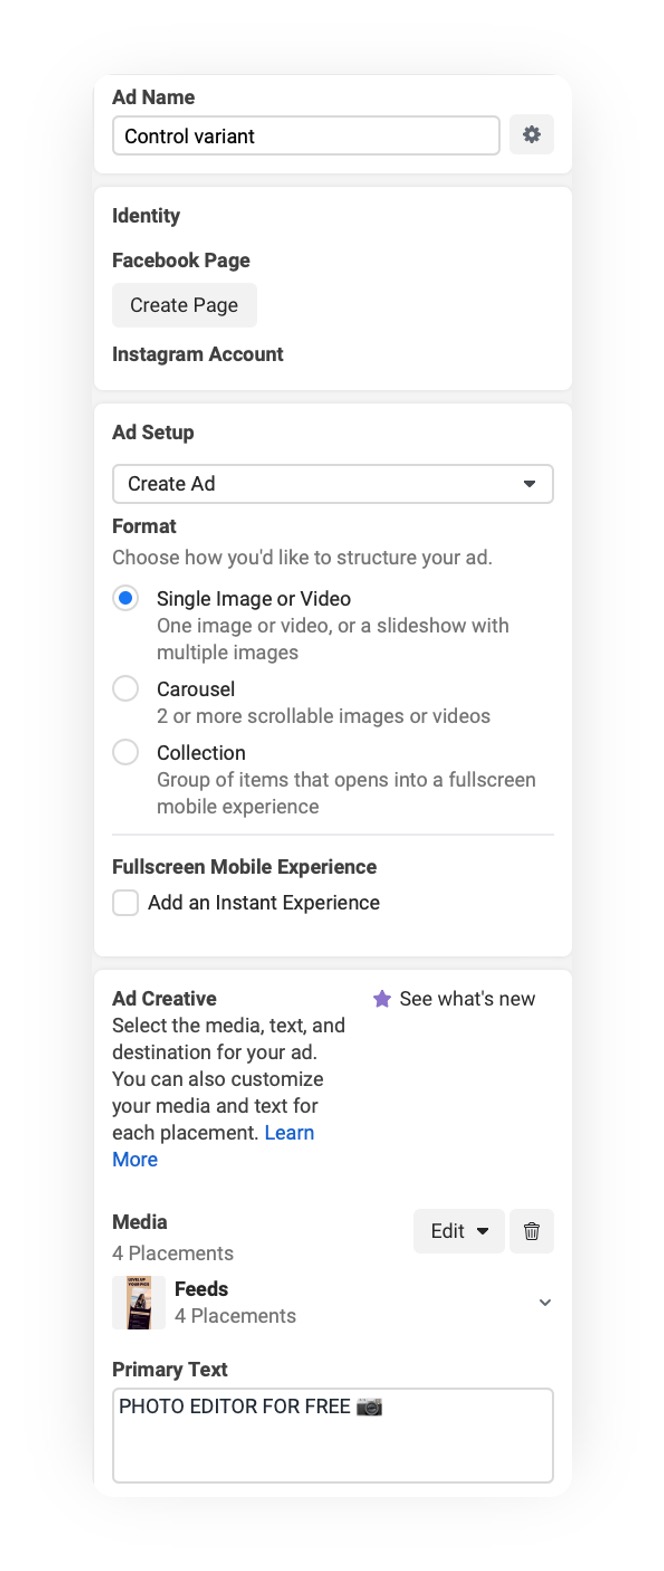
3.2 You can use old visuals from previous campaigns or create new ones to use for the campaign. For the format, choose the option that suits your ad best. To add visuals click on the Add Media box above the Primary Text. For the media use the visuals that you want to display in the ads. If you have separate ads for each variant, be sure that the intended ad images and Geeklab variation are in the same ad set.
3.3 The primary text is displayed to the user beneath your ad. So write a text that you feel like will call the user to take action.
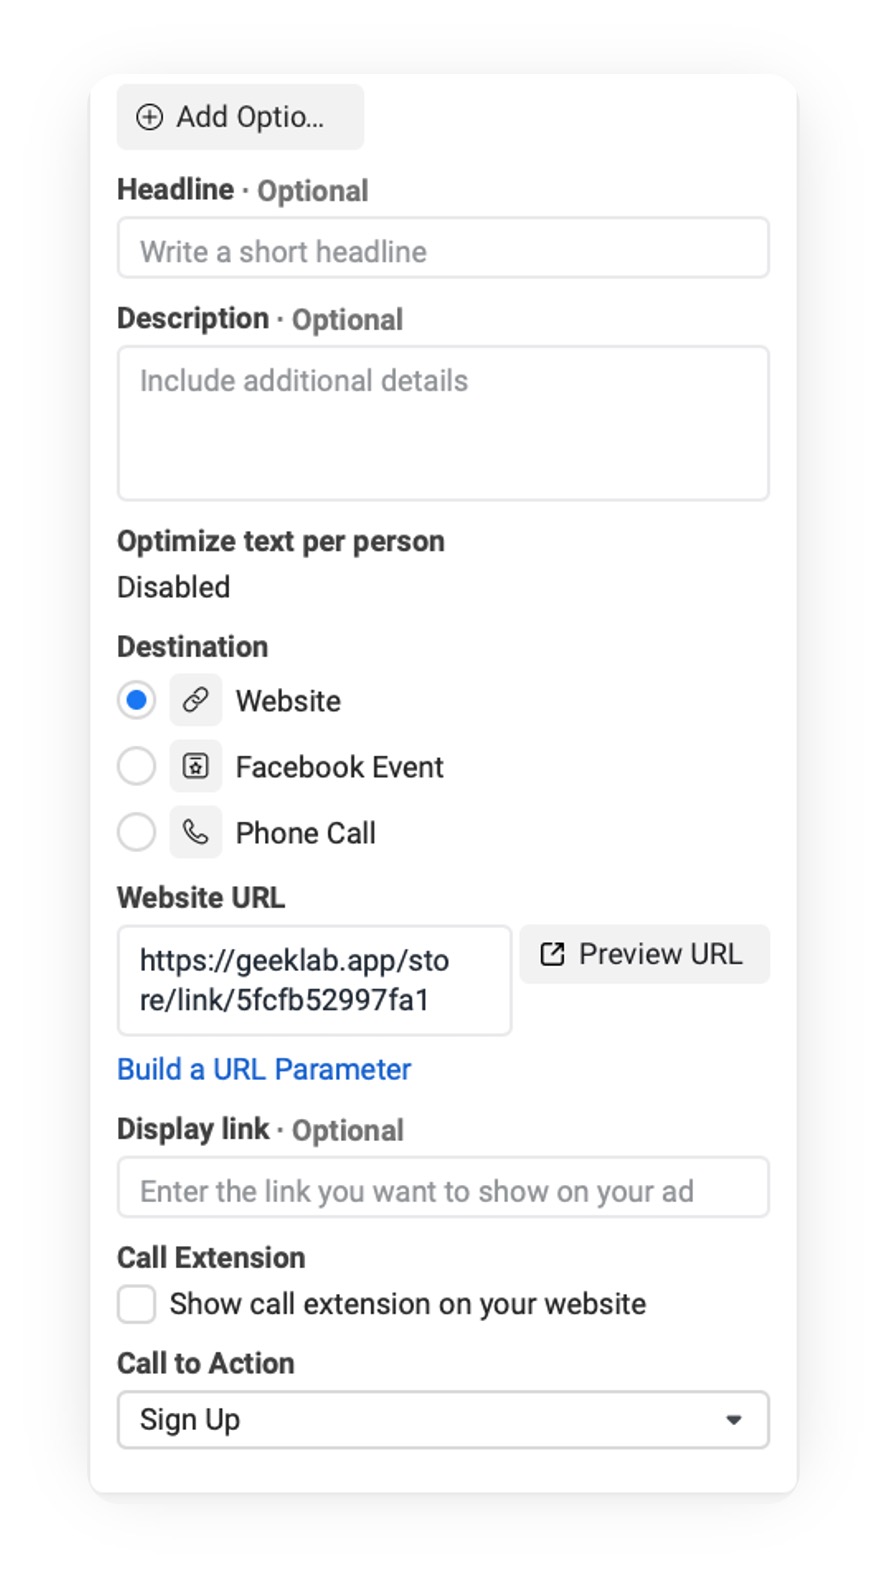
3.4 The final step before completing the campaign is to enter the Destination, which is where the user will go after clicking on the ad.
When you finished the campaign on our platform, you received the tracking links. You can add those to the Website URL depending on whether you're using the campaign tracking link or the tracking link for each variation.
_________________________________________________________________________
Note: Here's a complete guide on how to implement Facebook pixel : https://www.geeklab.app/posts/ios14-pixel
If you are using pixel it should show a warning below saying ' Pixel isn't tracking landing page views'
The final step in activating the pixel is to enable Website Events by checking the box before it.

Congratulation, now the first campaign is set!
If you used campaign tracking link you have now completed setting up the campaign, but if you wish to use separate variation tracking links then follow the next steps.
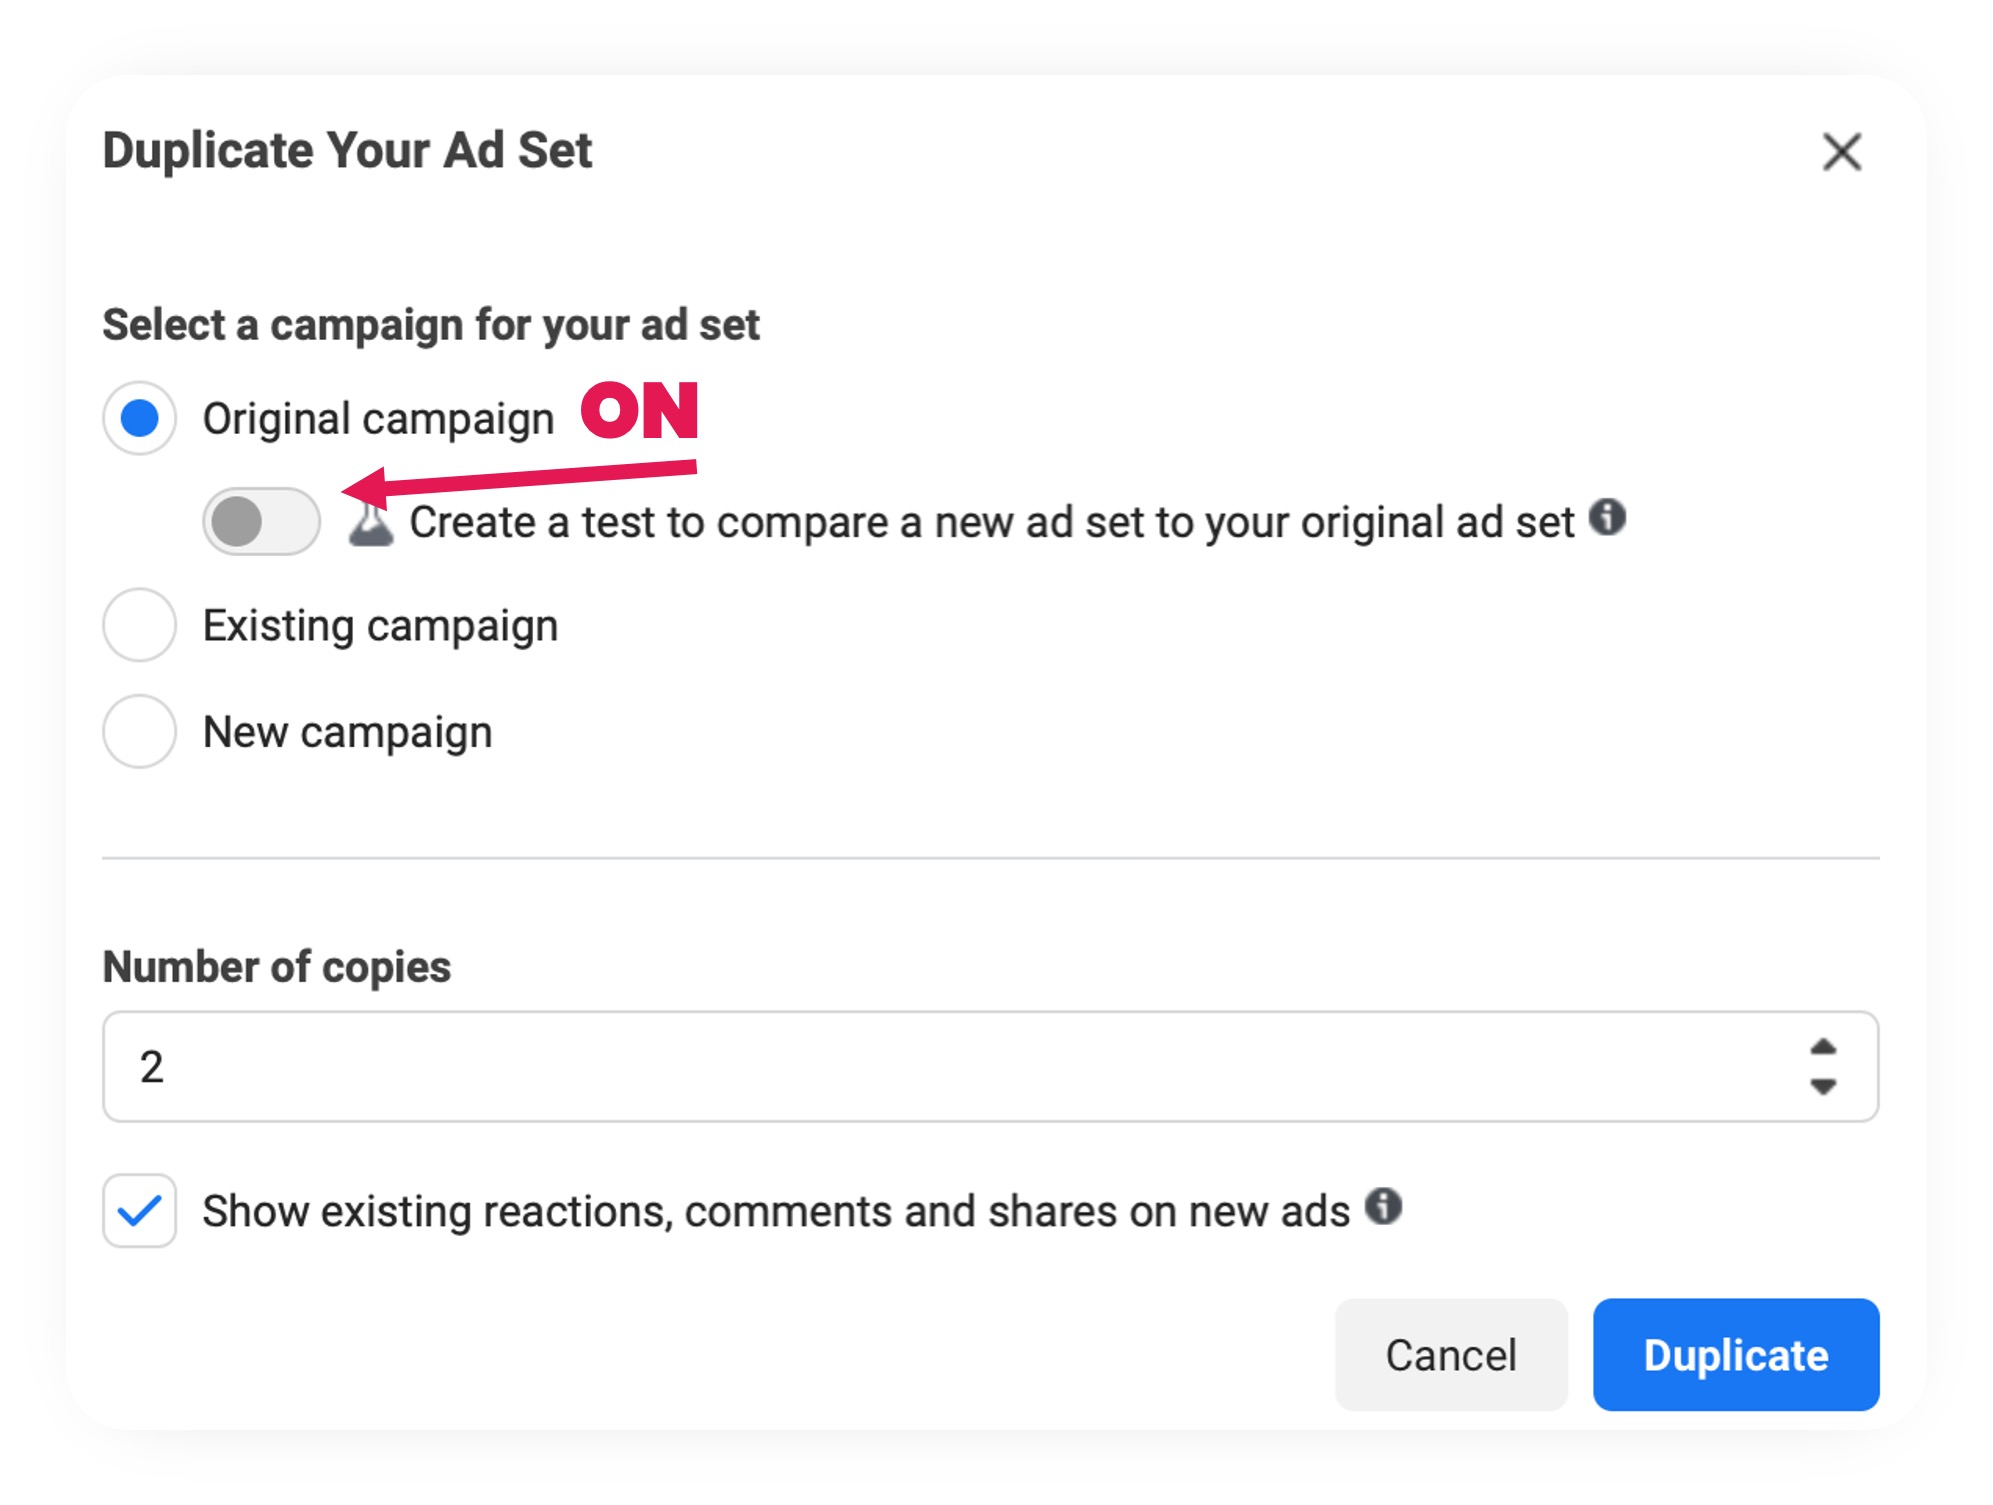
4. Now we need to add new ad sets for all the variations that we have. Let's say we have 3 variations. So now we have our first ad set with the same ad theme and the variation link. To add the other 2 go to Ad Set, and duplicate the first one.
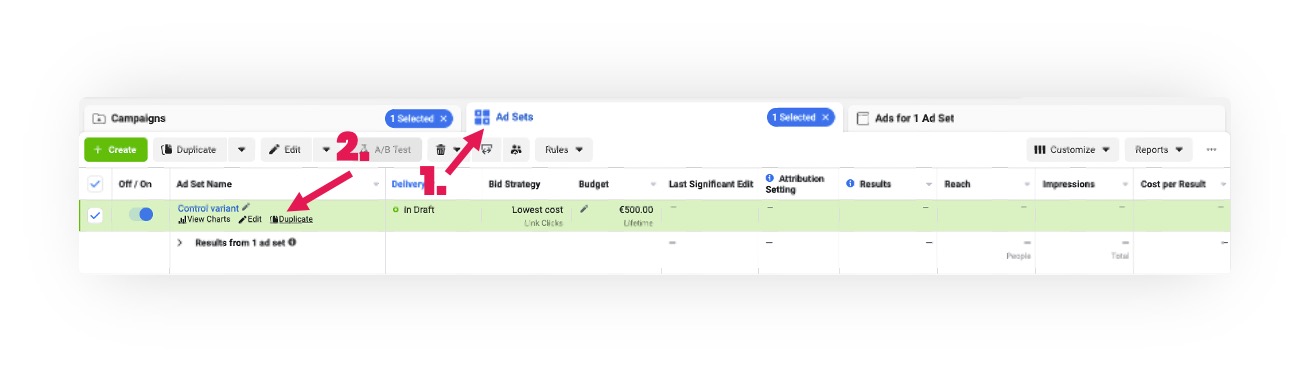
4.1 Choose Original campaign and turn the test button ON. Copy as many ad sets as you require for the variants. In this example, we still lack two
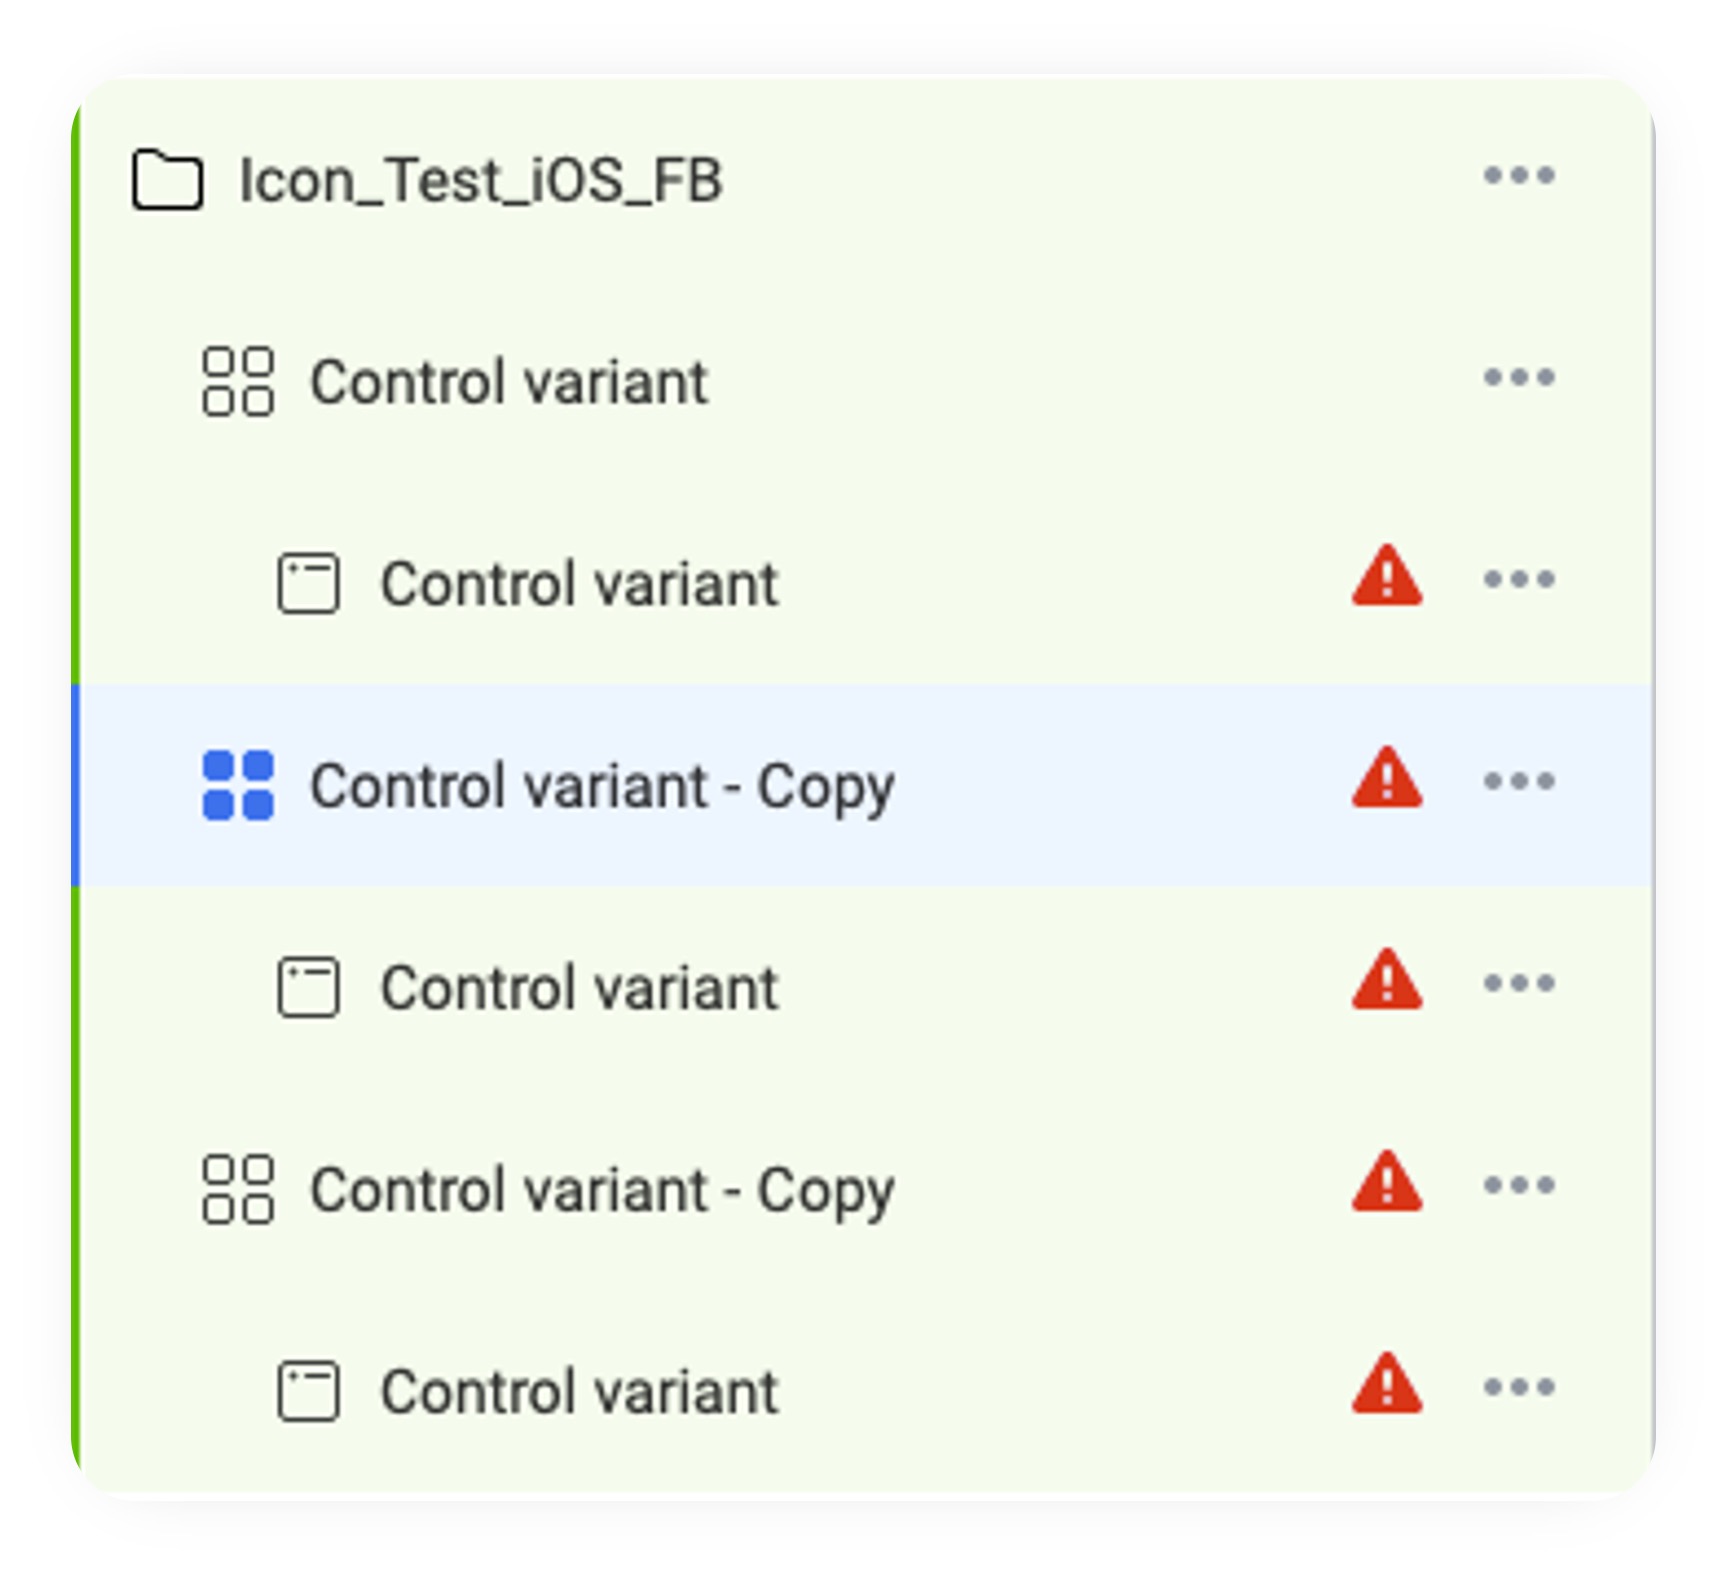
4.2 You should now have the copies like shown in the image below. The copies can then be given the variant names. Then, adjust the budget evenly between the ad sets. Finally, edit the Mediavisuals and Website URL in the same way you did for the first ad set, using the variant tracking links.
Awesome, you are now ready to start the campaign and sending traffic to the store pages.
If you encounter any difficulties along the way, please do not hesitate to ask for help in the live chat; we are more than happy to help you.