❗️Before you continue, make sure you've requested and received access to the Geeklab Meta App. More information on how to authenticate the Meta App can be found here.
AudienceLab is a powerful tool that lets you manage your advertising campaigns directly from the Geeklab dashboard. By running ads through AudienceLab, you reduce the amount of manual input and can concentrate on the parameters that are important to your campaigns.
We use Meta's business account level system users to connect AudienceLab with your Meta ad account and its associated assets, and authentication occurs through them.
The assets you need to create/have to be able to use AudienceLab for running ads on Meta:
- System User: System users represent servers or software that make API calls to assets owned or managed by a Business Manager.
- Meta Pixel: A Meta Pixel is a javascript code that allows you to improve the performance of your Meta campaigns. The pixel fires when a user clicks "download" on your Geeklab product page, sending an event back to Meta.
- Ad Account: A meta ad account is the account you use to buy Facebook impressions. At this level, you define your payment methods, business information, and currency.
- Facebook Profile Page: This is a public page that anyone with a Facebook account can visit and interact with. The page will be used in conjunction with your ads as the ad deliverer on both Facebook and Instagram
- Business Account: The main organization to which all assets belong. Assets can be shared among multiple business accounts, but they are always owned by one.
How to create an system user
To create the system user, you must first define the set of rights that the system user will have. Following the creation of the system user, you can attach assets from the same business manager as well as generate an authenticator token.
❗️When you create the token, save it locally on your device because it will not be saved in Meta Business Manager and we will need it later when we enable Audience Lab.
Begin by going to the Users section and selecting System Users from the dropdown to create your first system user.
To create your system user, click the Add button. Select Geeklab as the app to attach to the system user when prompted.
If possible, select Admin as the system user type to avoid future access issues.
Create an authentication token after creating the system user by clicking generate new token. This will give you a token, which you should keep on your local device because we'll need it later to authenticate Geeklab to use your assigned Meta assets. You can revoke all previously granted tokens at any time, removing access to your Meta assets assigned to your system user.
Assigning assets to the system user
Because Meta Business Manager displays the various assets (pixels, ad accounts, and pages) as standalone assets, you must manually link the various assets together before using a specific pixel and a specific page with a specific ad account.
Before proceeding to the next step, ensure that you have created all of the necessary assets (Page, Pixel and Ad Account).
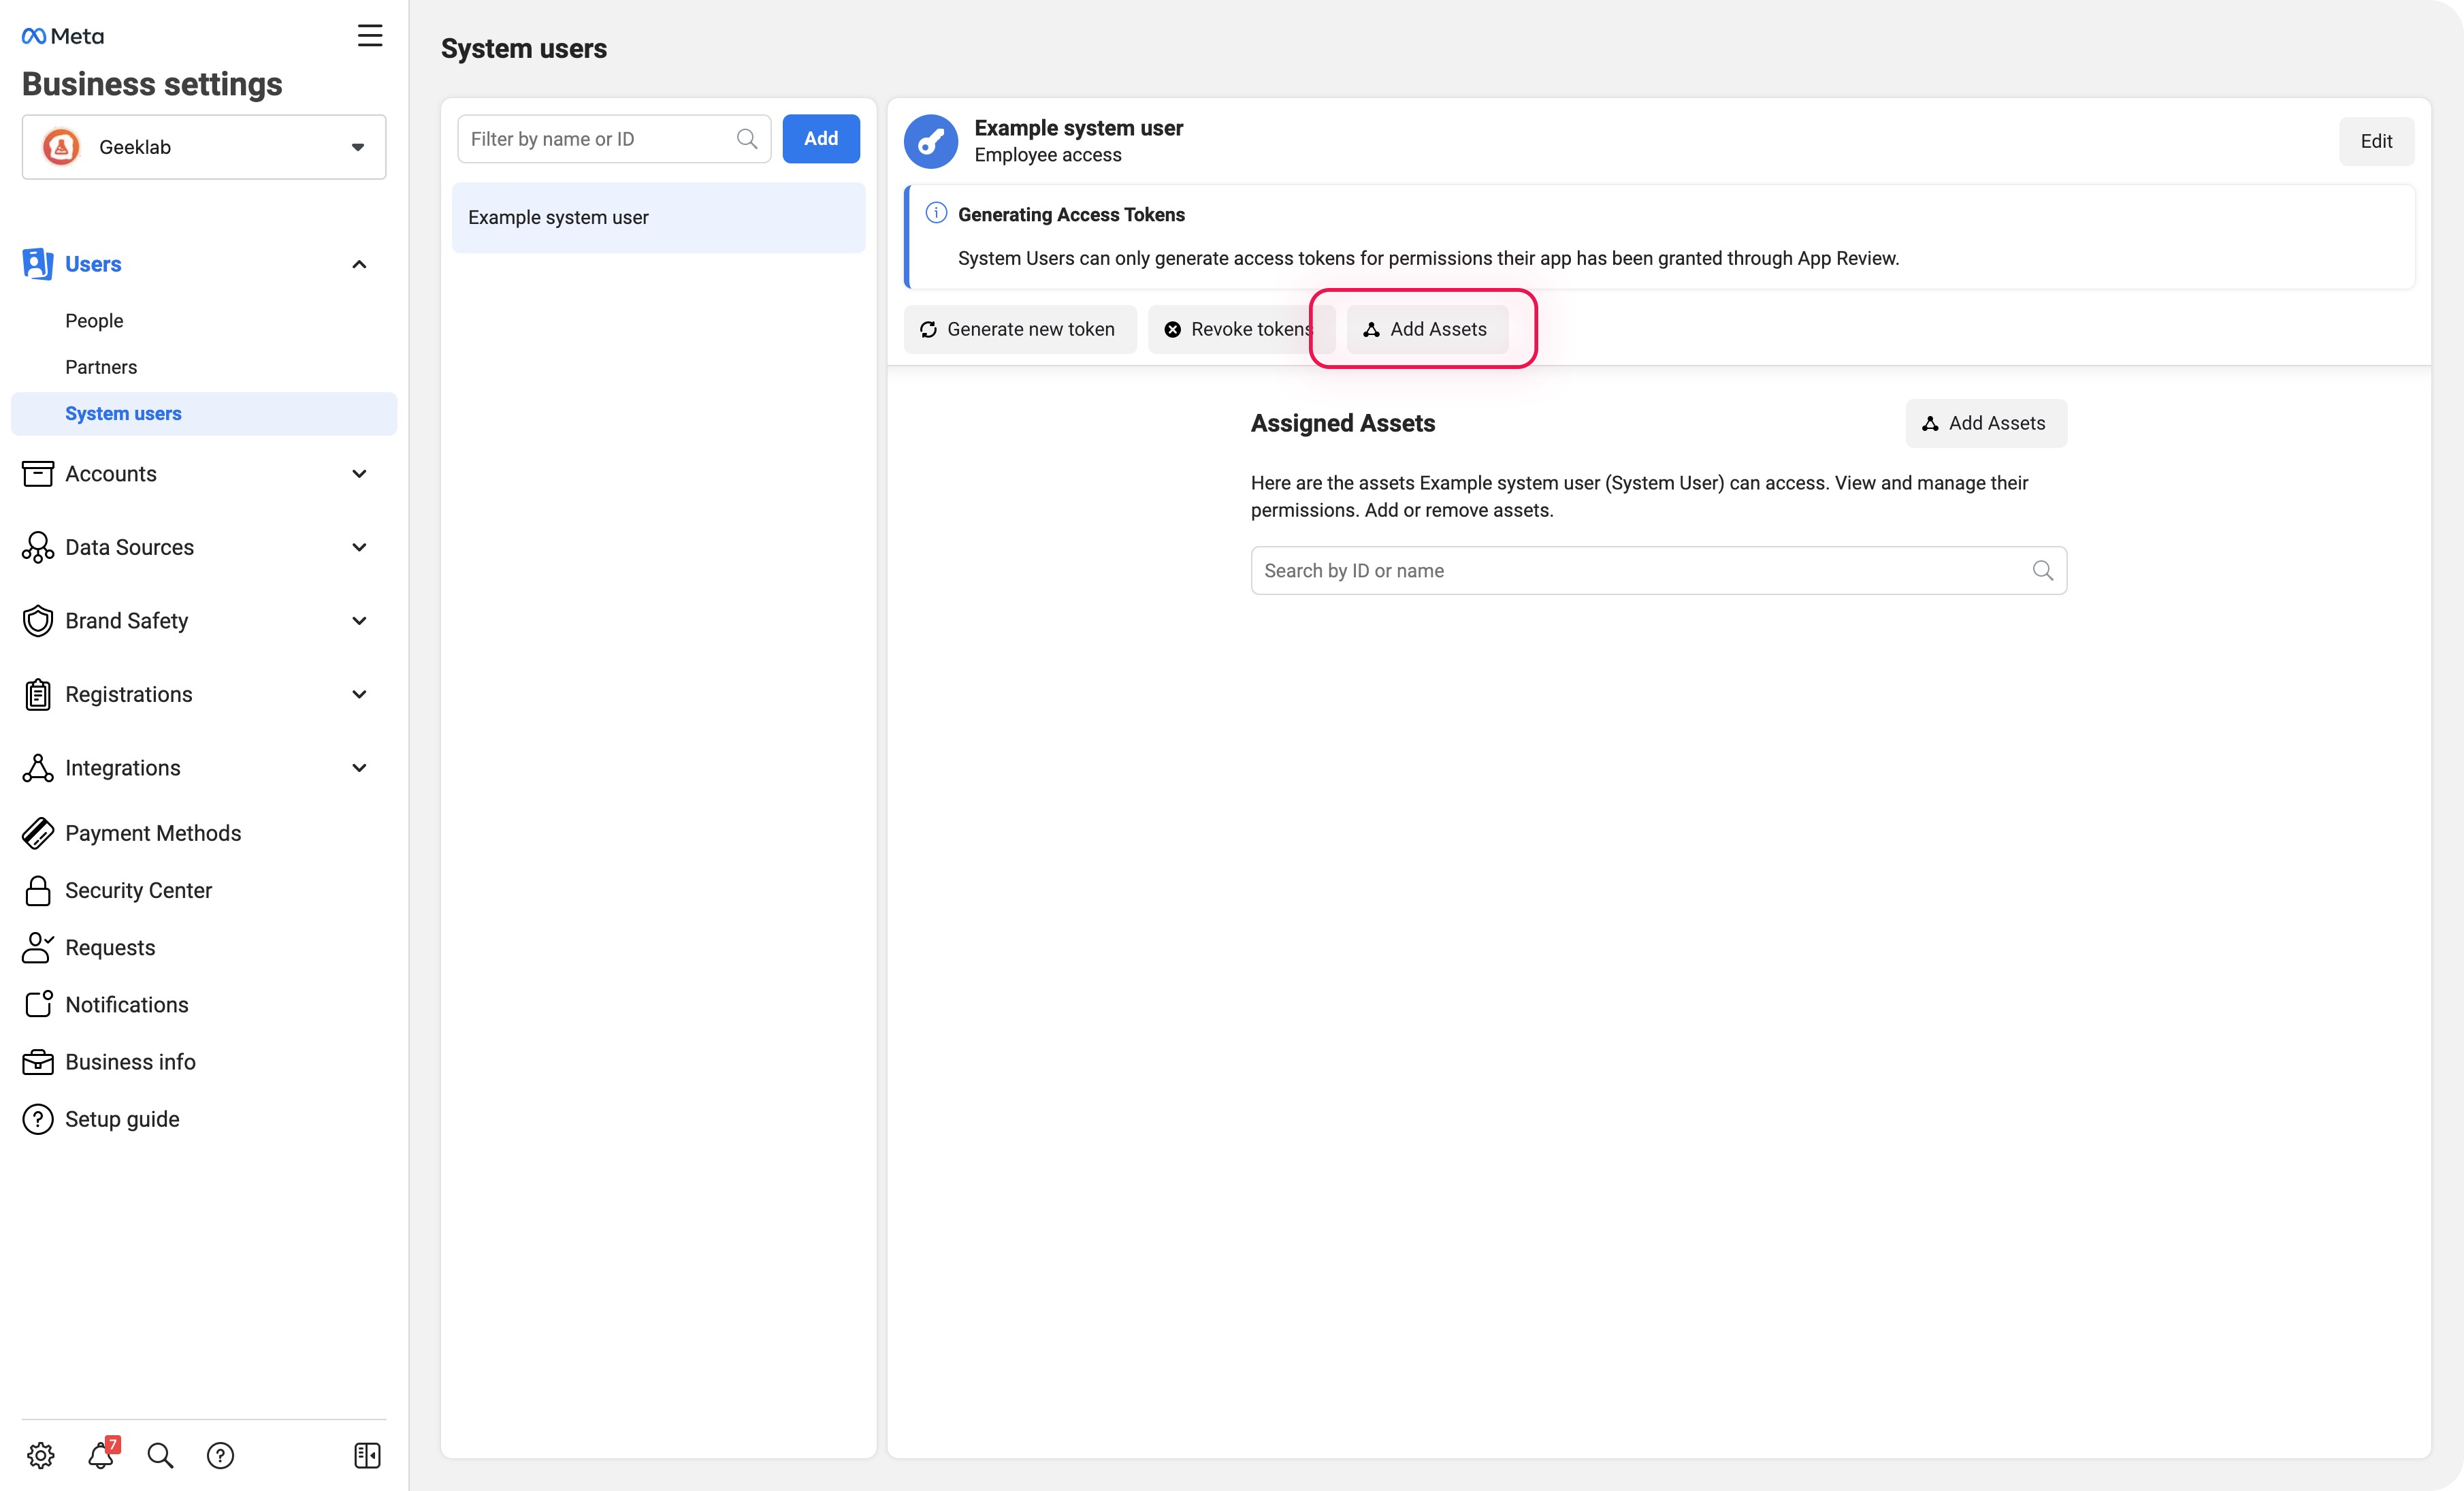
To add assets, return to the system users tab by going to the Users section and selecting System Users from the dropdown menu.
Select the system user you created in the previous step.
Ad Assets will open a modal where you can assign specific assets to the system user.
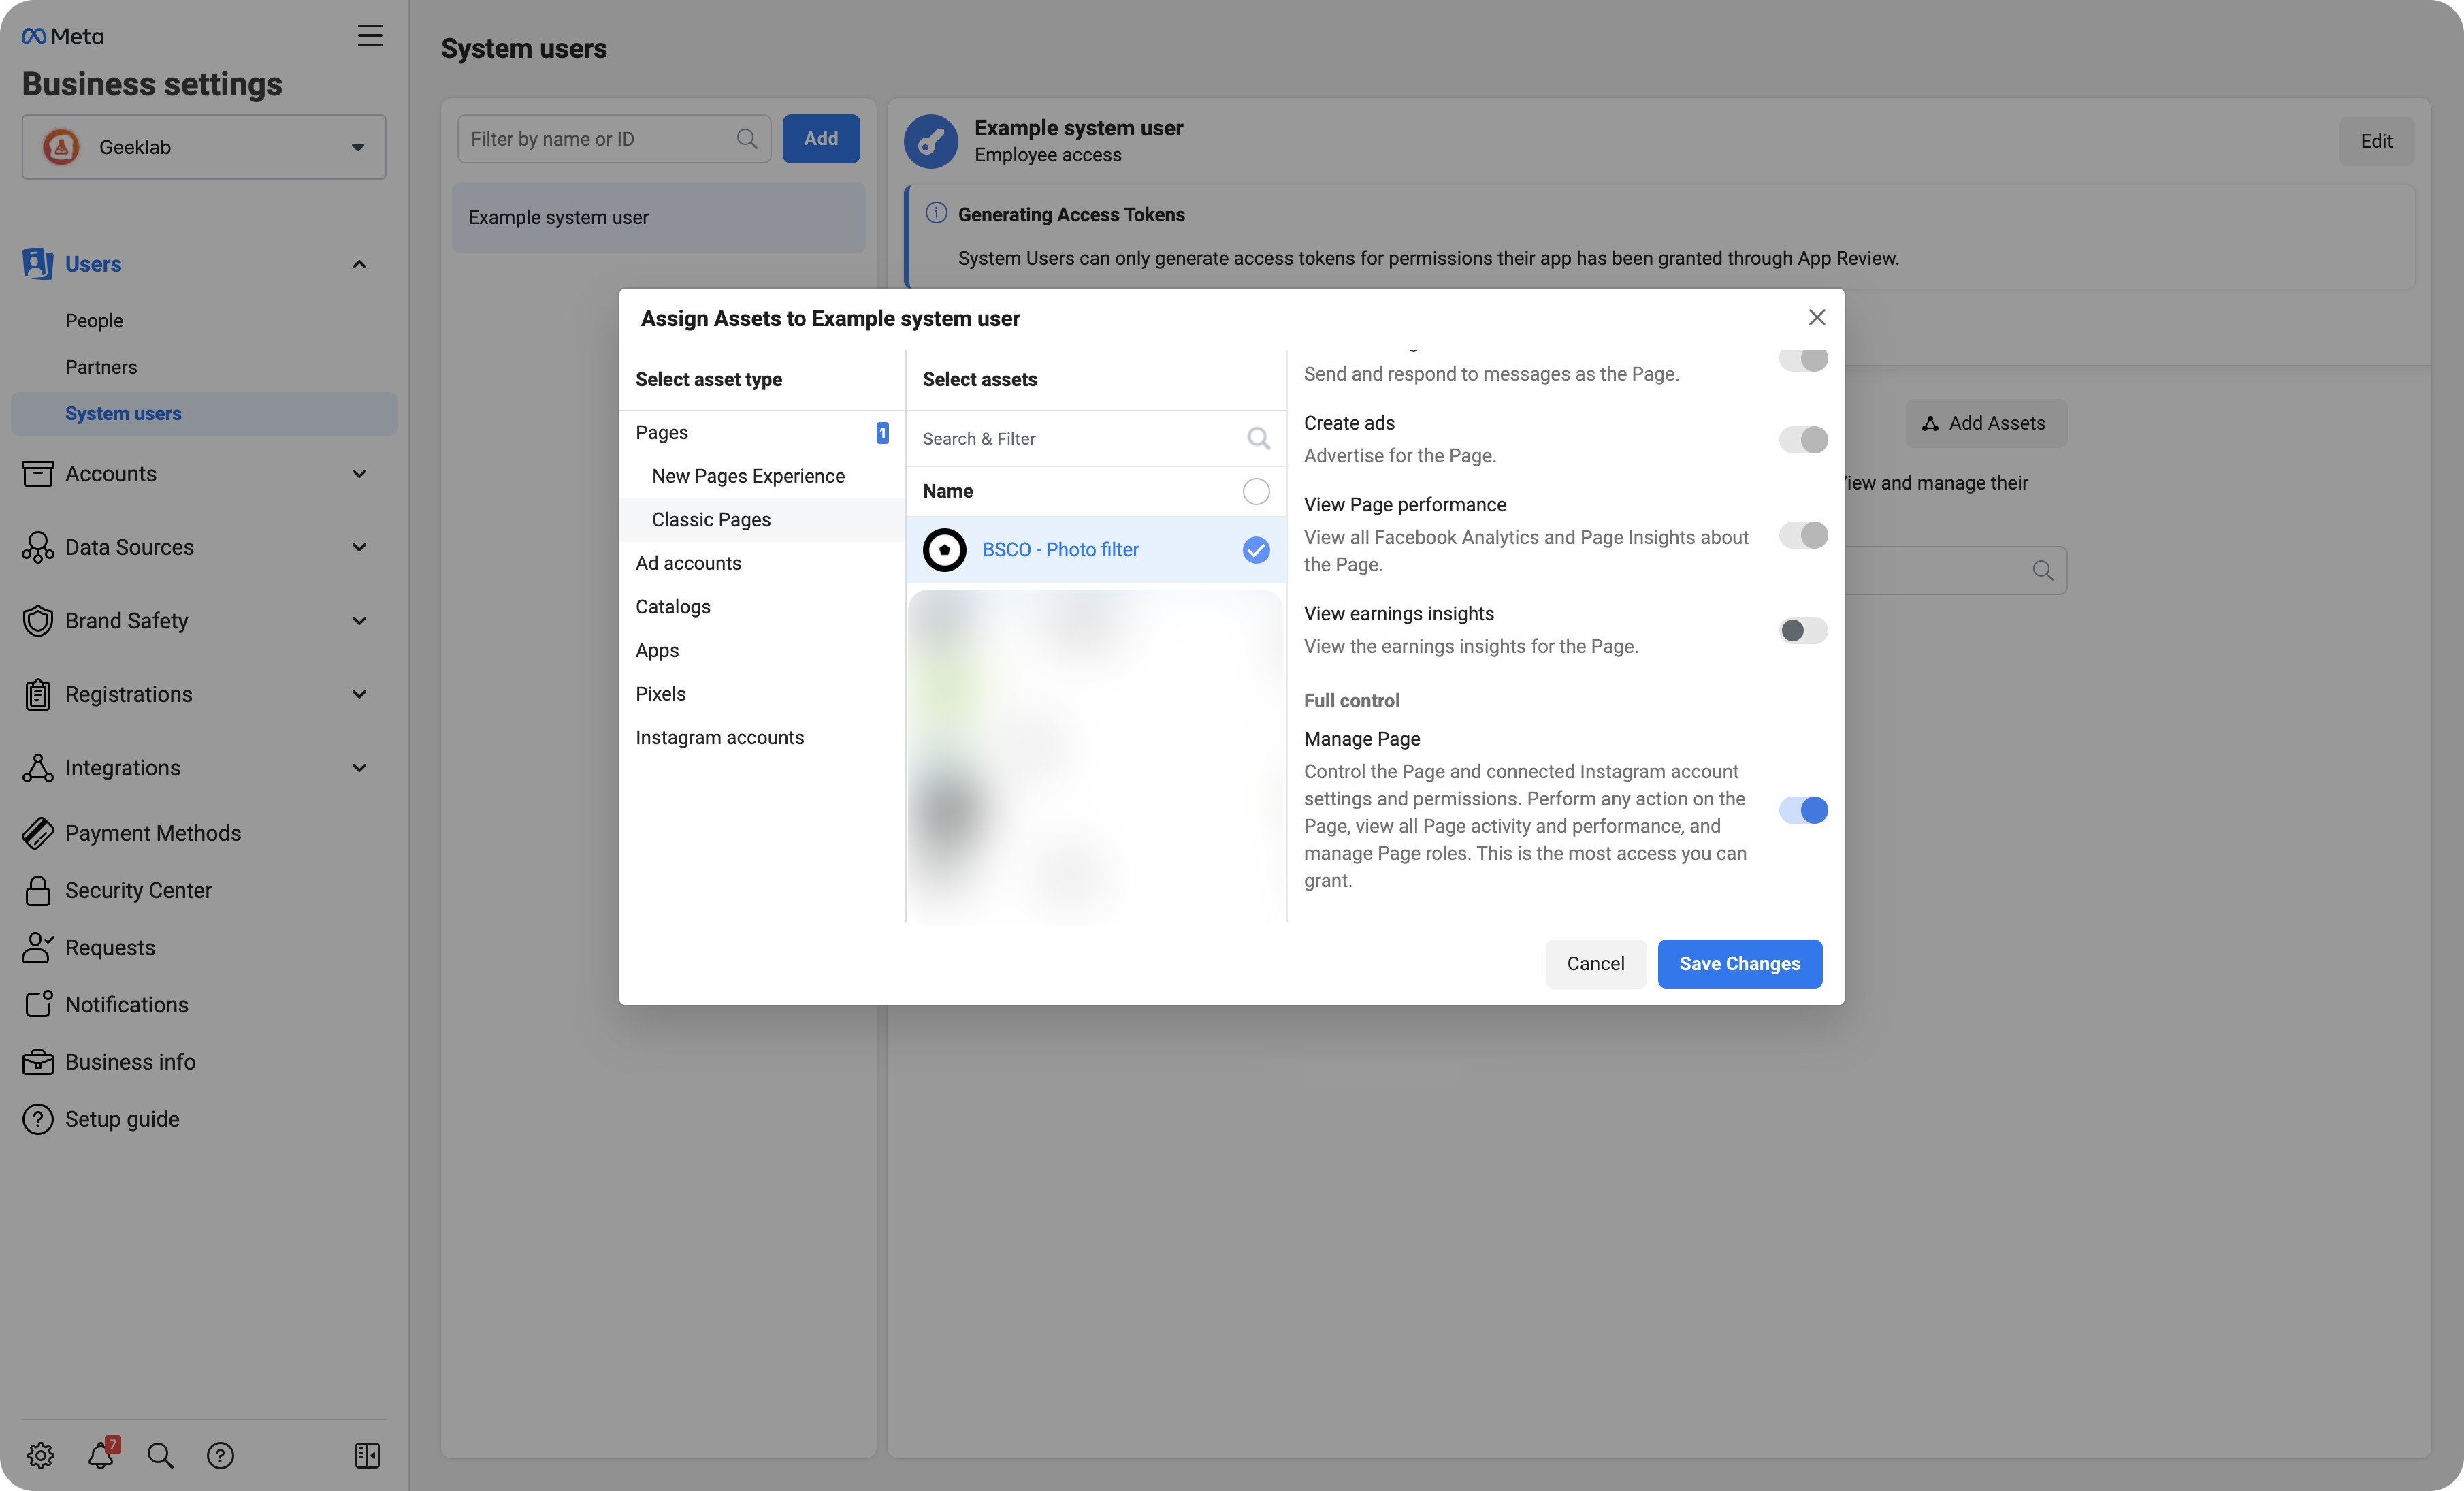
Begin by selecting the Facebook Pages of the Meta account you want to use with your Geeklab campaigns by clicking Pages and Classic Pages.
After you've selected all of these, hover over and scroll all the way down on the very right side of the modal to grant your system user full control over these pages.
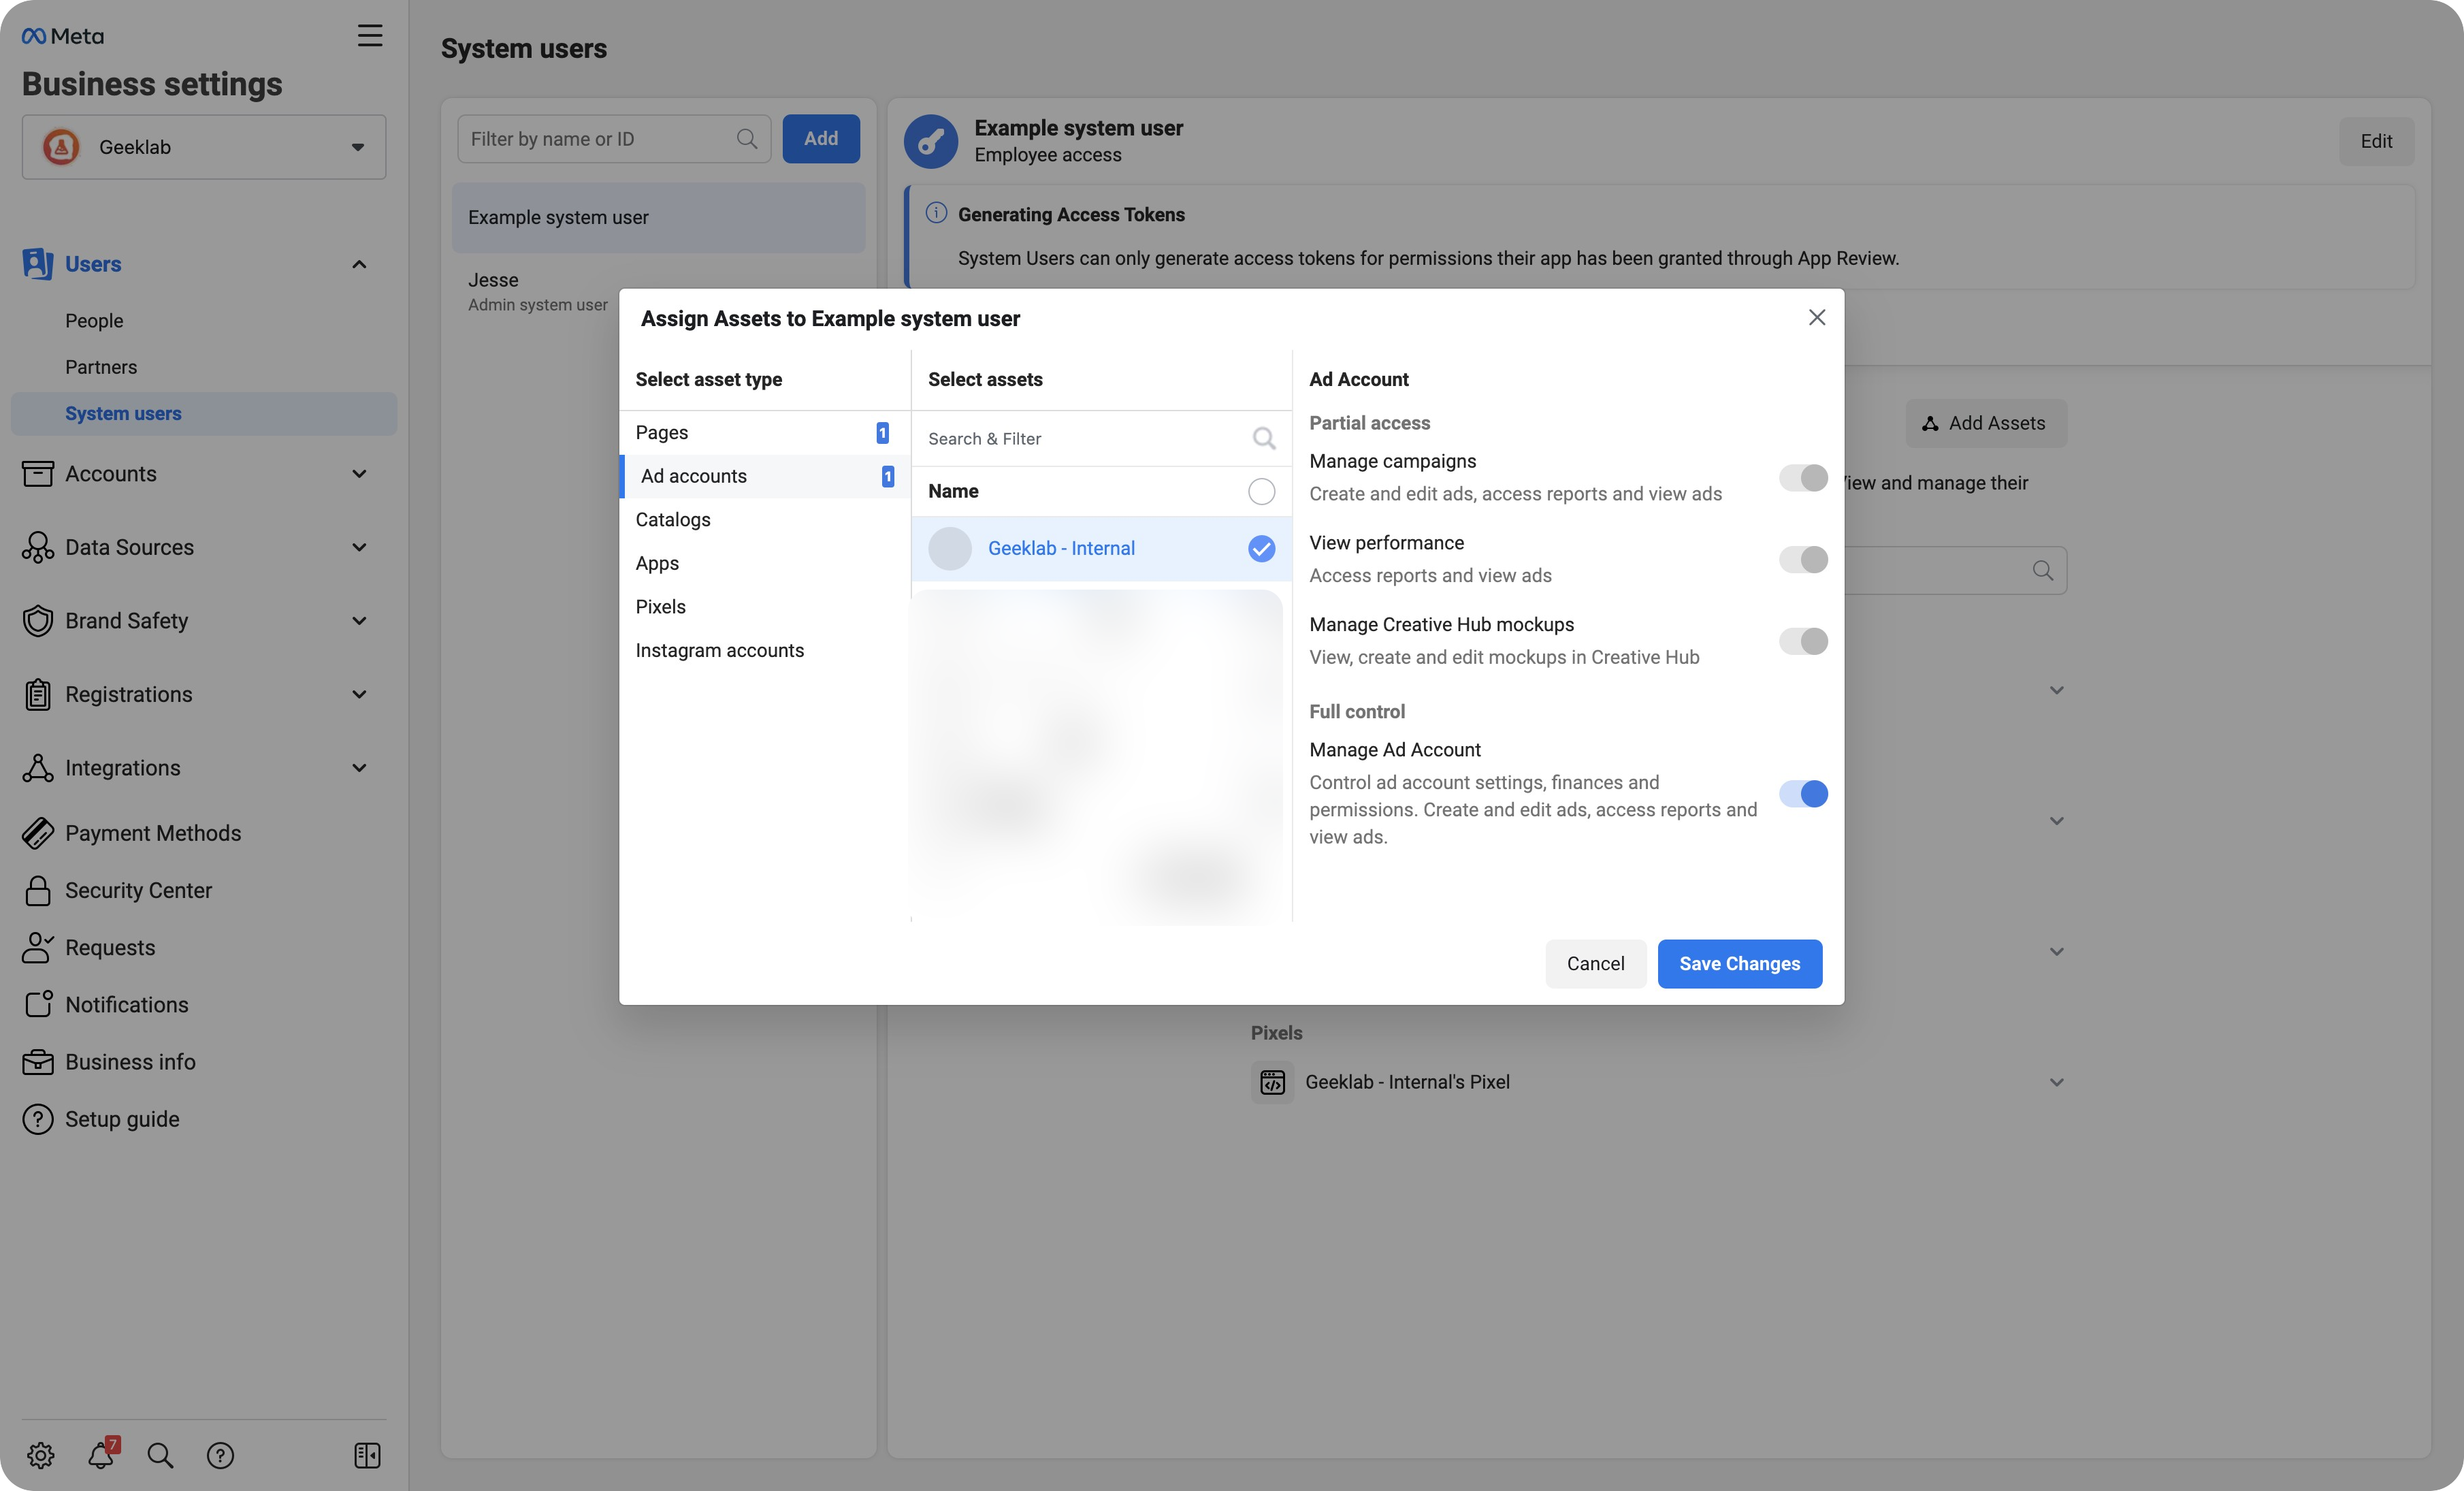
Continue to the ad account section and choose the (1) ad account you want to use with Geeklab AudienceLab. Hover over and scroll all the way down on the very right side of the modal to grant your system user full access to the ad account management.
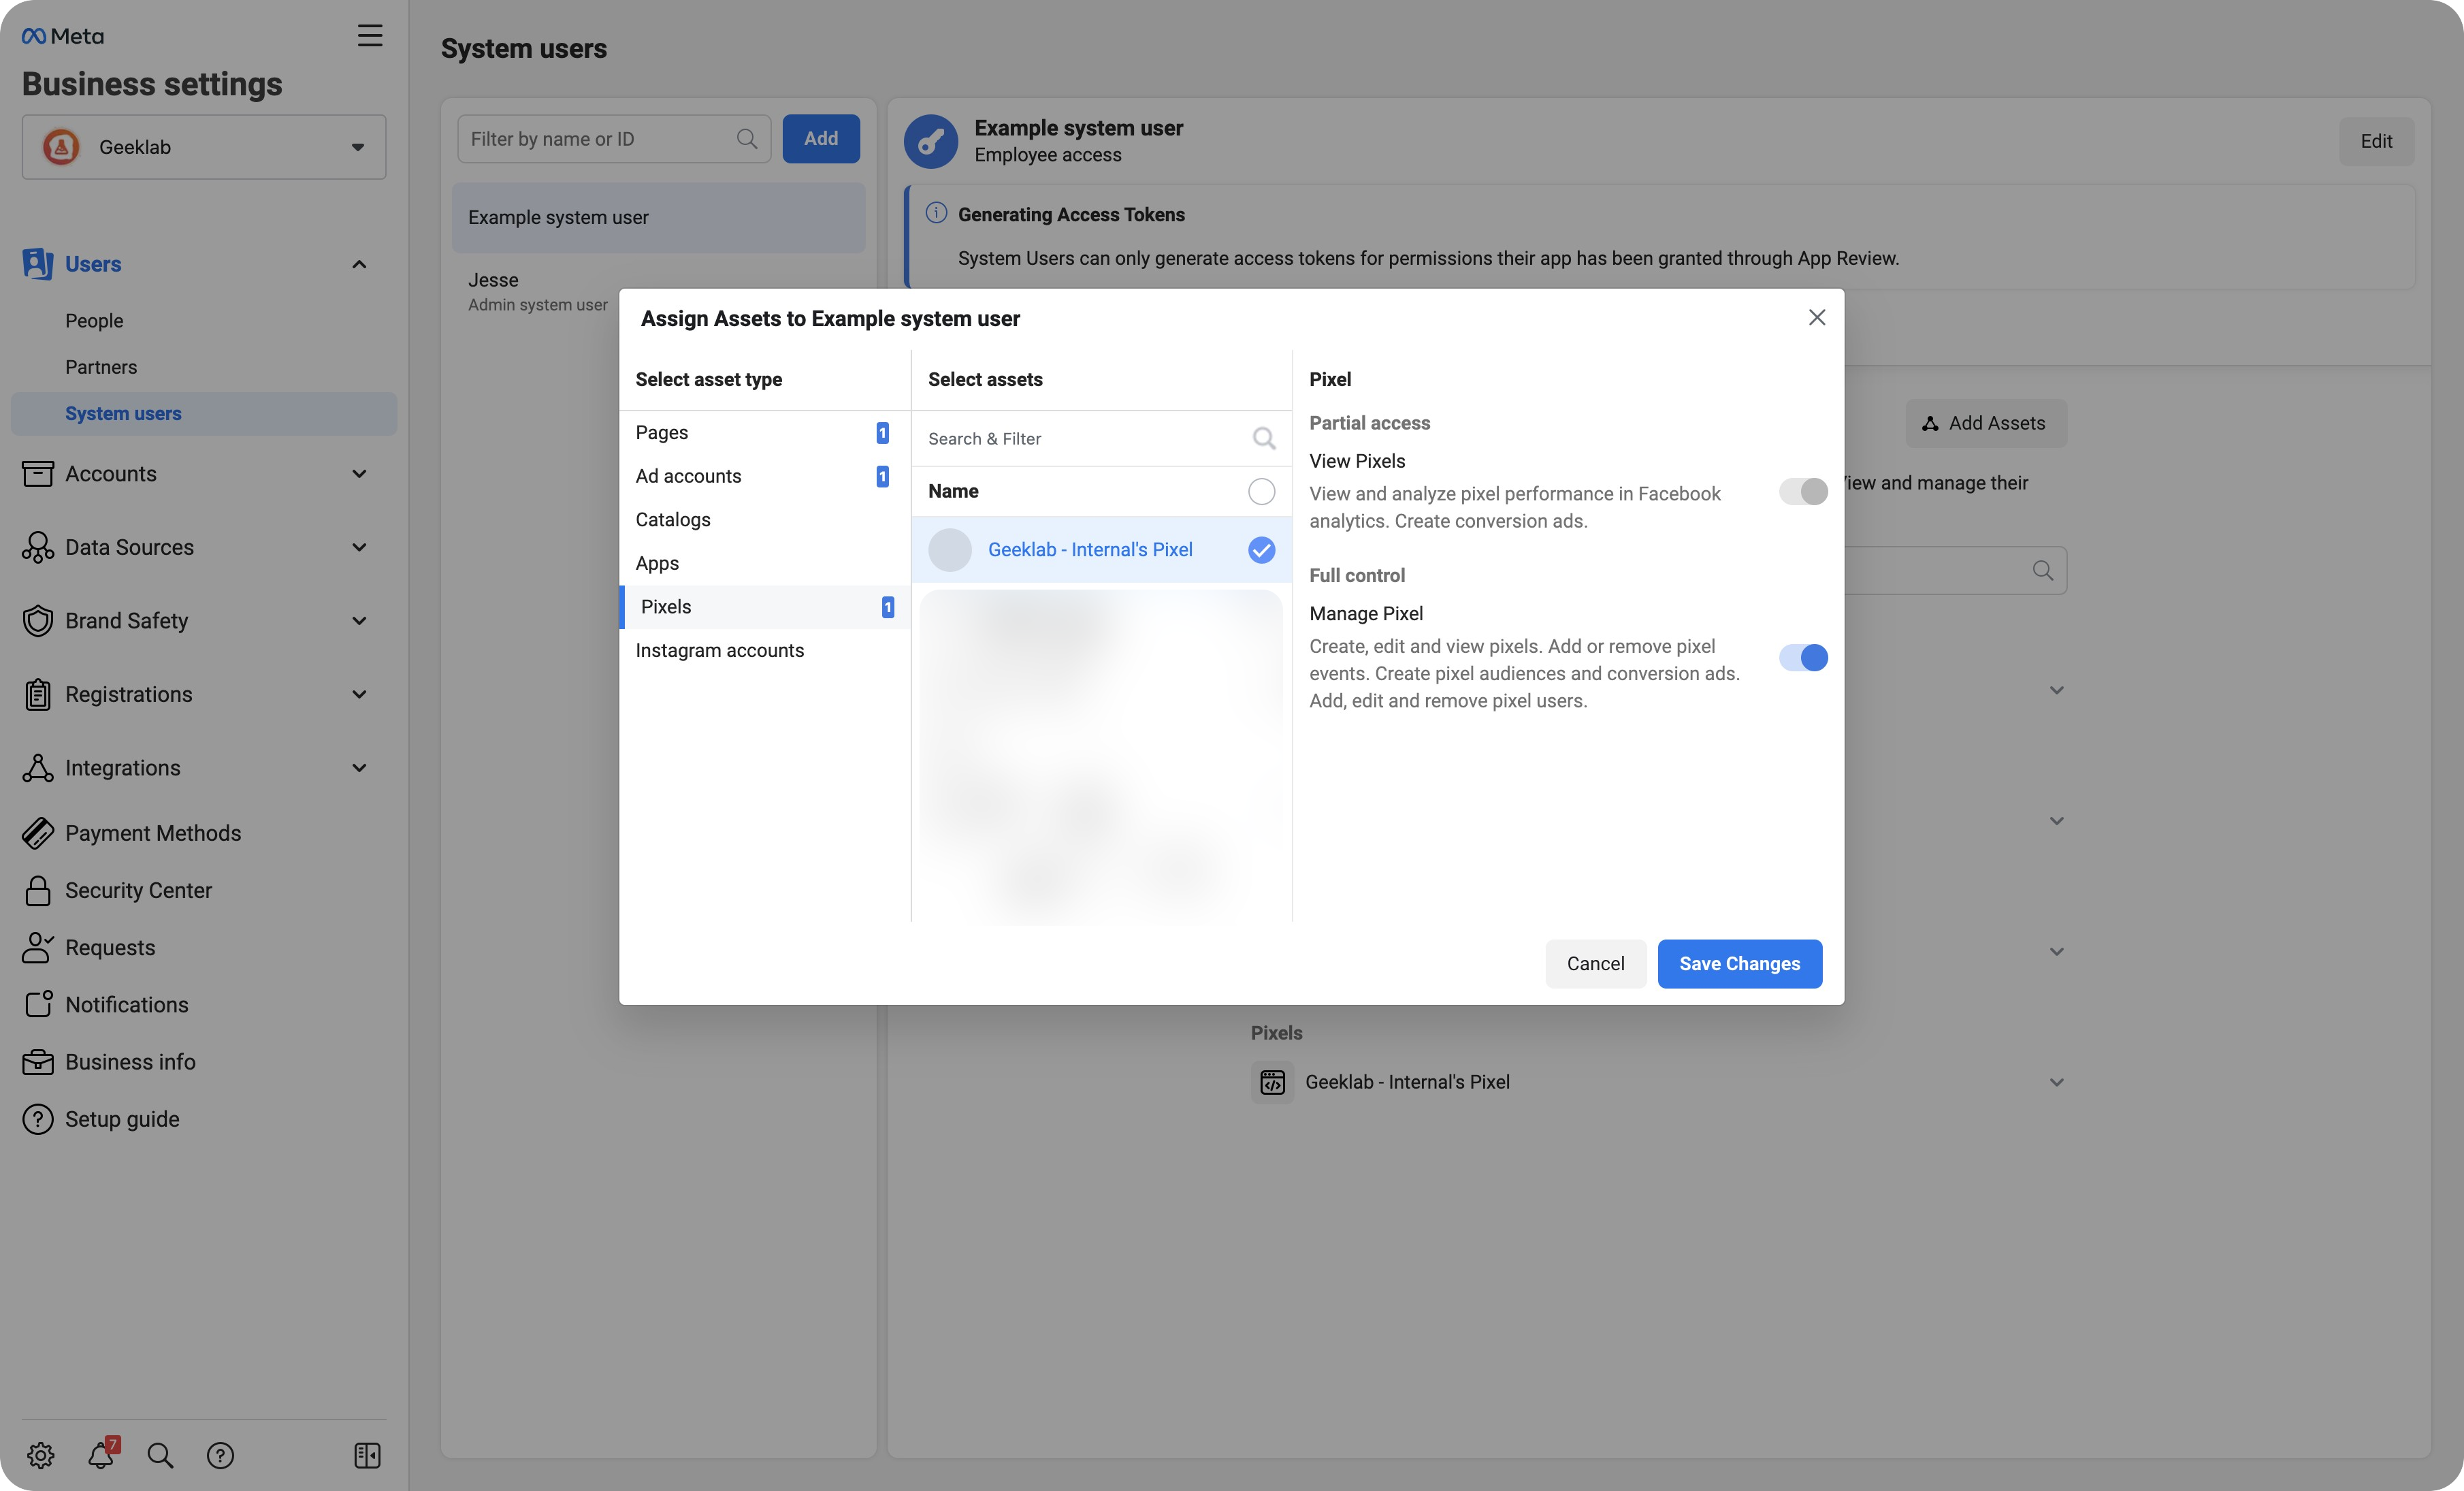
Continue to the pixels section and choose the pixel (1) that you want to use with Geeklab AudienceLab. Hover over and scroll all the way down on the far right side of the modal to grant your system user complete control over the pixel.
Assigning Pixel to the ad account
To run campaigns with the Meta Pixel, you must first connect the Meta Pixel to the ad account.
To begin, navigate to the data sources section and select pixels from the drop down menu.
Choose the pixel you assigned to the system user.
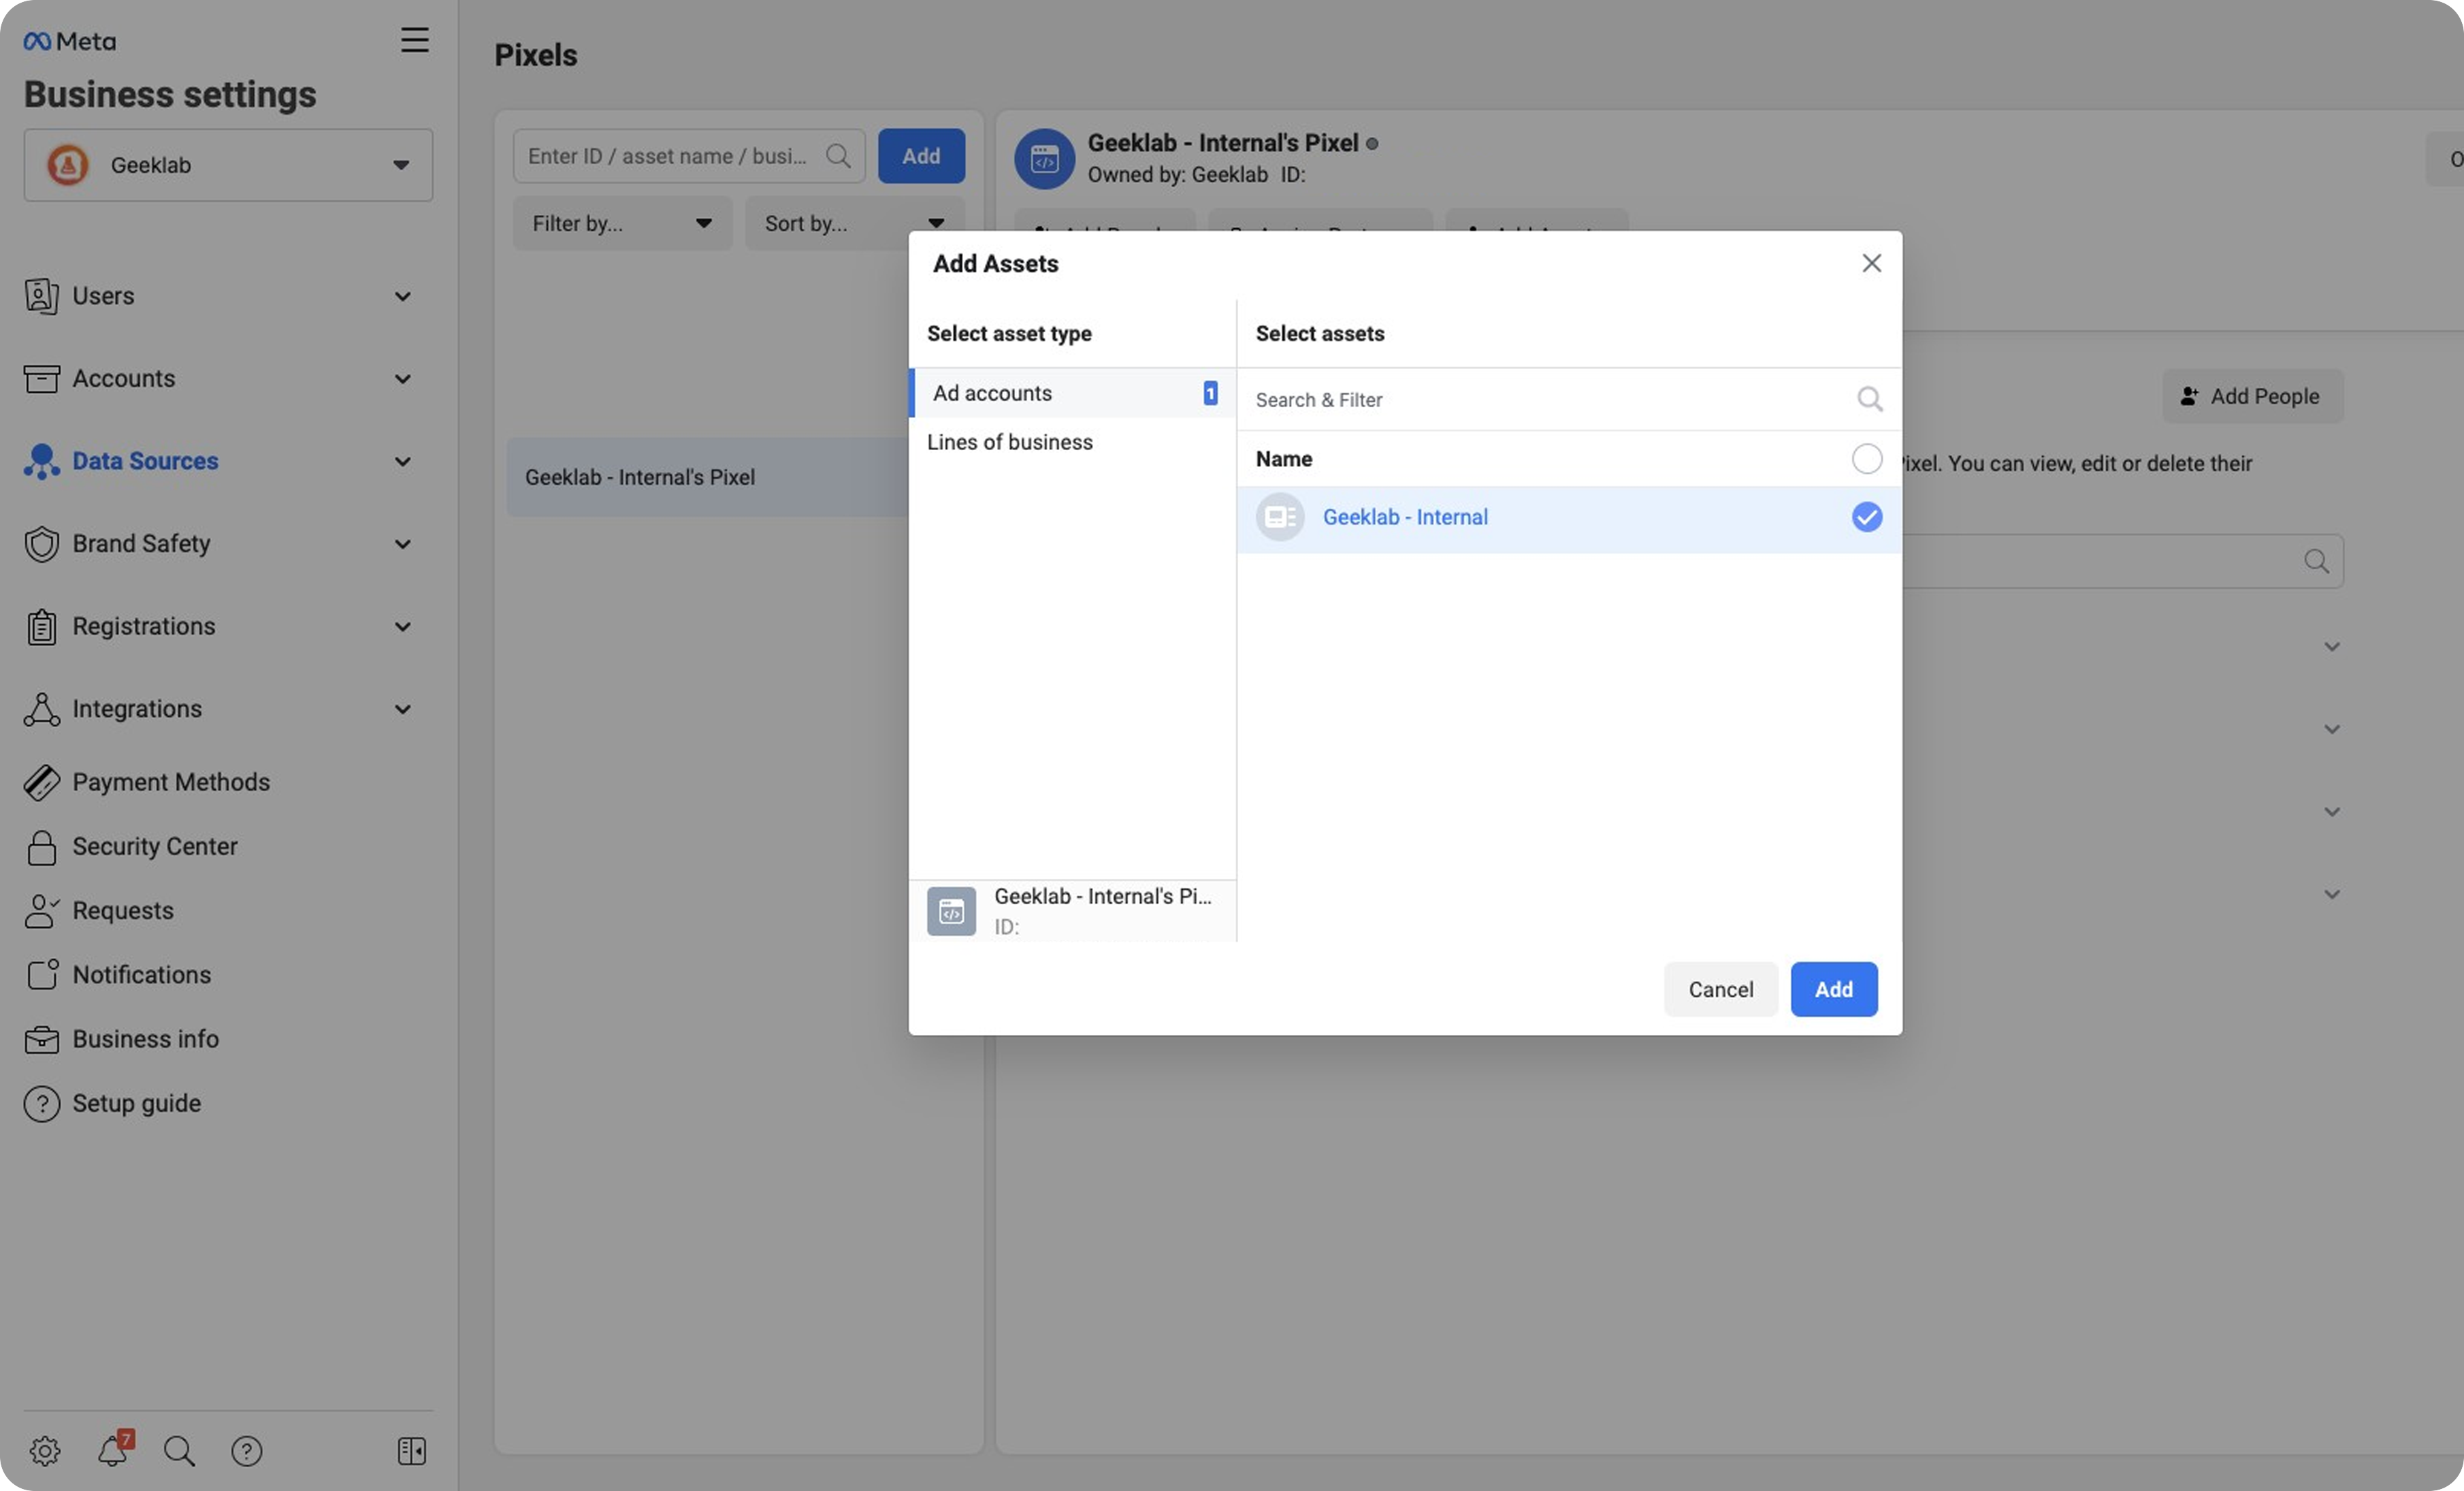
There are two tabs visible: People (currently active) and Connected Assets. Select the Connected Assets tab.
There is now a new button labeled Add Assets. Clicking the button brings up a modal that allows us to select the ad account to which we want to associate the pixel.
Choose the ad account you assigned to the system user.
At the bottom of the modal, click Add.
Sharing all the necessary info with Geeklab
Now that you've granted the system user all of the necessary permissions, we can move on to the Geeklab configuration. When you first launch AudienceLab, you will notice Geeklab requesting four (4) different pieces of information before the AudienceLab can function fully.
These information are as follows:
- System User Authentication Token
- Facebook Page Names and IDs (can be multiple)
- Ad Account ID
- Pixel ID
Below we’ll show how to access all the information we need.
System user Authentication Token
This is the long string of characters and numbers we made at the start of the tutorial. Take it from wherever you saved it locally and paste it into the Geeklab form.
Facebook Page Names and IDs
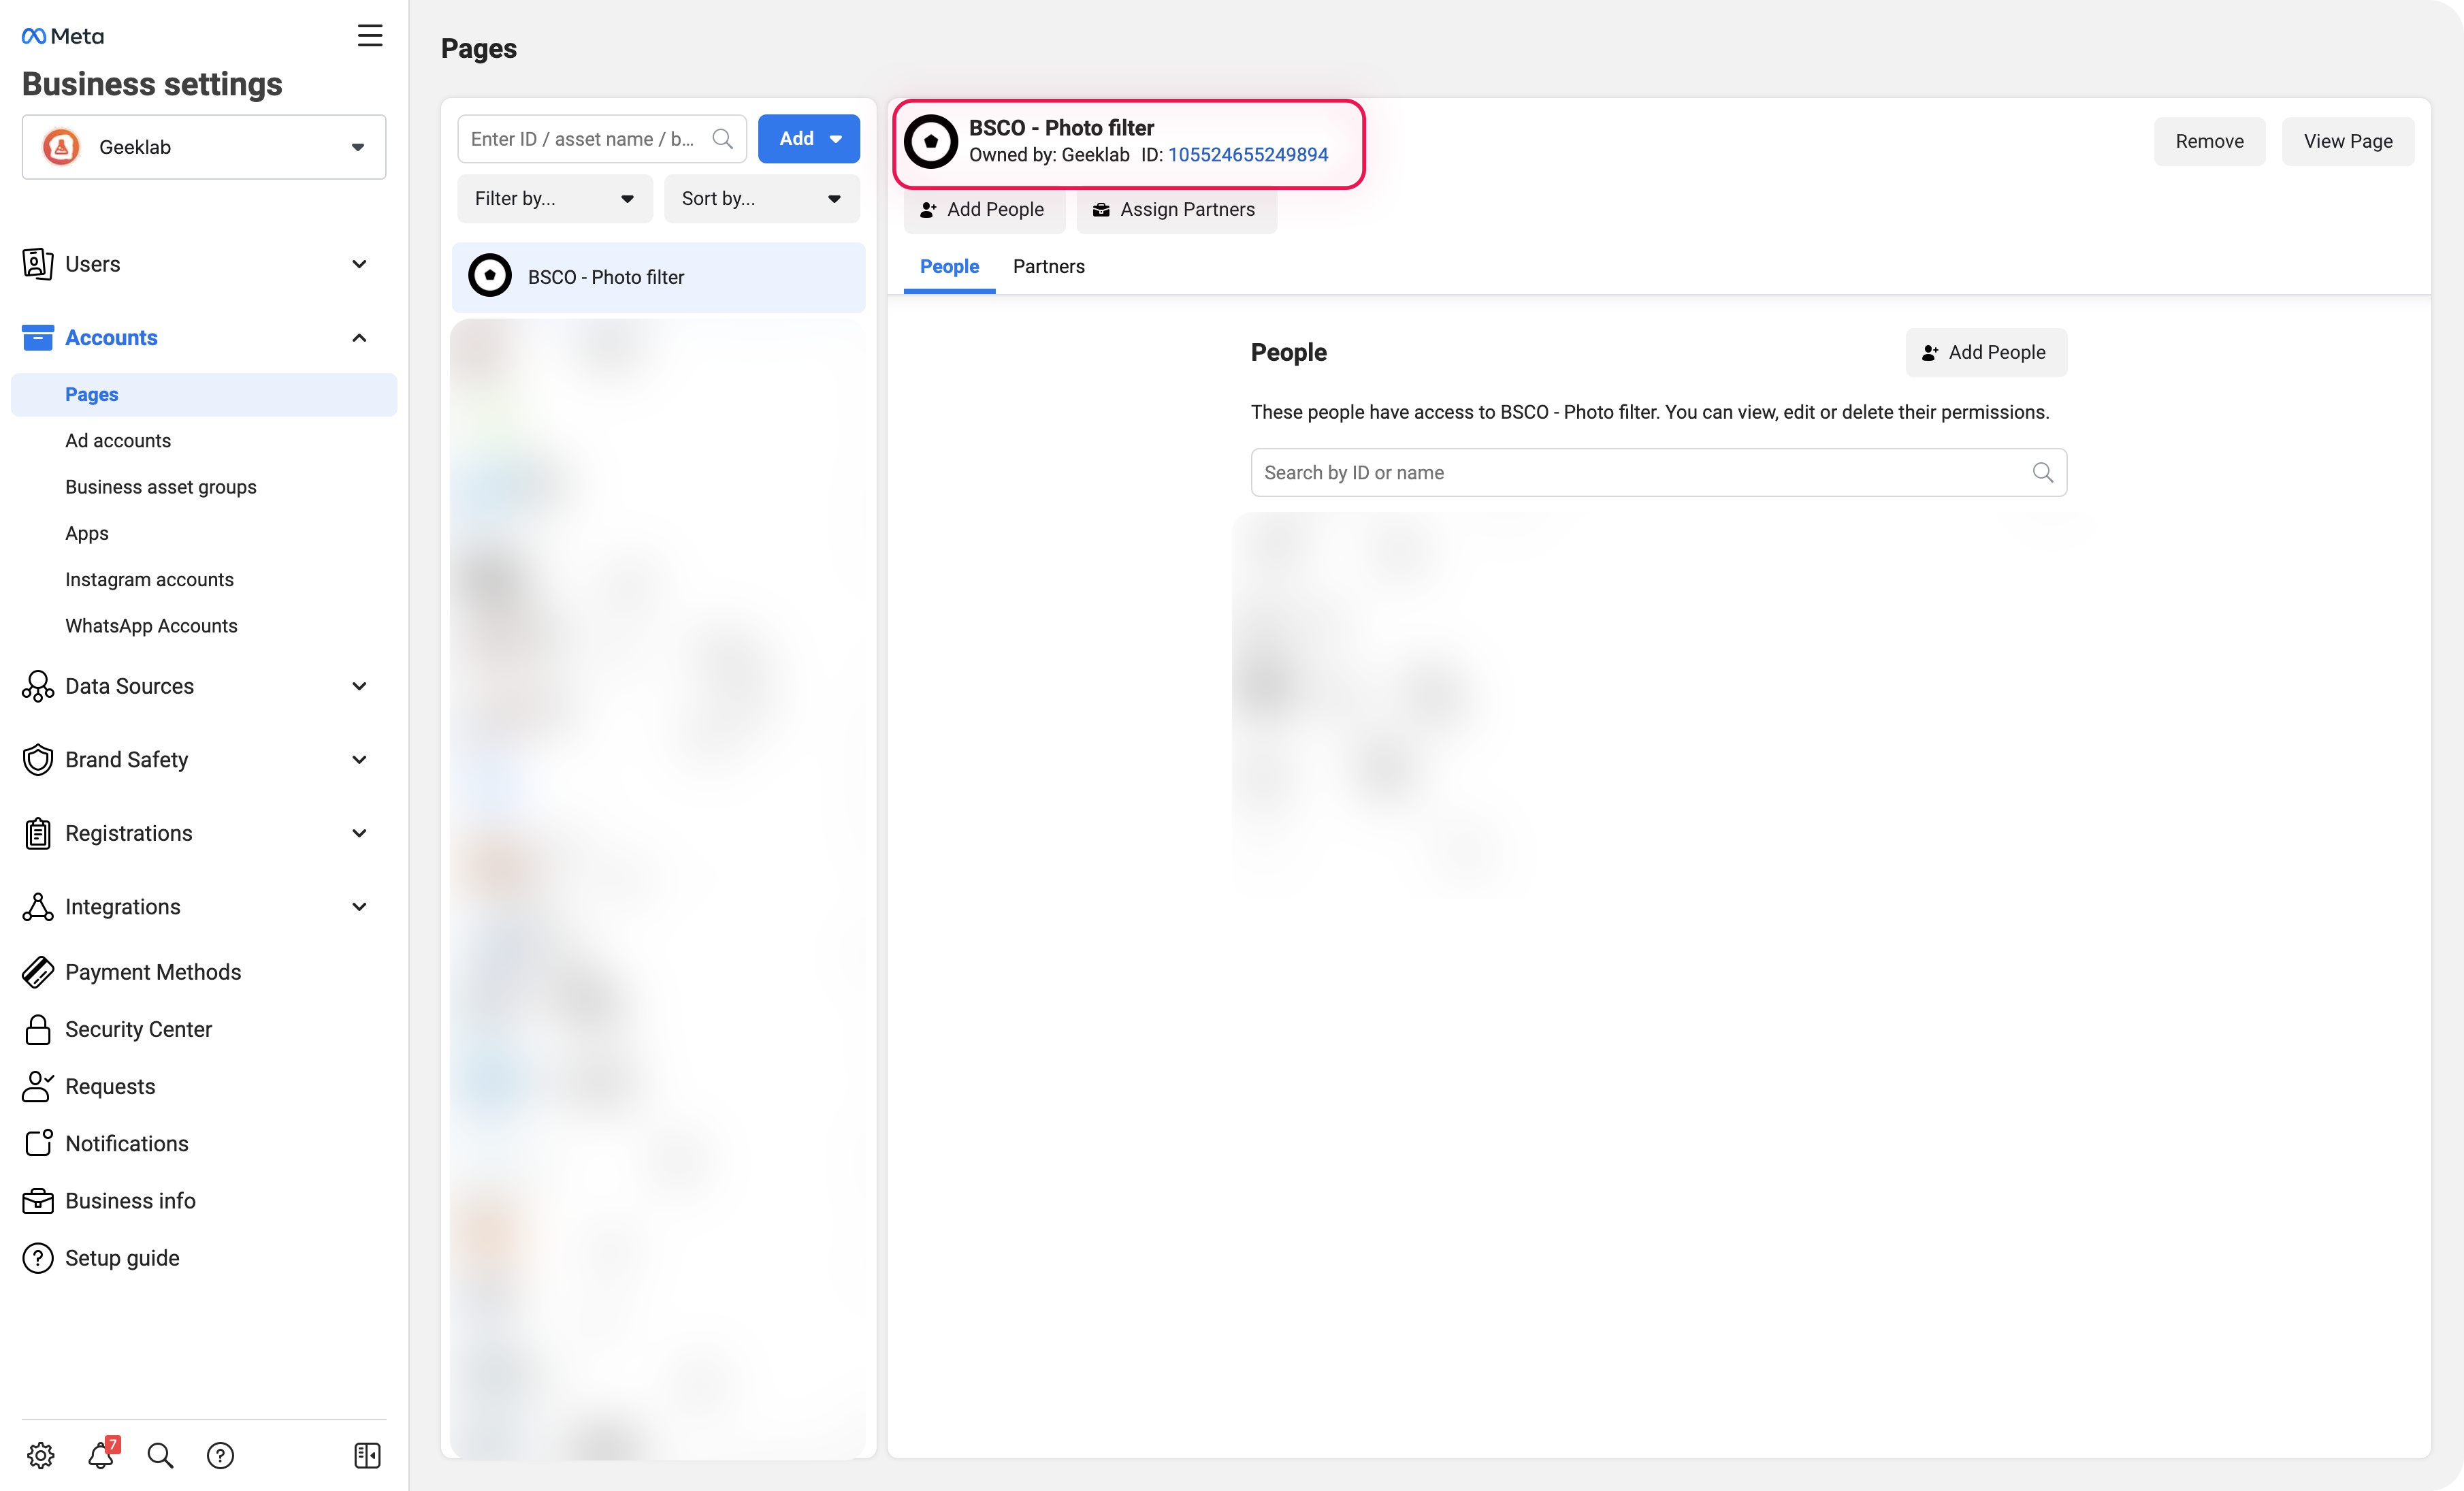
To obtain the Page name and ID, go to your business manager settings and choose accounts from the sidebar and pages from the dropdown menu.
You'll find your Facebook Name right next to the sidebar, and by clicking on it, you'll be able to access the Facebook Page ID.
To copy the Facebook Page ID, click the 12-16 digit code next to the icon and name at the top of the page, as shown in the image above.
Ad Account ID
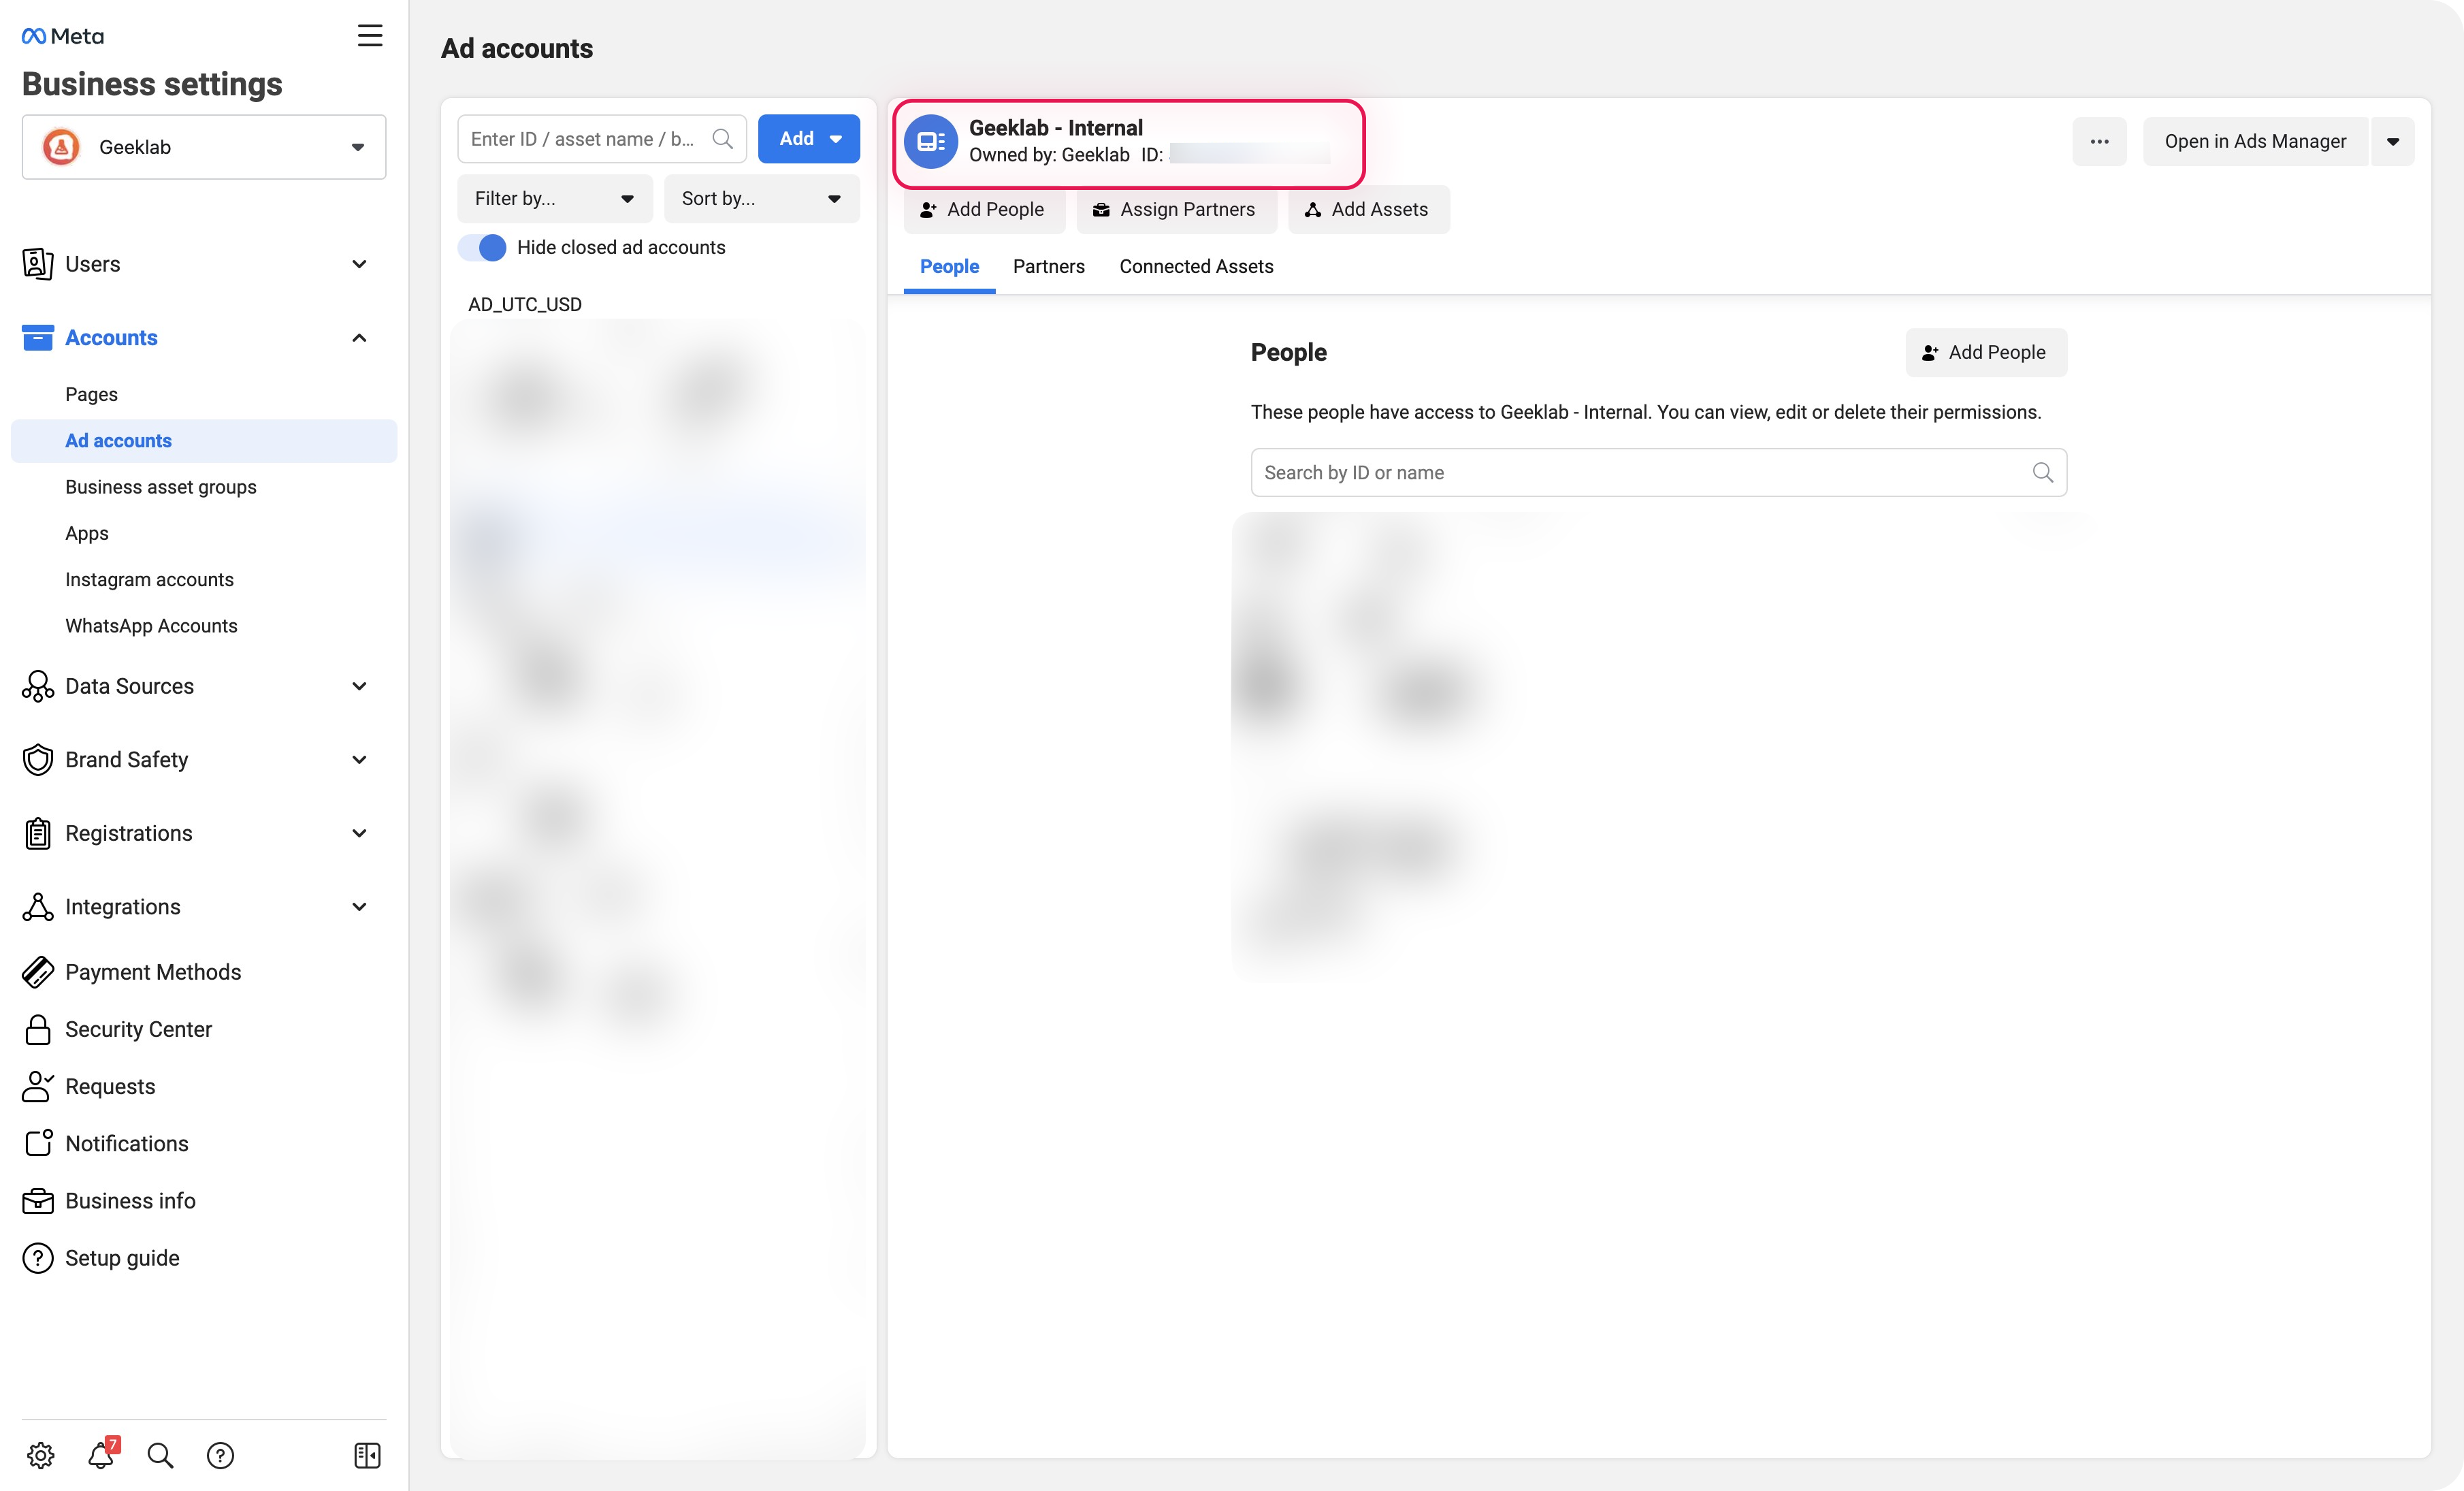
To obtain the ad account id, go to your business manager settings, select accounts from the sidebar, and then ad account from the dropdown menu.
Choose the ad account you linked to your system user.
Copy the Ad account ID by clicking the 12-16 digit code next to the name at the top of the page, as shown in the image above.
Pixel ID
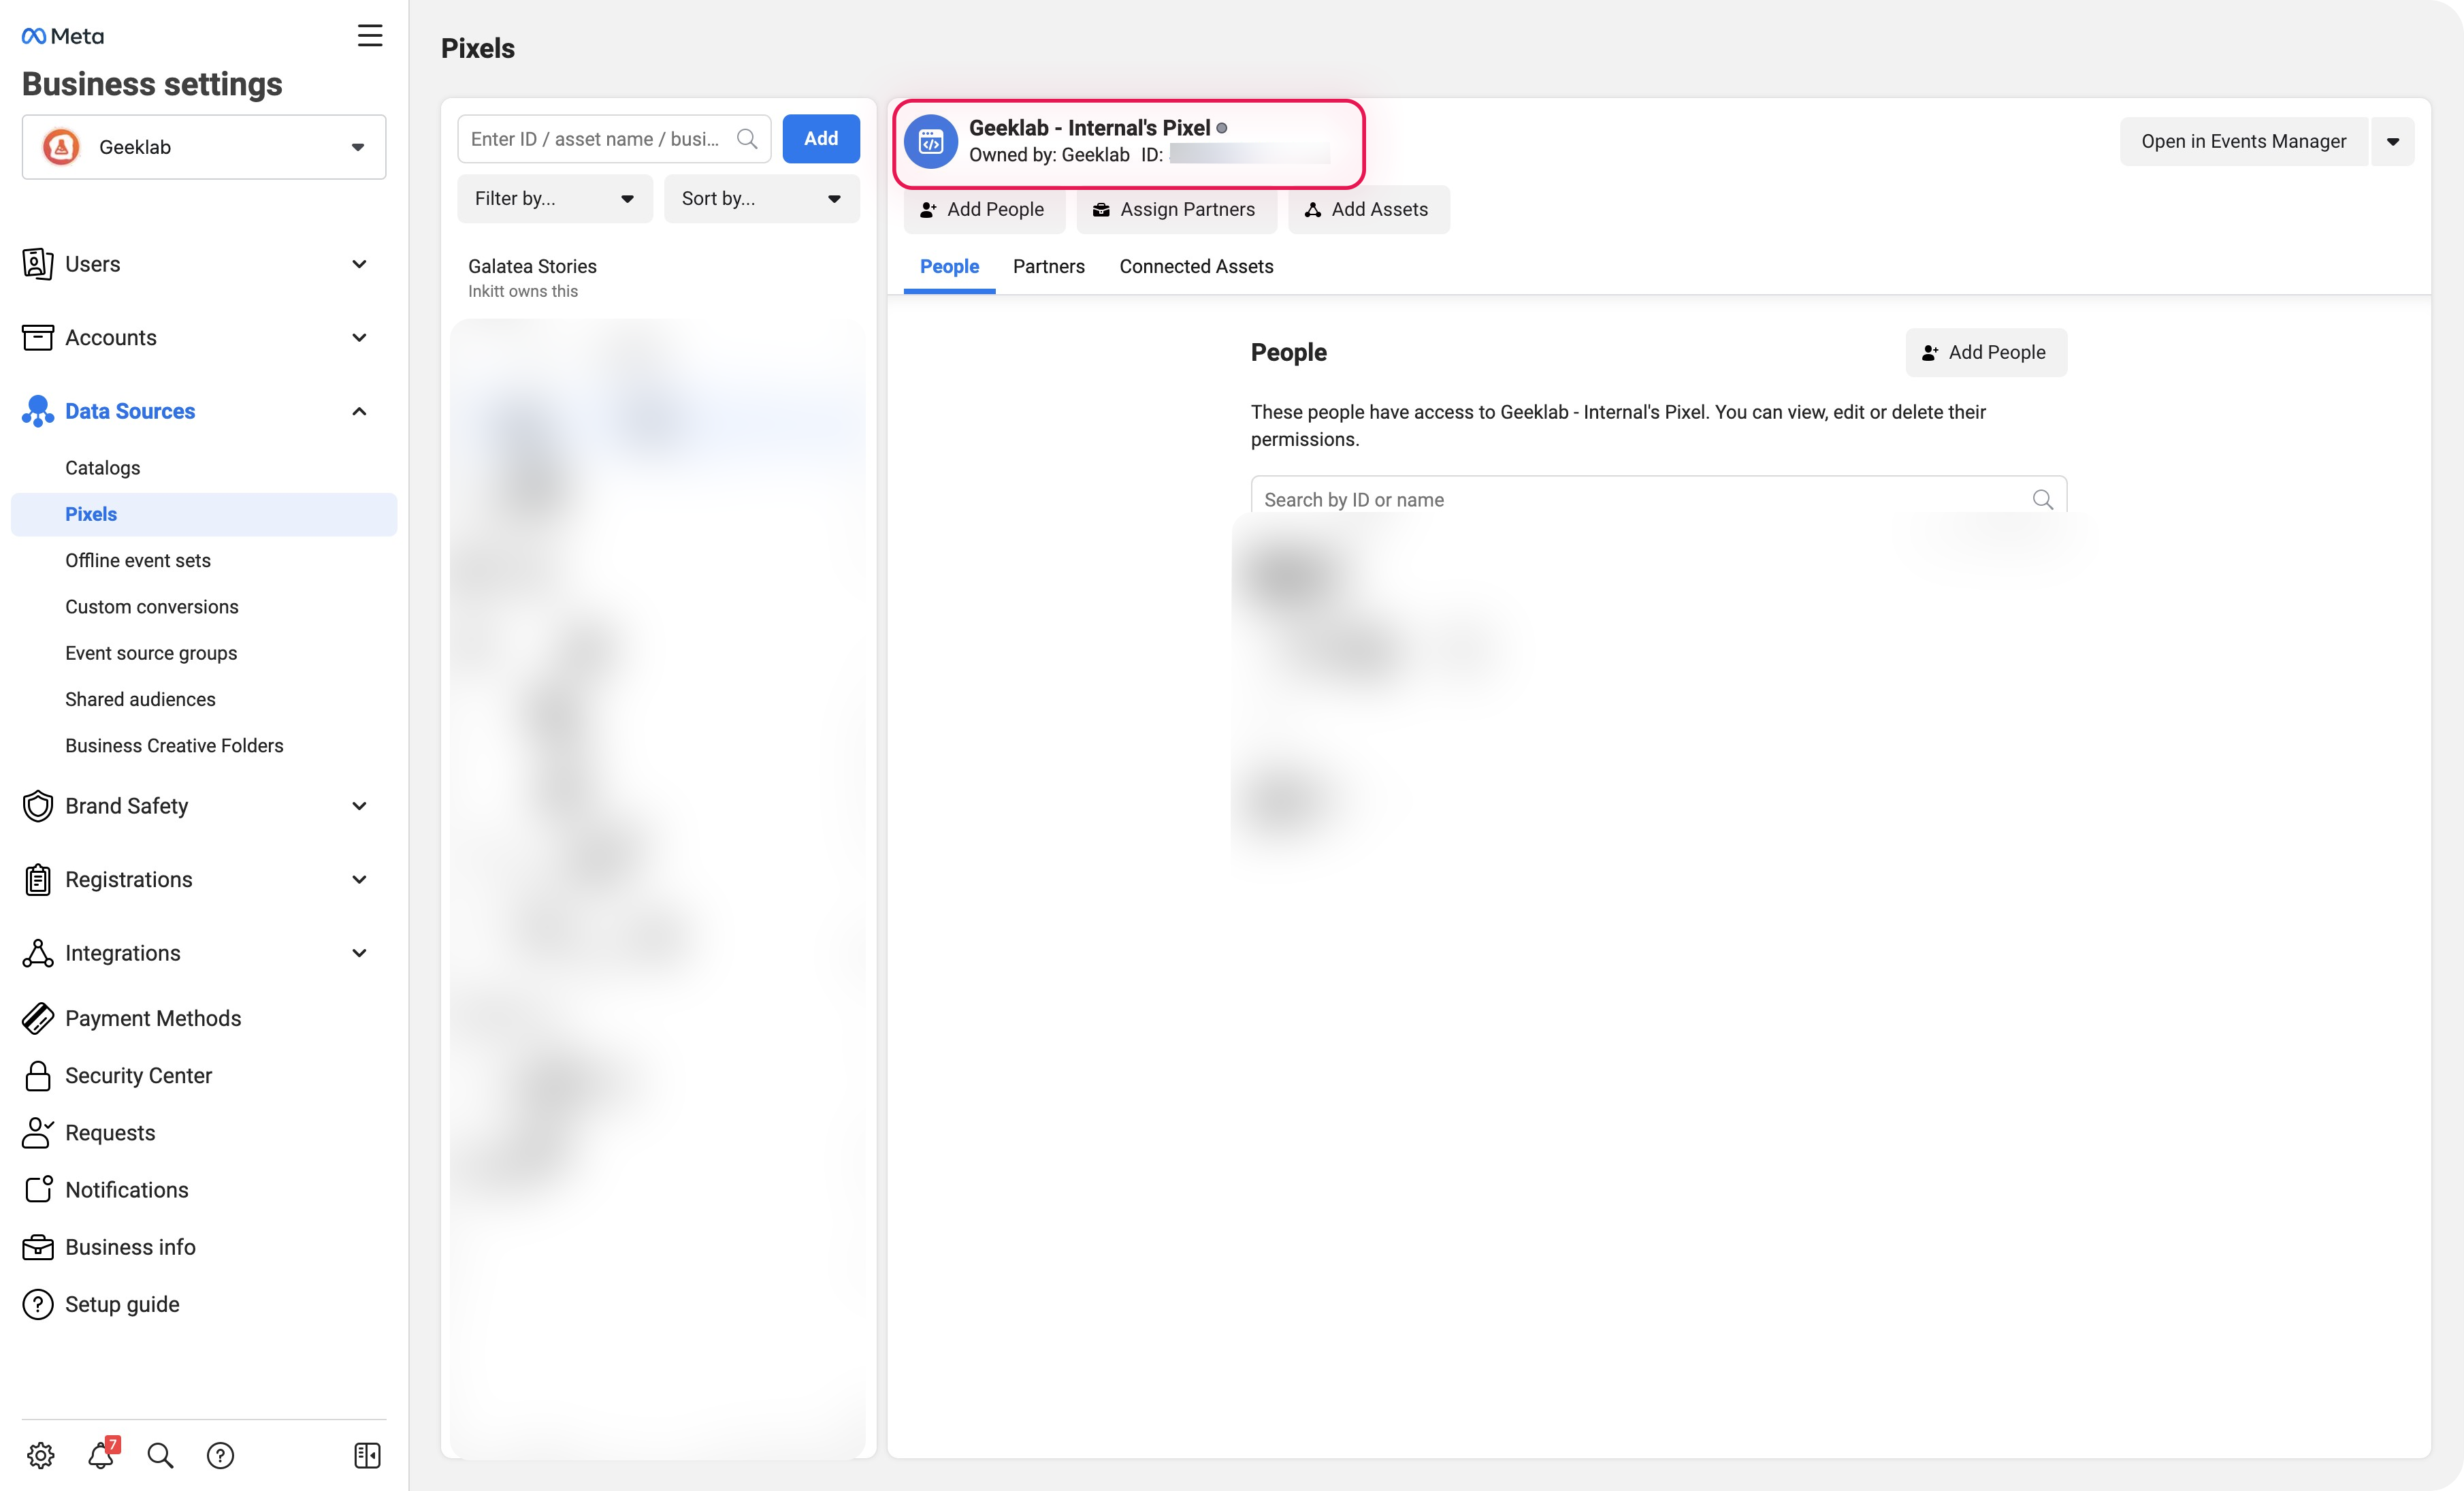
To obtain the pixel id, go to your business manager settings and choose data sources from the sidebar and pixels from the dropdown menu.
Choose the pixel you assigned to your system user.
Copy the Pixel ID by clicking the 12-16 digit code next to the name at the top of the page, as shown in the image above.